
VeraProtect Enrollment
This guide will go over:
- What VeraProtect is
- The availability of the service
- Monitoring Permits
- The available billing plans and their advantages
- How to sign up for the VeraProtect service
- How to check to see if your subscription is active
- How to cancel your subscription
- How to edit related information after finishing the enrollment process
- How you can edit your Emergency contacts
- How you can download your Insurance Certificate
- The VeraProtect Settings Page
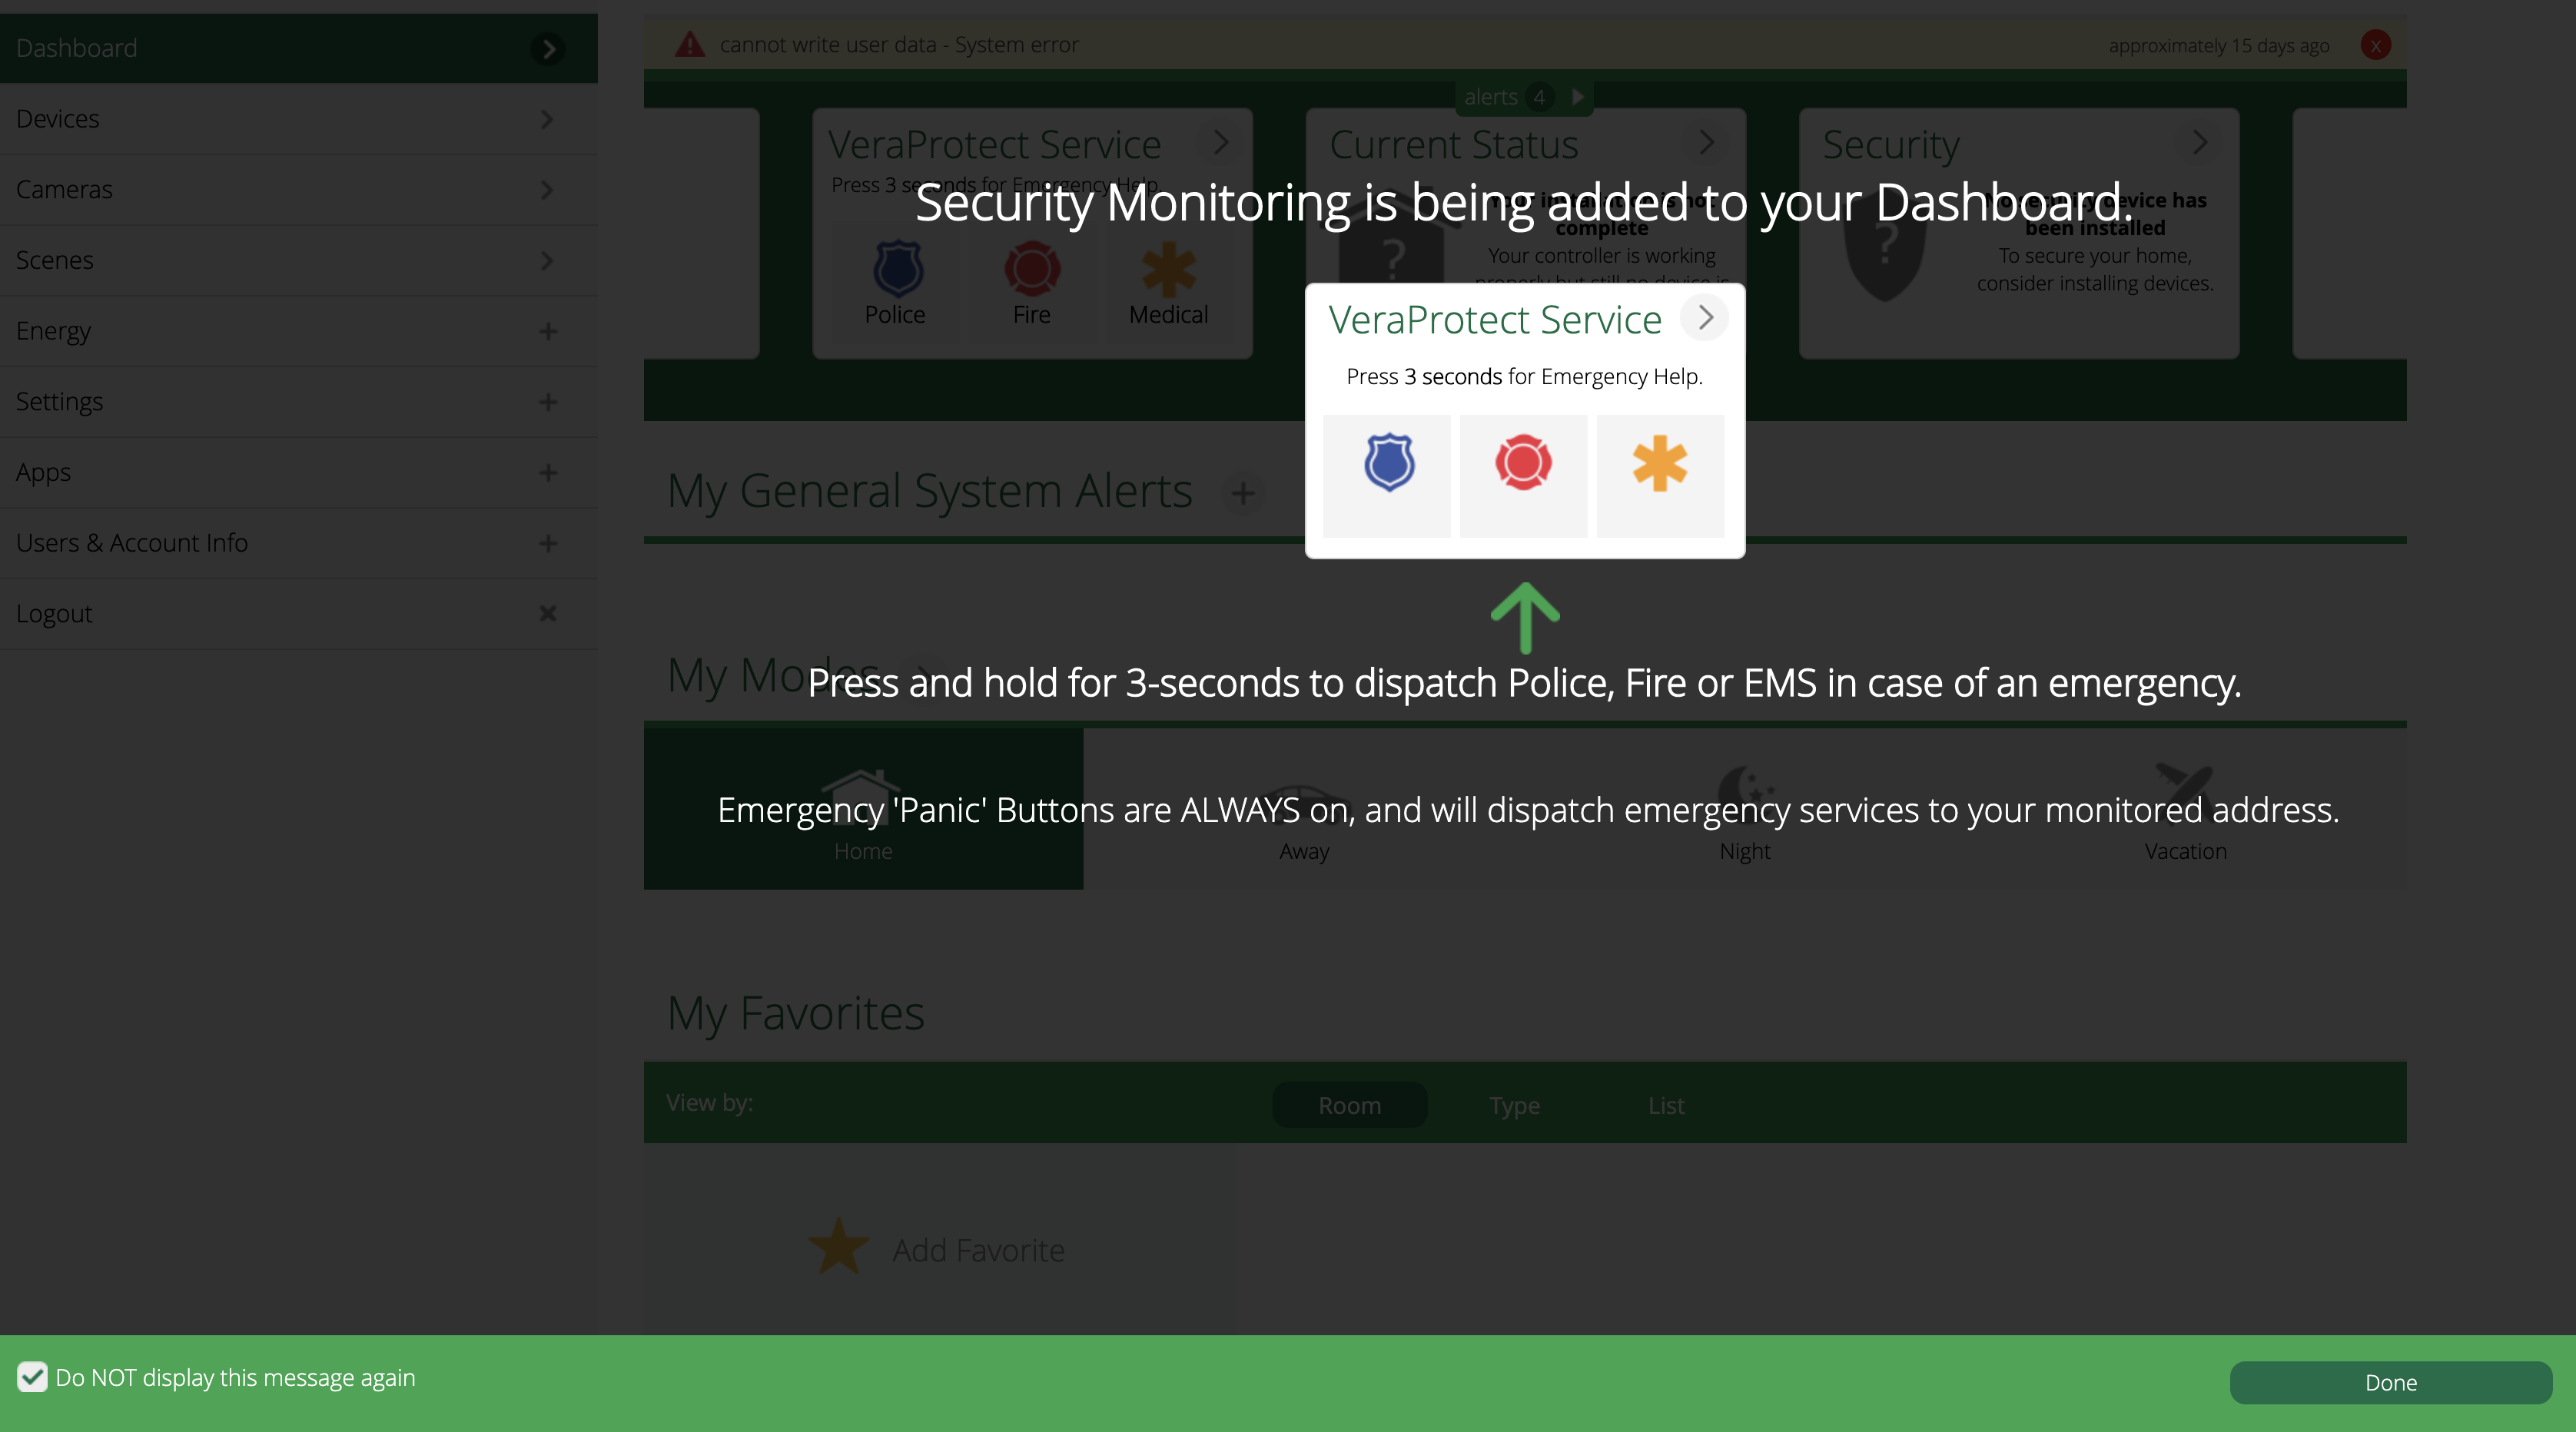
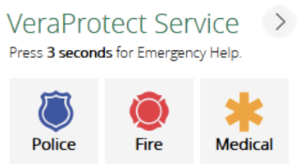
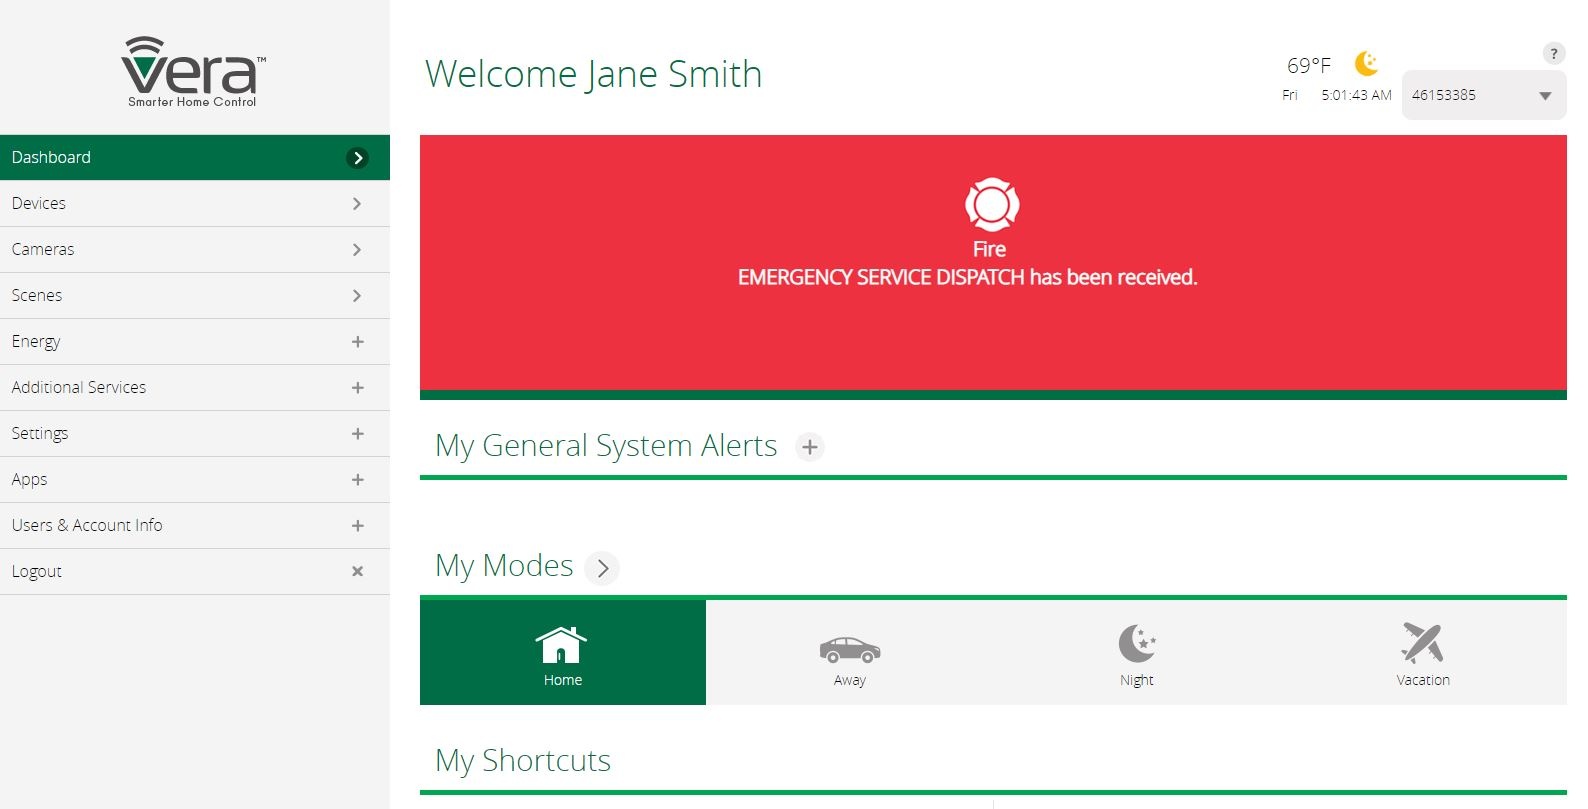
- The panic buttons and VeraProtect card on the dashboard
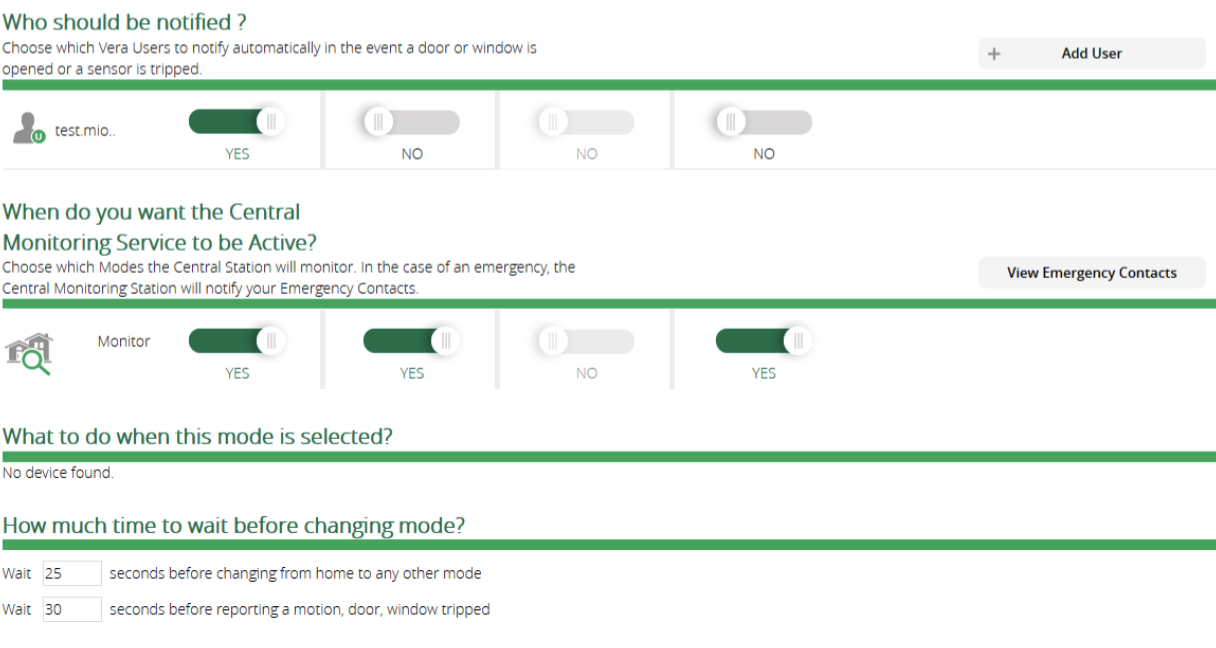
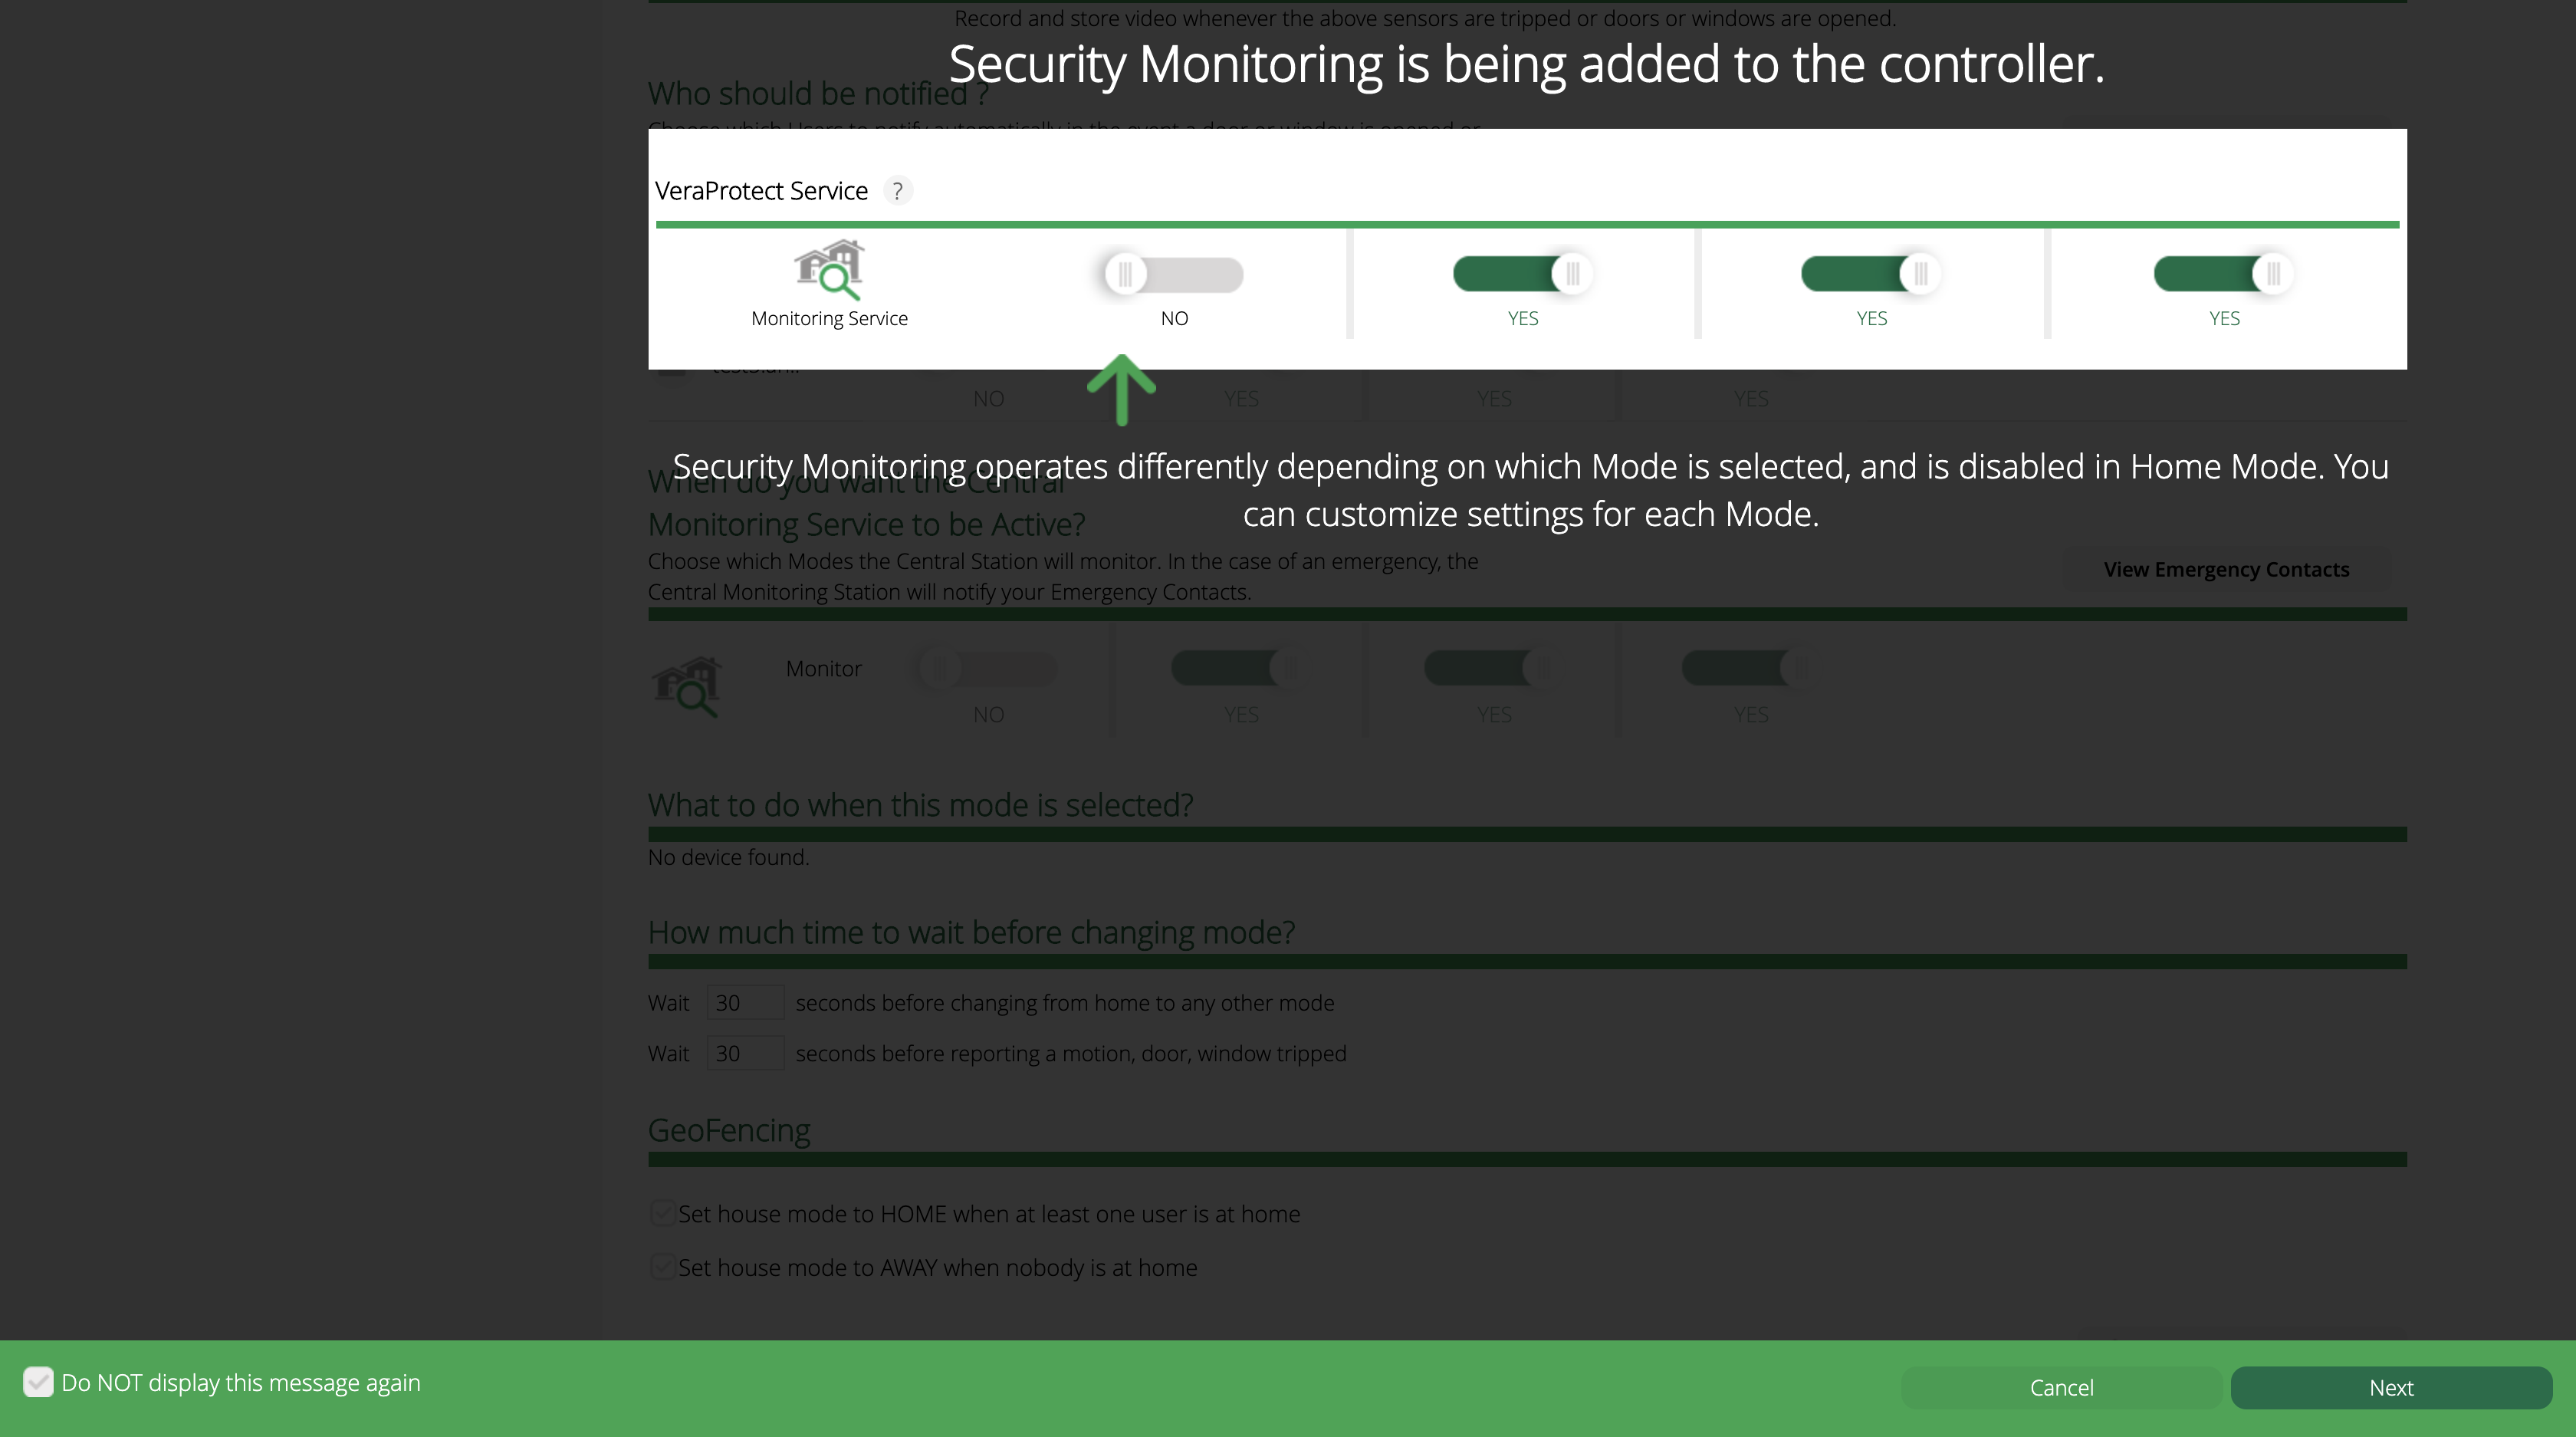
- How you can customize Security Monitoring Service notifications depending on the house mode
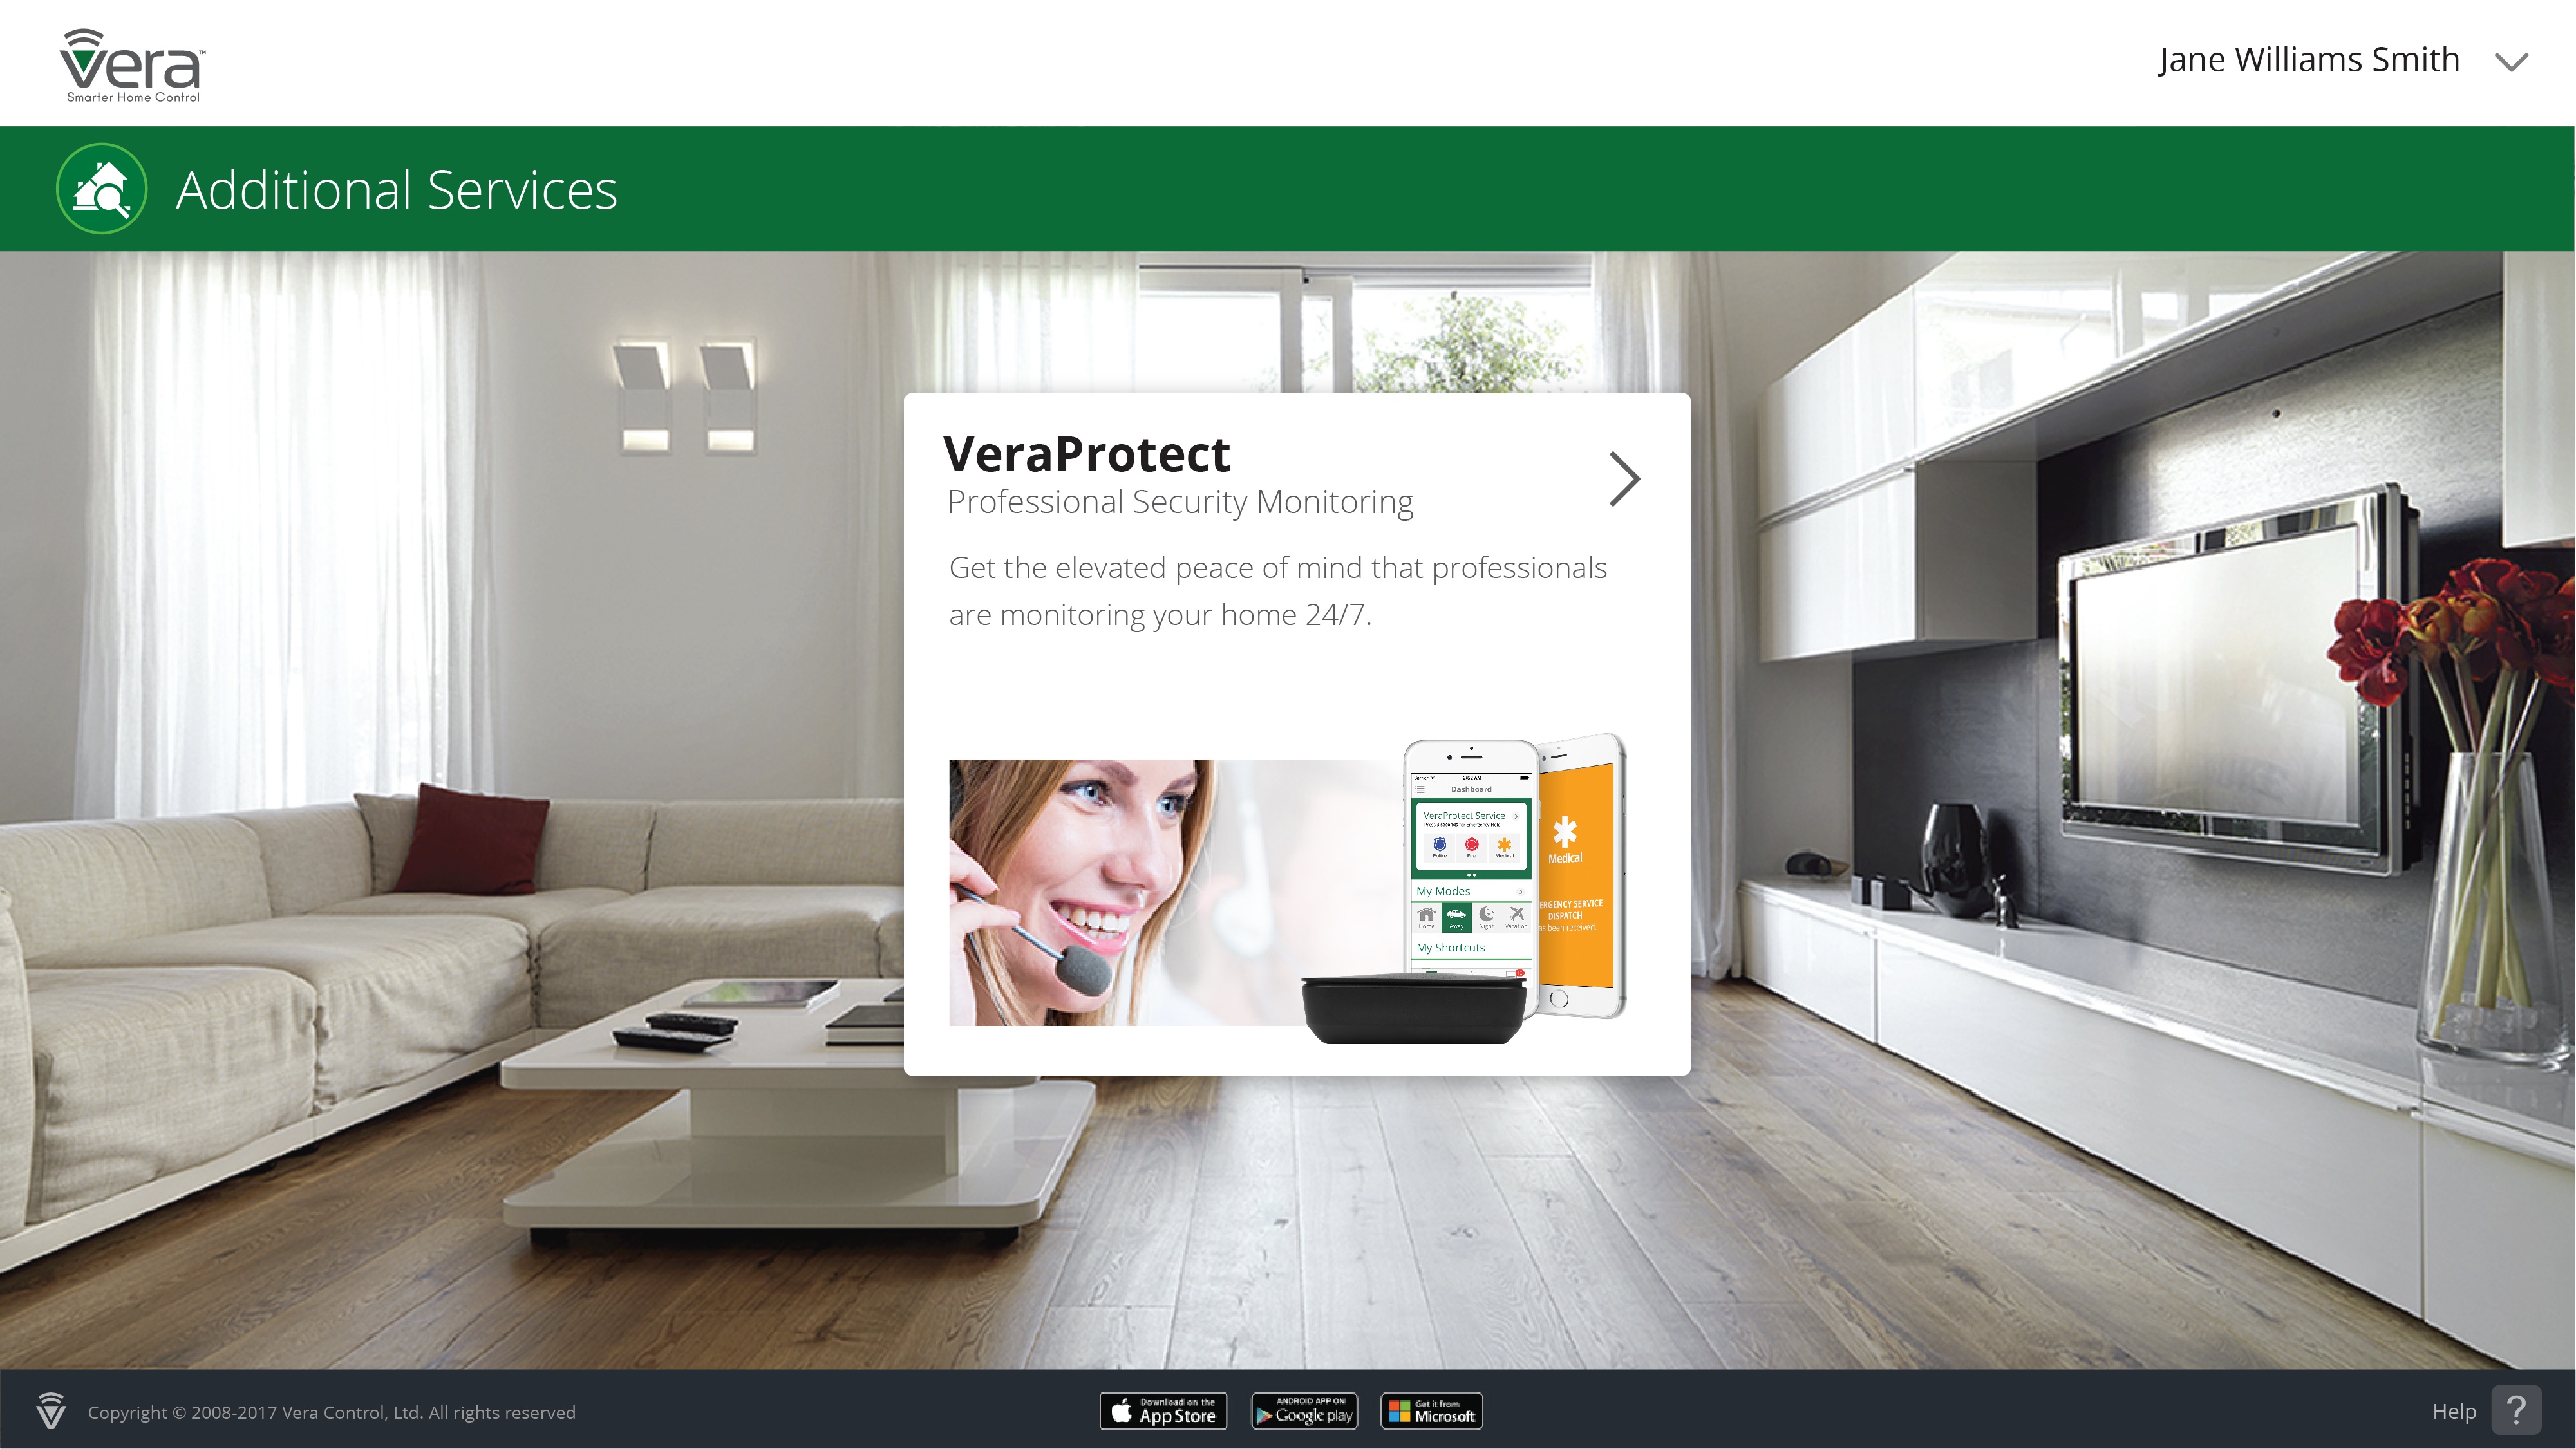
The "VeraProtect" professional security monitoring service is a dedicated system providing a higher level of security when away from home - either 24/7 or just at night. The monitoring is handled by a team of Security Industry Association-certified alarm operators, done without affecting your privacy, as VeraProtect receives information only from security sensors: smoke or motion detectors, flood and door / window sensors.
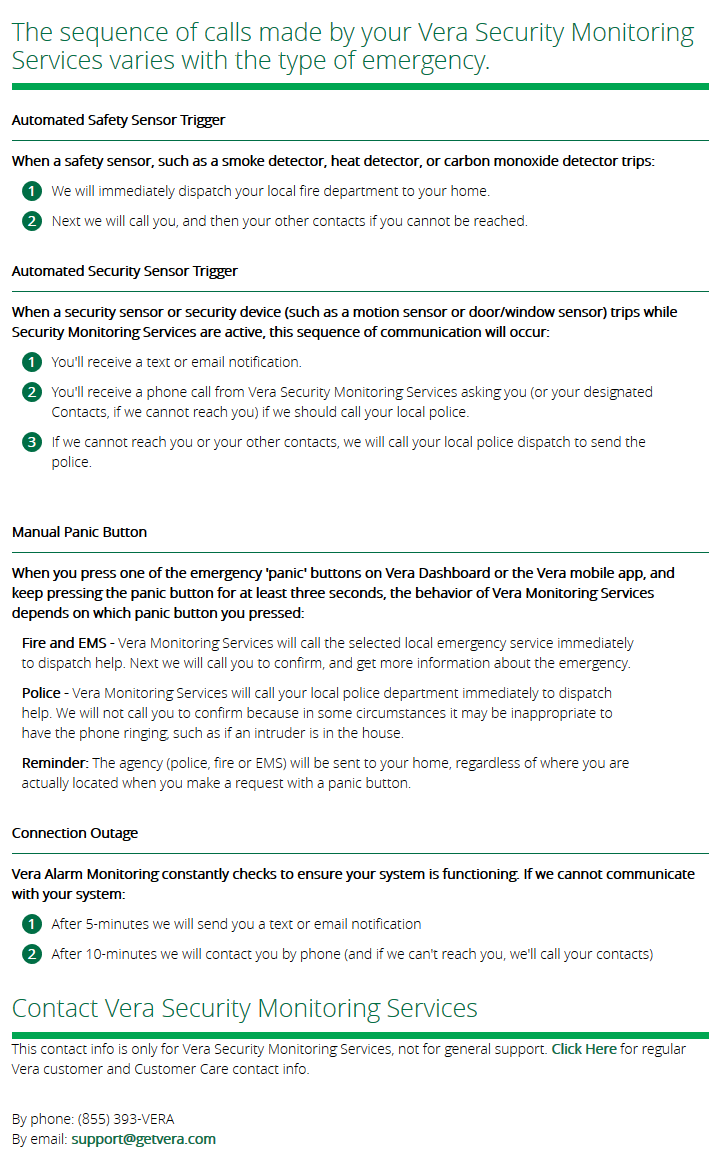
Your Vera system has 2 main monitoring options: self-monitoring and the optional Central Monitoring. The essential advantage of the latter is that it manages any potential emergency by contacting the appropriate agency: Fire Department, Police or EMS.
Note: VeraProtect is a service activated per controller, based on its location, not per account.
Where is the service available?
- UT - Utah
- TN - Tennessee
- AL - Alabama
- VA - Virginia
- MD - Maryland
- TX - Texas
*The service can't be activated in any of the states listed above, but we're working on making it available soon. This list has been updated on September 23 2020.
Billing plans
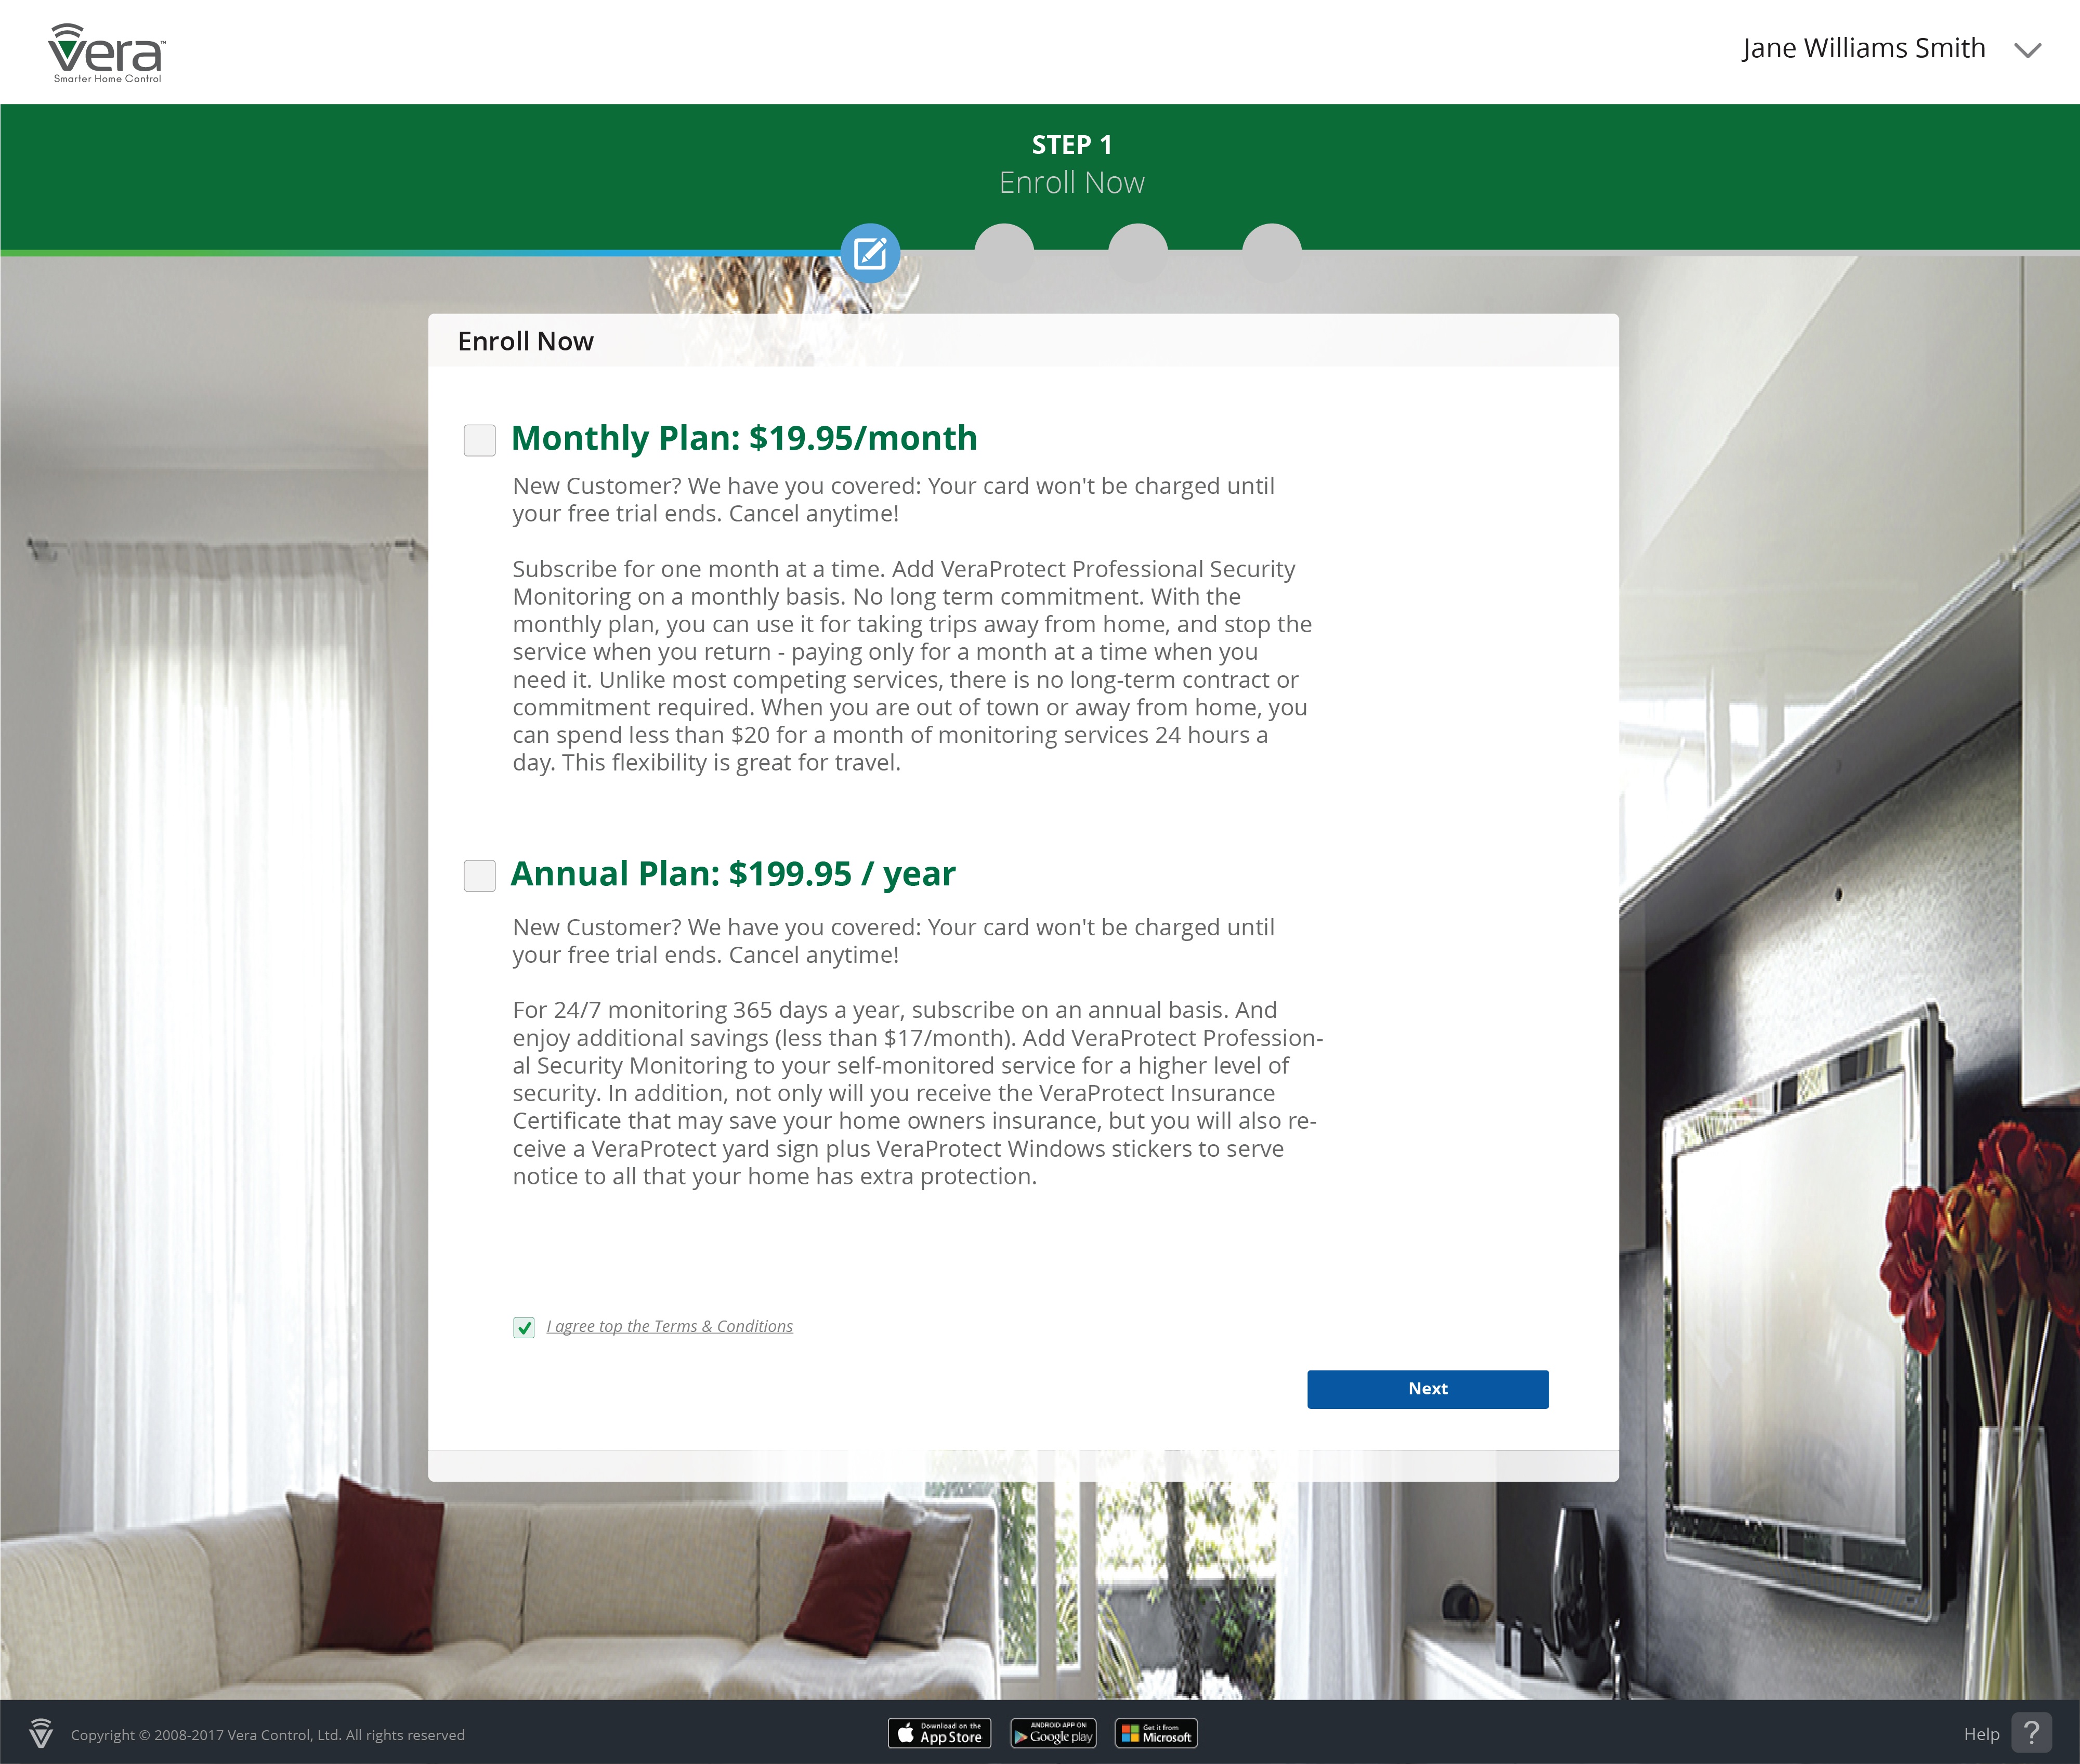
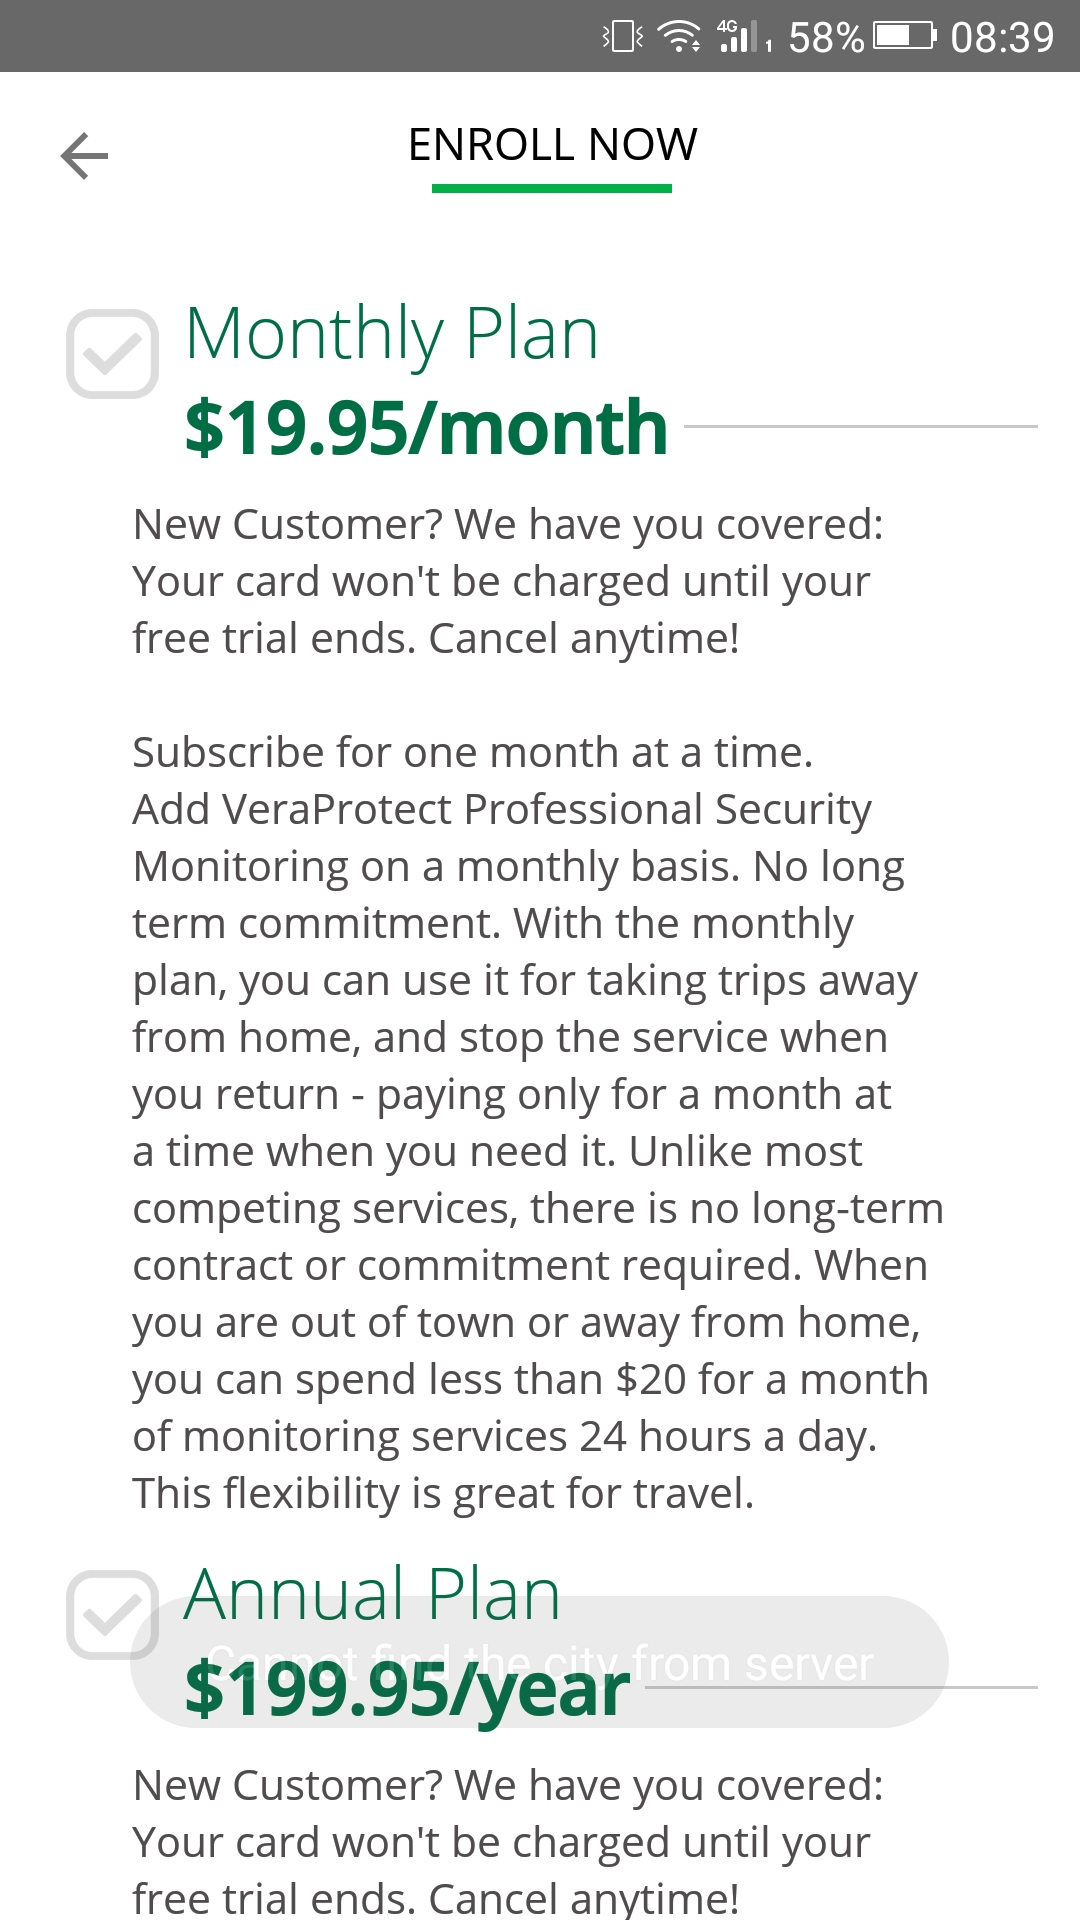
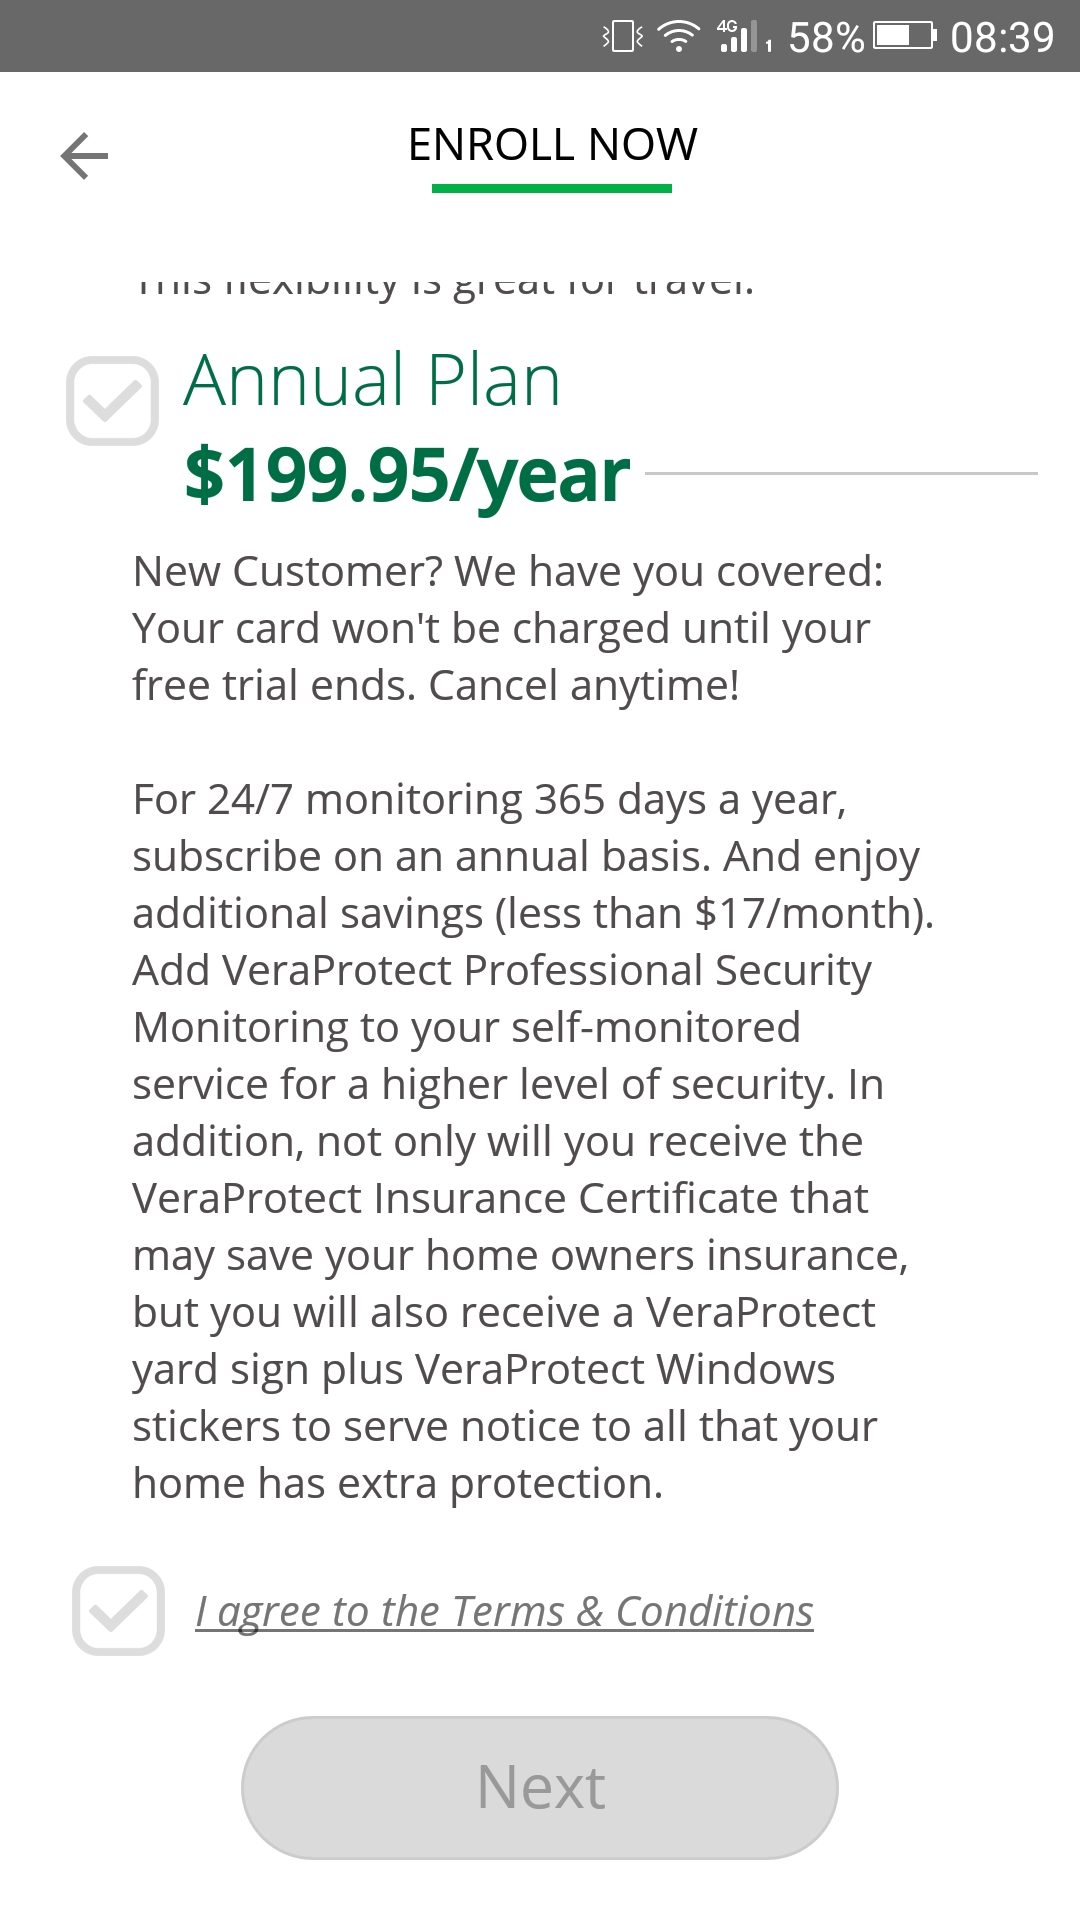
There are two available billing plans for the service you can choose from (note that in both cases, if this is your first time subscribing to VeraProtect, you’ll be getting a free 30-day trial.)
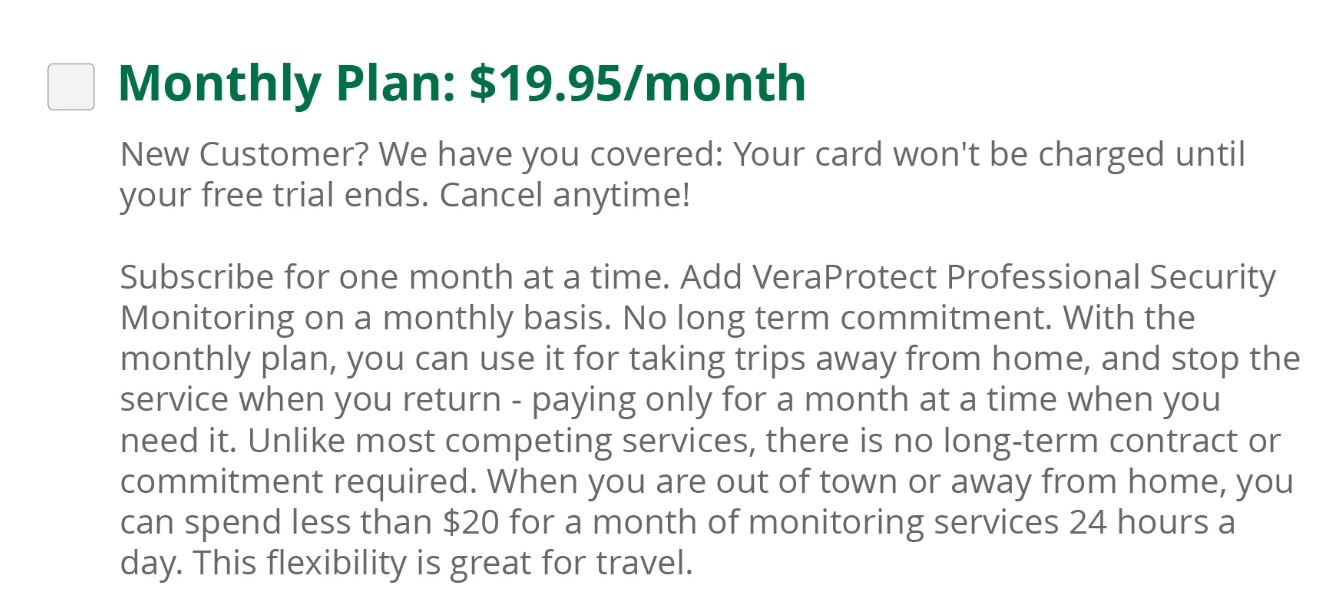
- Monthly: This option affords greater flexibility, being perfect for prolonged periods of time when you’re away and want to make sure you're leaving your house in safe hands. It allows for greater room of maneuver, as you can cancel, reinstate, and space out your subscriptions on a monthly, as-needed basis, and get security monitoring at an affordable price (only $19.95/month).
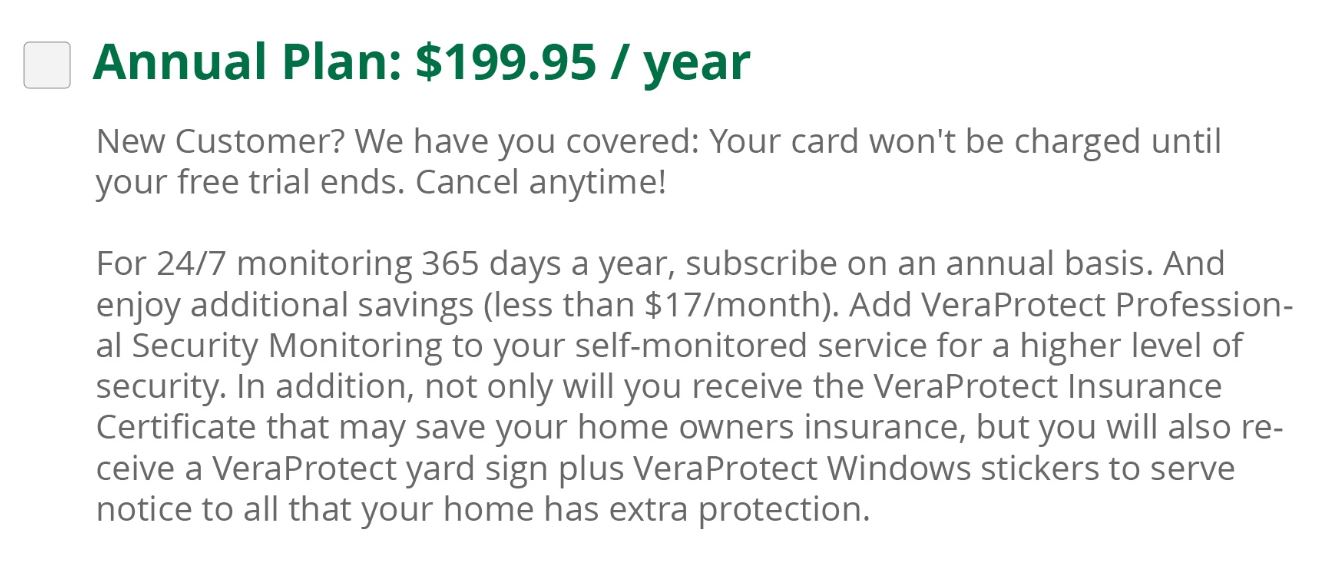
- Annual: Where the monthly plan offers greater flexibility, the annual one is a longer-term commitment, but means a substantial amount of money saved in the long run ($199.95/year) and having your house kept safe all year long.
VeraProtect Enrollment
Prerequisites:
- VeraProtect is available in your state (see above);
- The service isn't already active on your controller
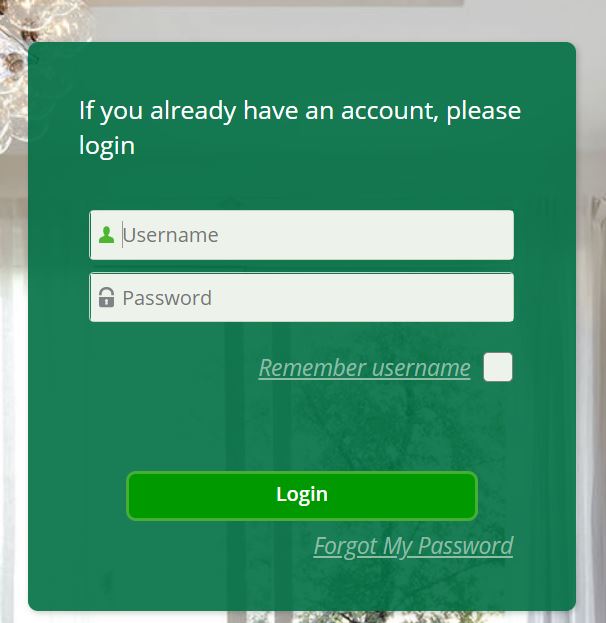
The first step is to log into your account at home.getvera.com, the Vera Web User Interface. Fill in the Username and Password fields with your login credentials, then click on the Login button at the bottom.
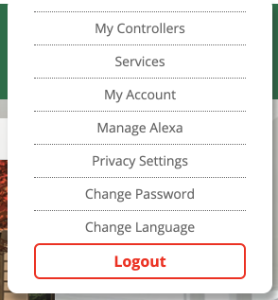
Here you should see the controller assigned to your account (or a list of them, if you have more than one). To sign up for VeraProtect, head over to the top right corner of the page, where you can see you username. Click on the arrow sign next to it to open up the drop-down menu, then click on Services.
And then, on the next page, on VeraProtect.
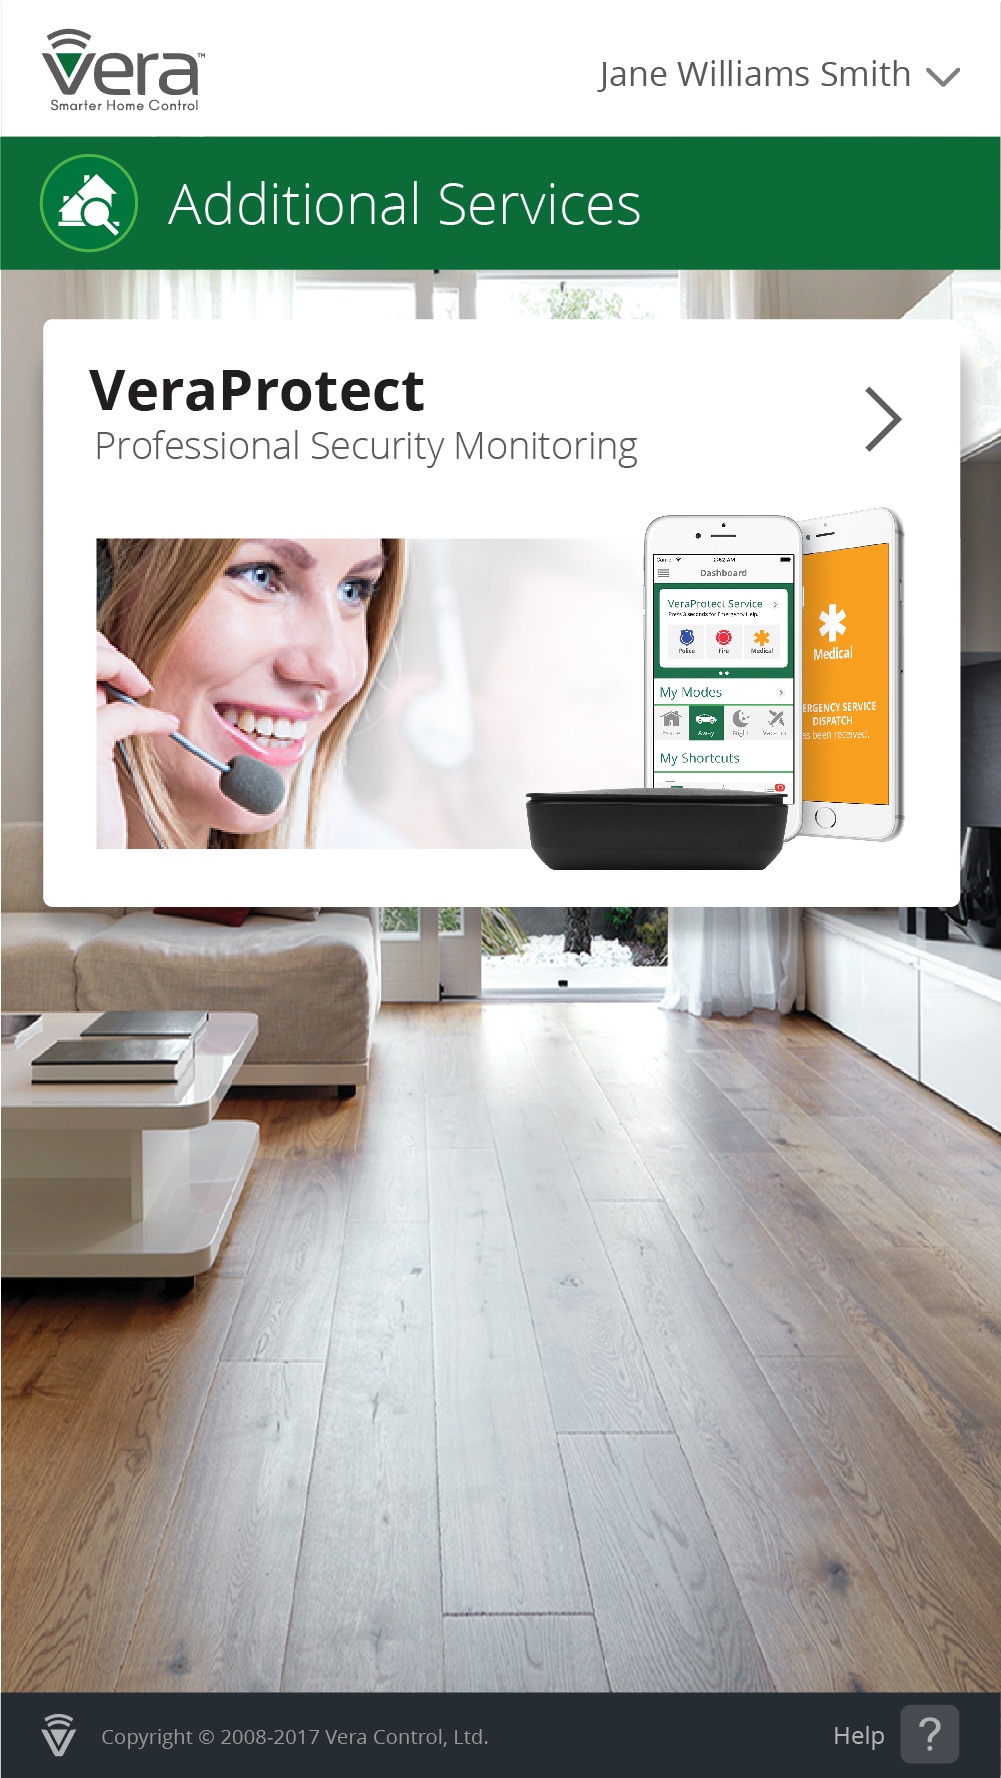
You can also do this from the Vera Mobile app, and it's a similar process if you want to take this route instead. After logging into the app, click on the connect button next to your controller, then on Additional Services, on the left-hand-side menu, and then, as before, on VeraProtect.
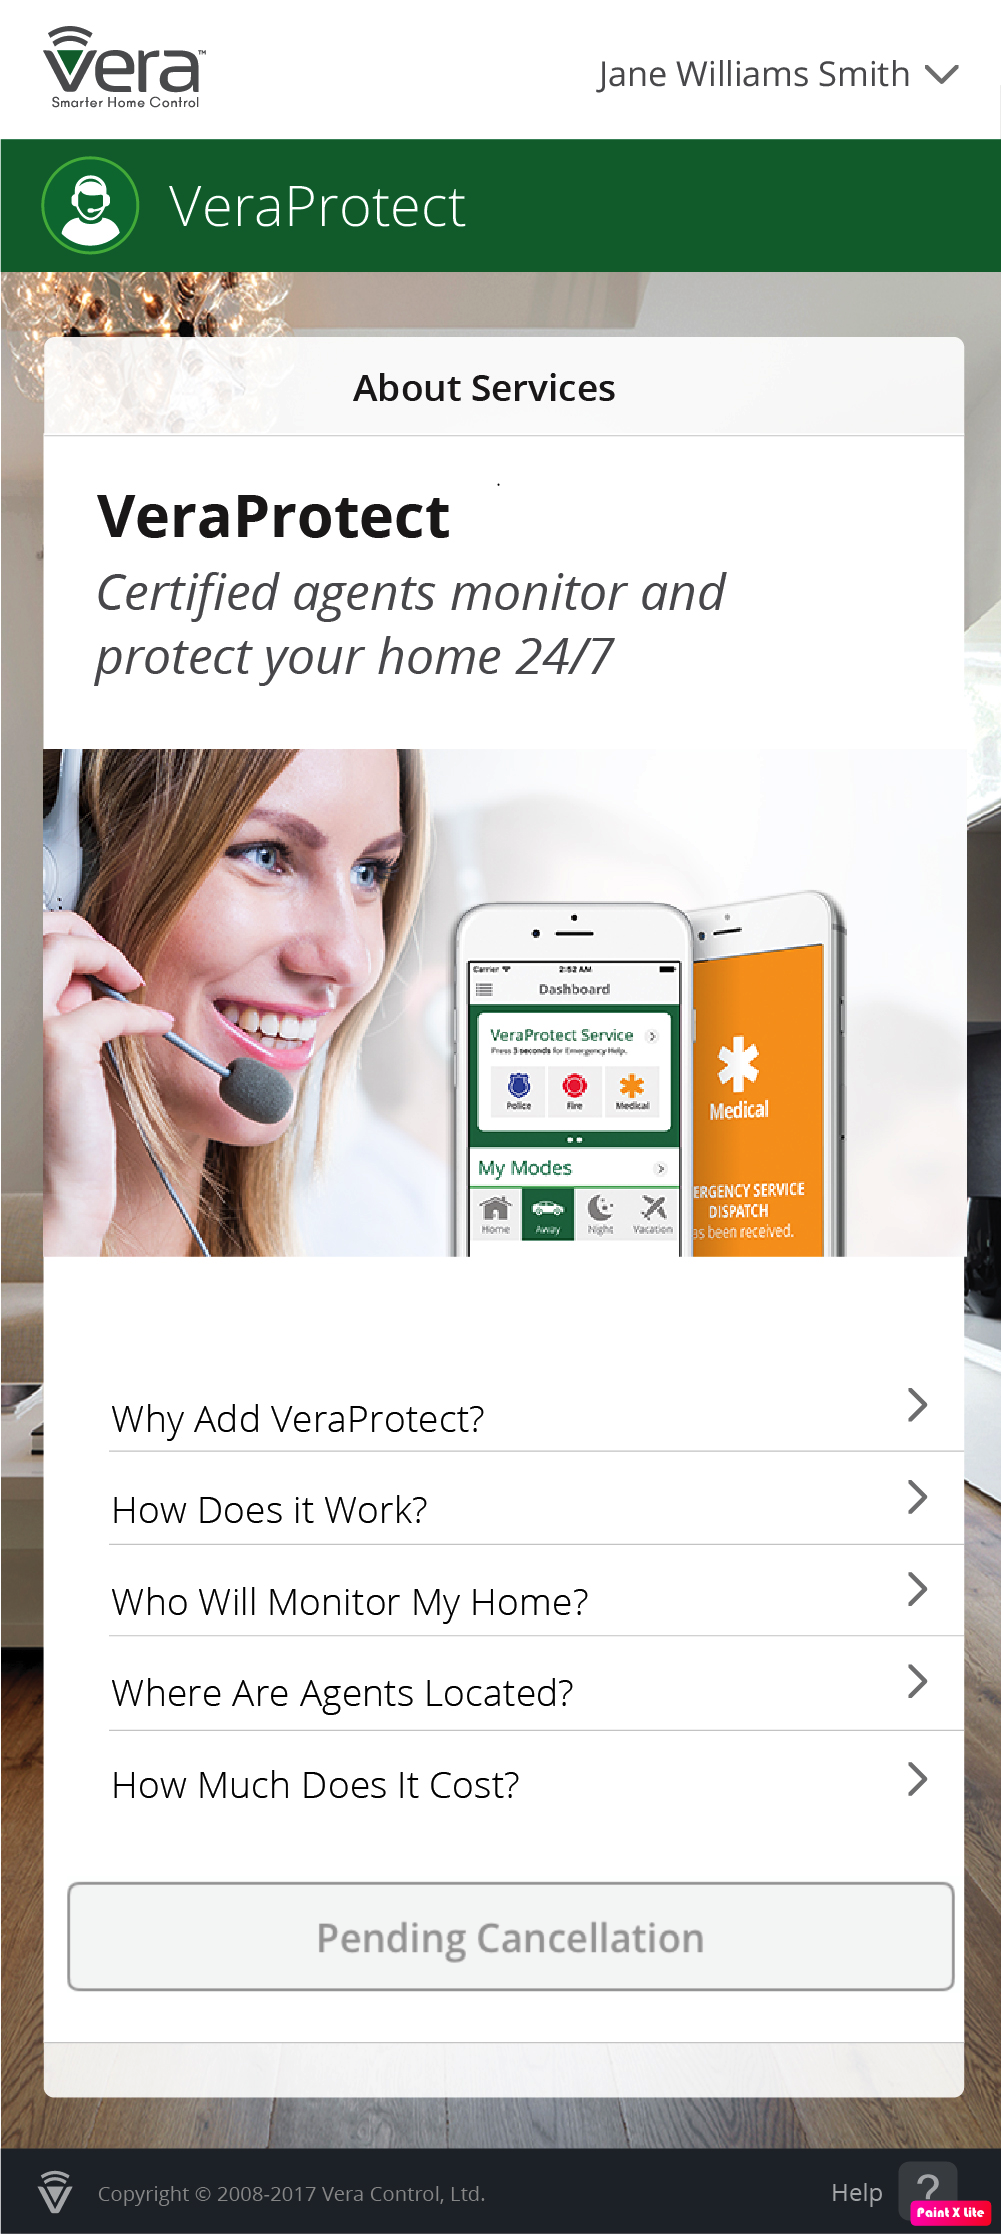
After clicking on VeraProtect, you'll be taken to where you can start the enrollment process, first being welcomed by a presentation page giving you an overview of the service.
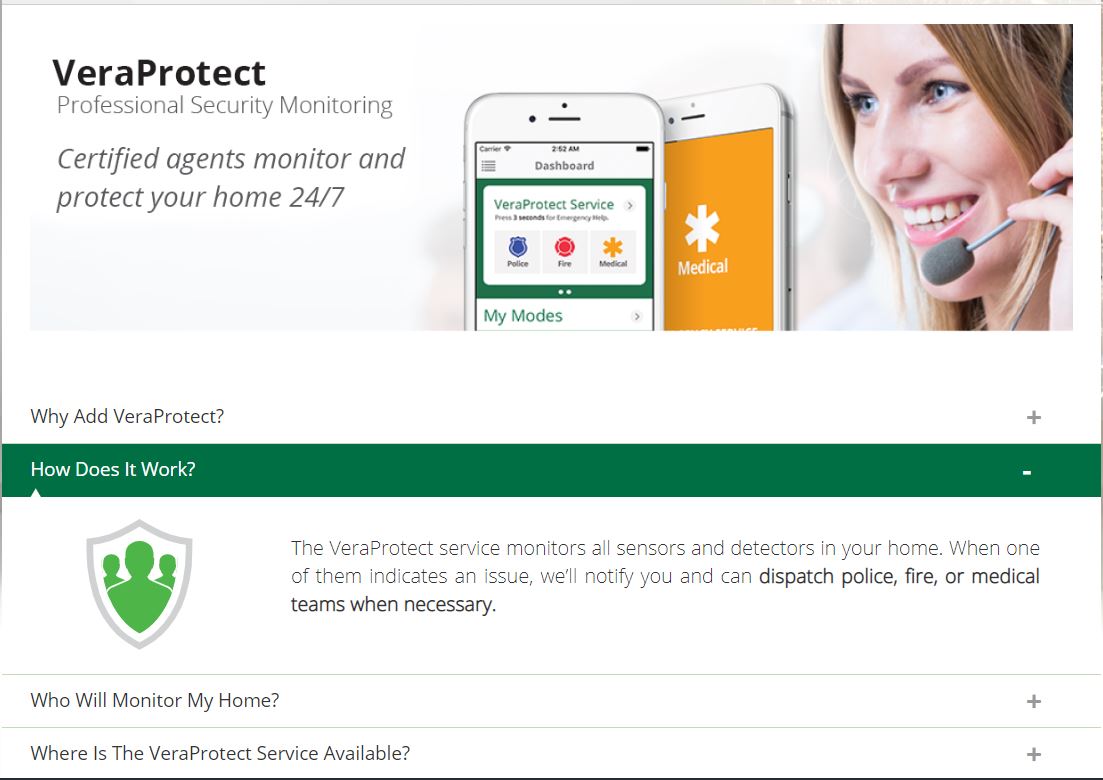
Click on the 'Let's get started' button at the bottom of the page to go ahead and begin the enrollment process.
![]()
On the next page, you have to choose one of the two plans available - monthly and annual - and agree to the terms and conditions presented. When done, click on next.
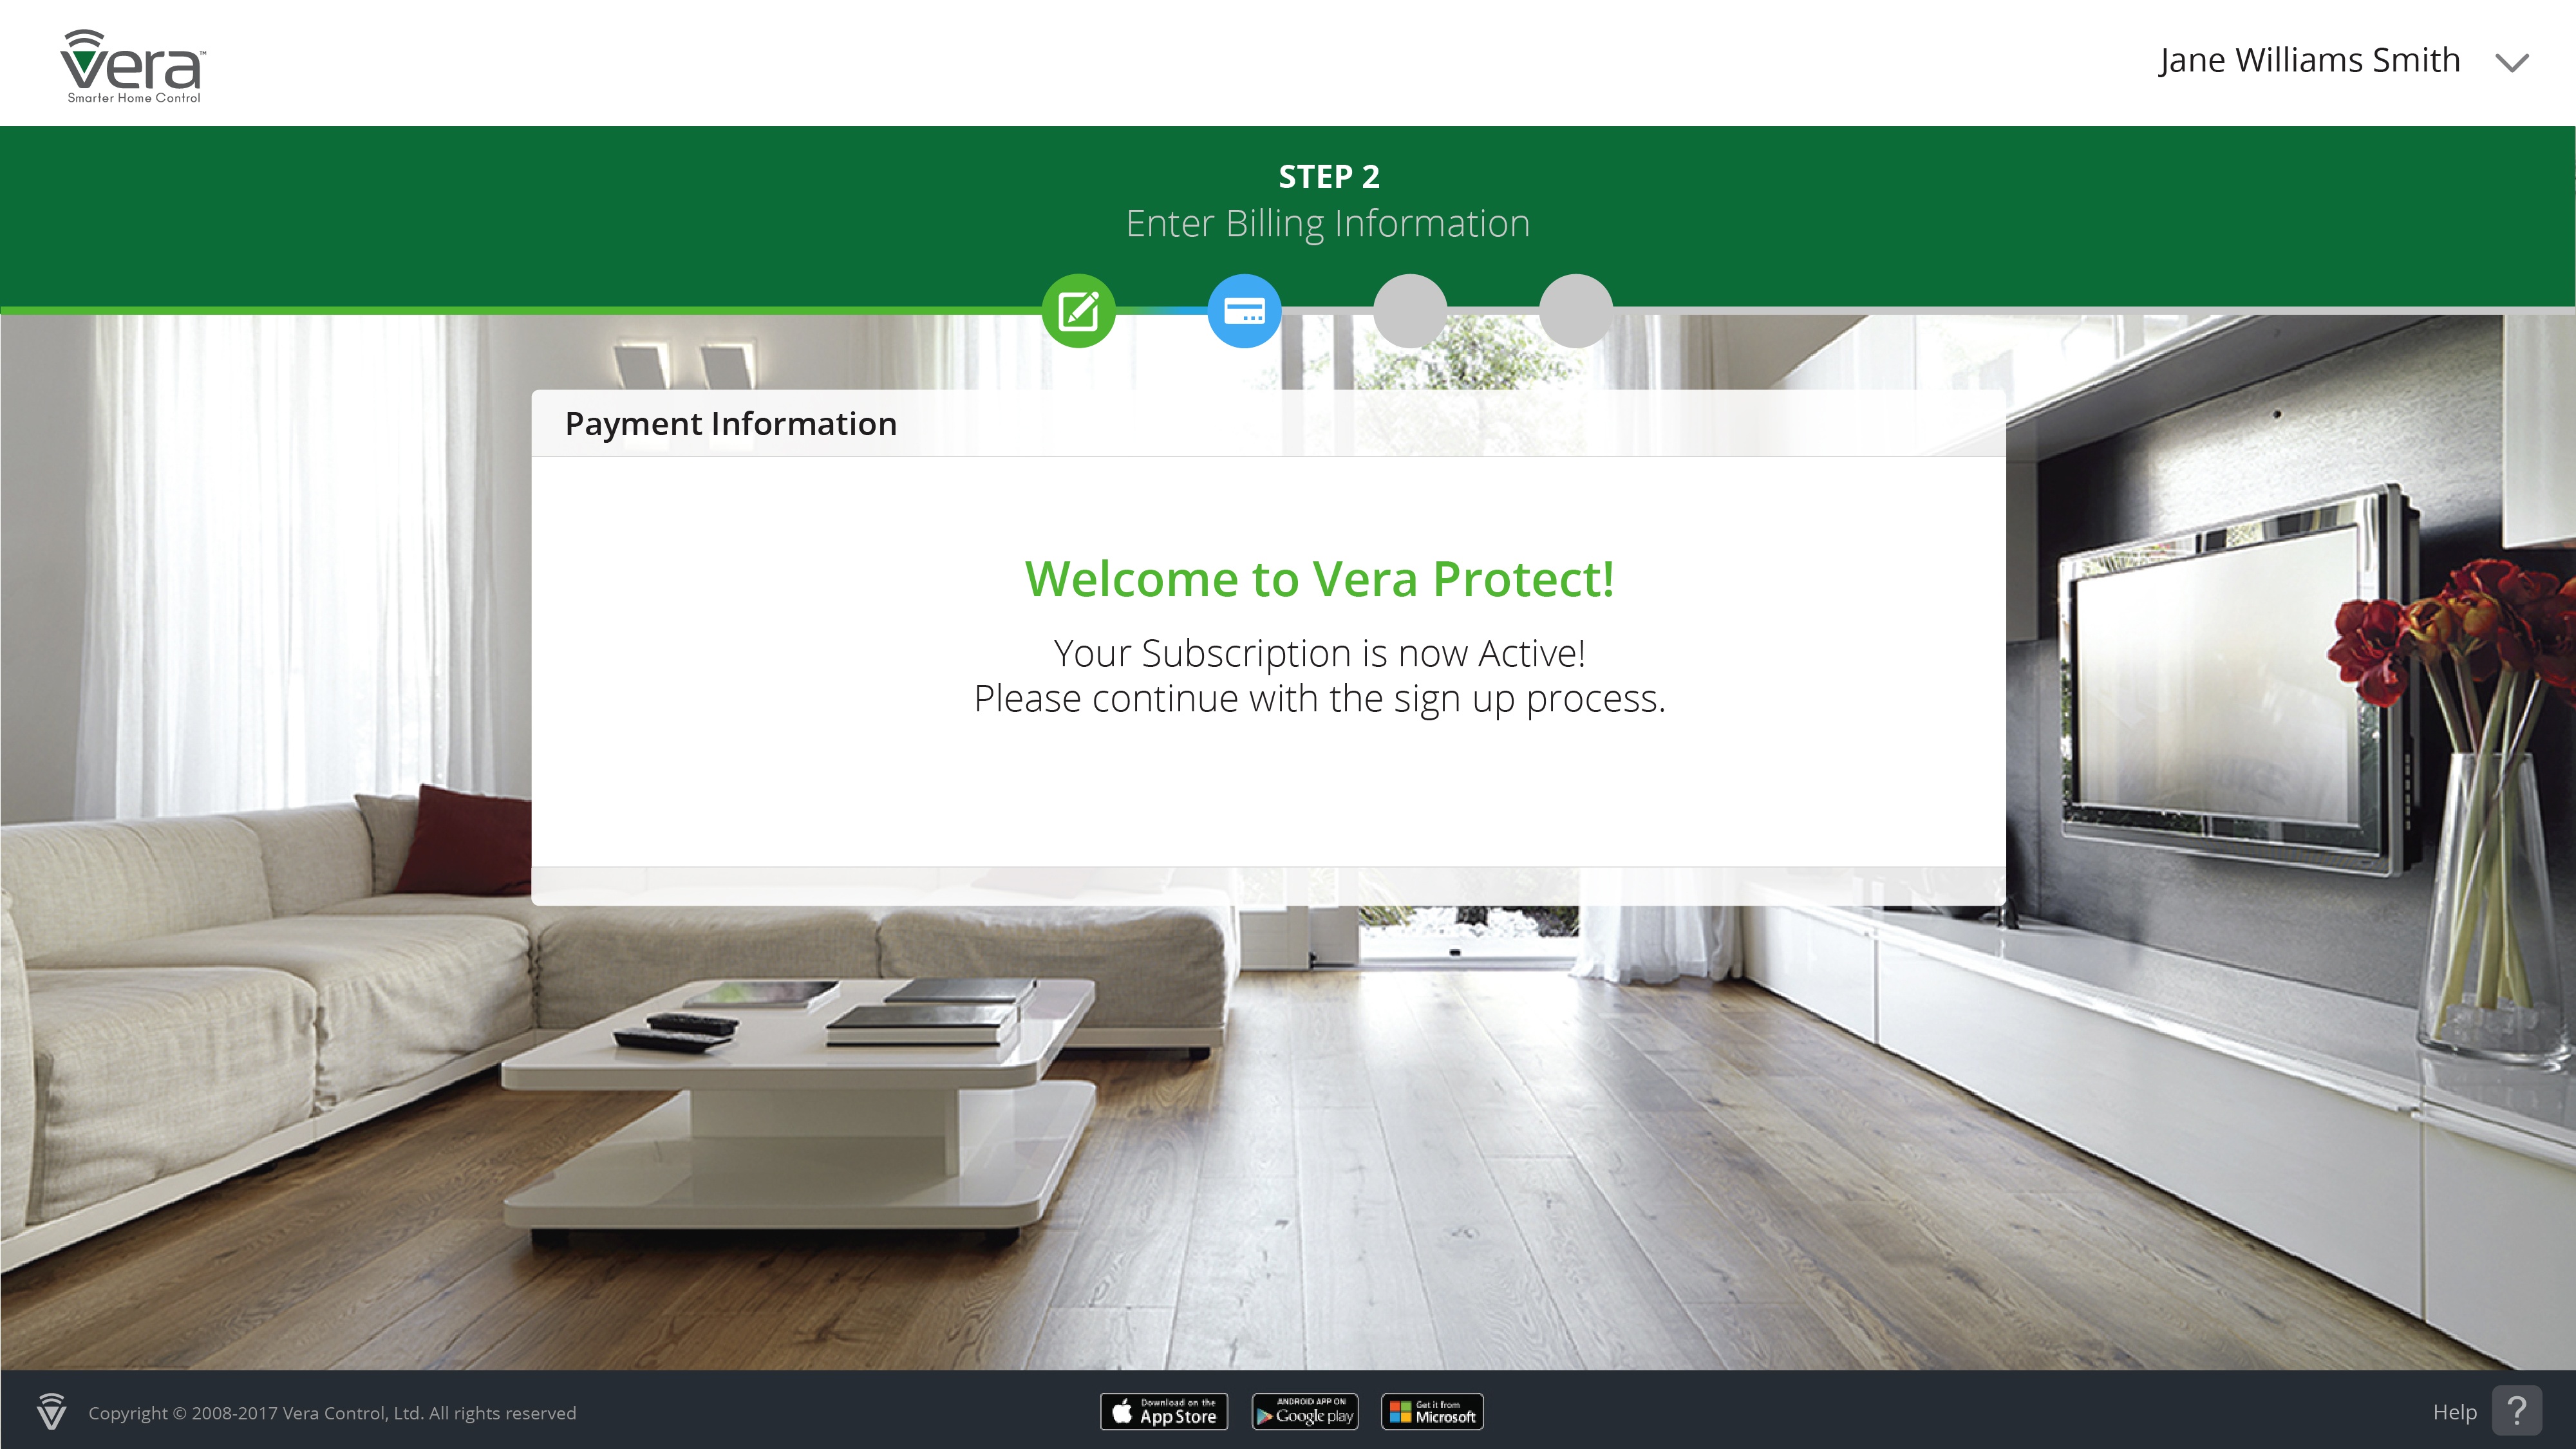
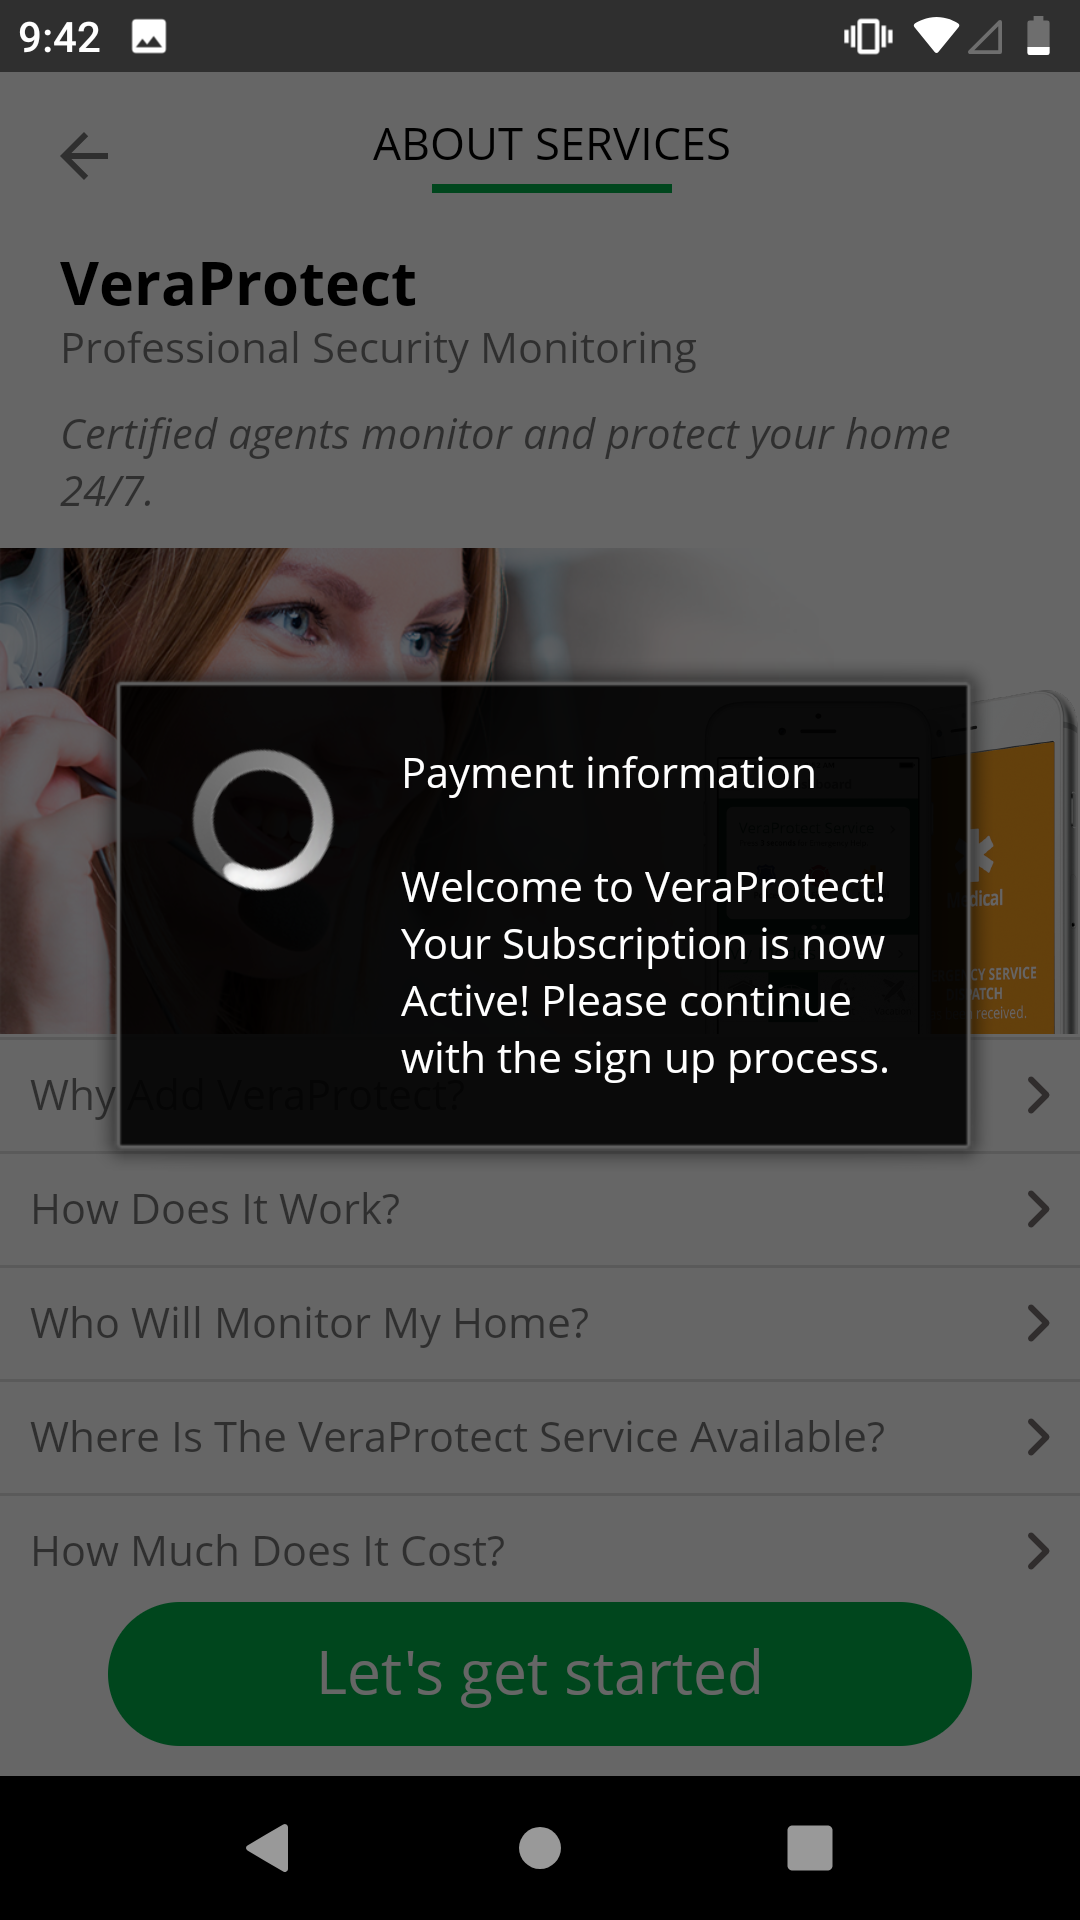
The next step consists in filling in your billing information.
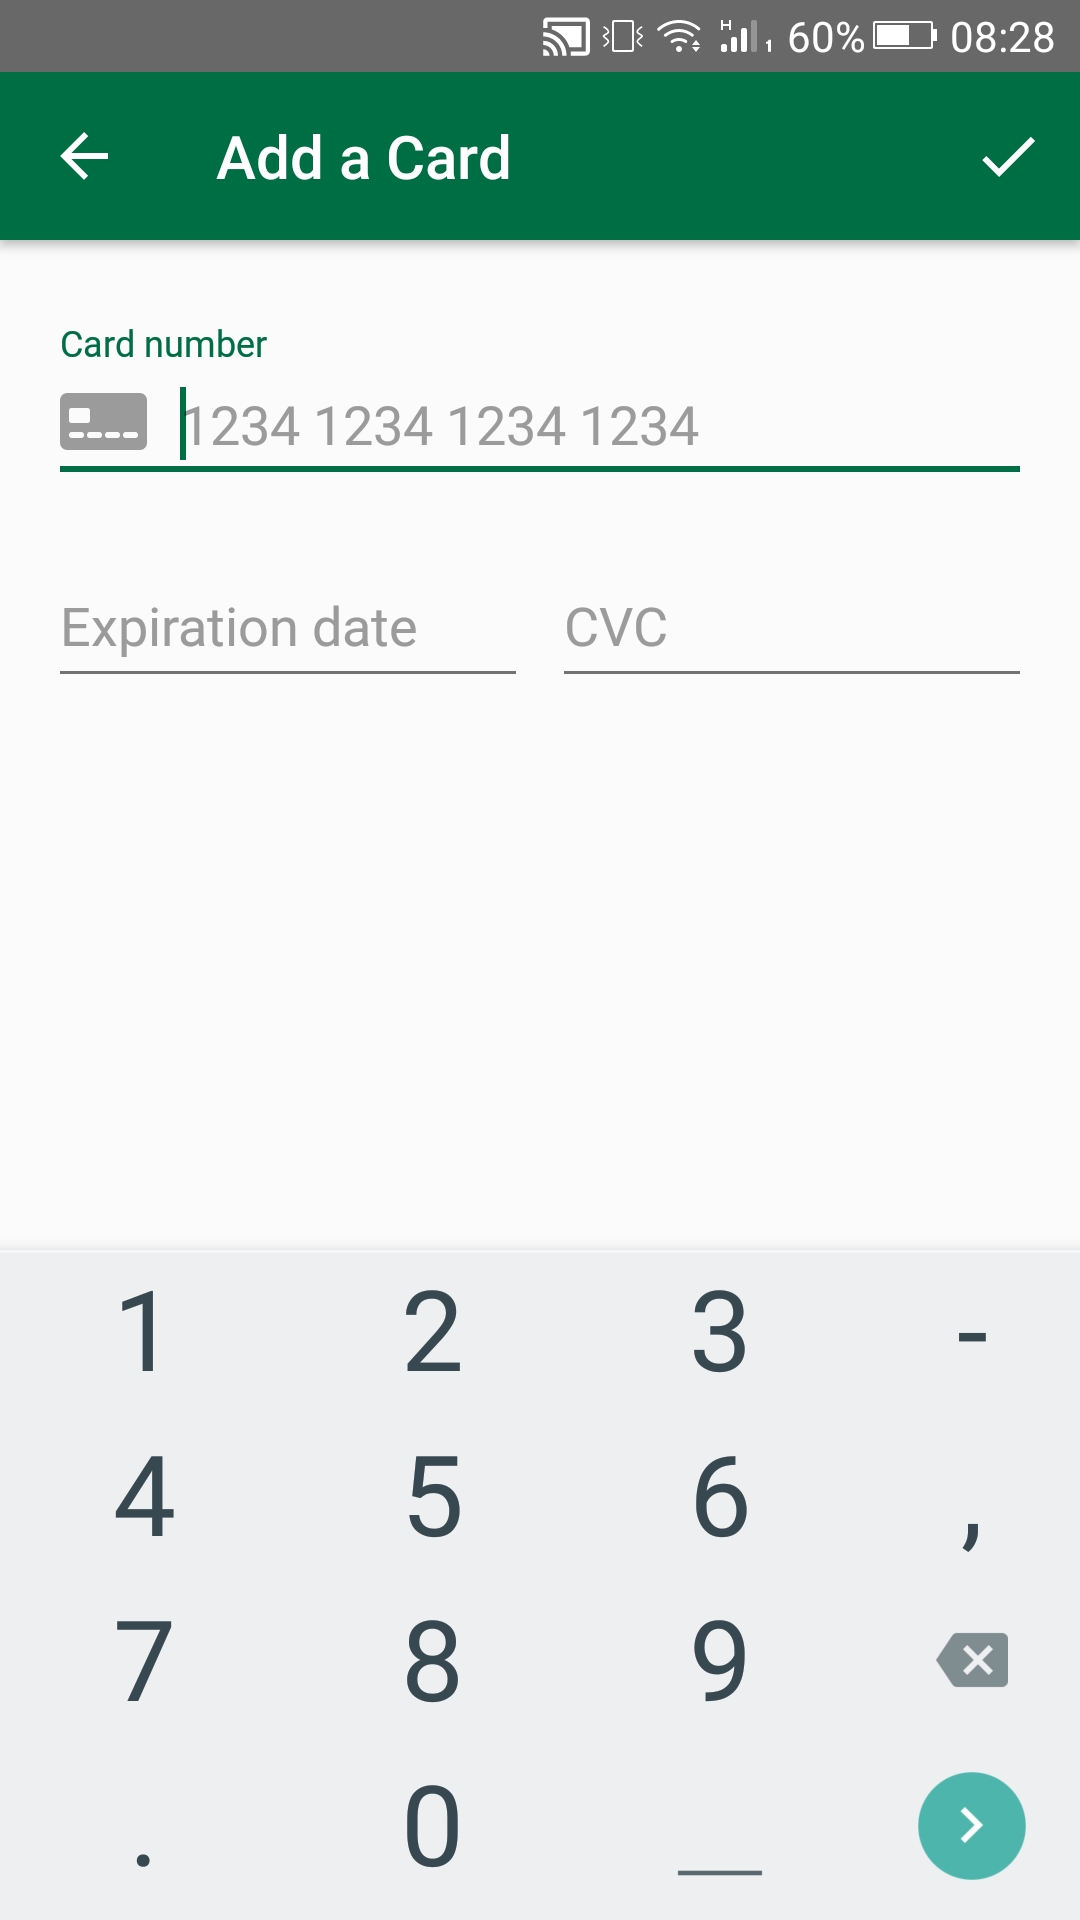
Note: If on mobile, you'll then be taken straight over to where you're supposed to fill in your credit card details (as seen below), and won't see this image.

Click on Next/Continue, and then, when prompted, enter your credit card information, such as card number, card expiration date, and CVC code, in the new form, and then the ZIP code - when finished, click on 'save card' (note that you need to fill in all the fields before being able to do that).
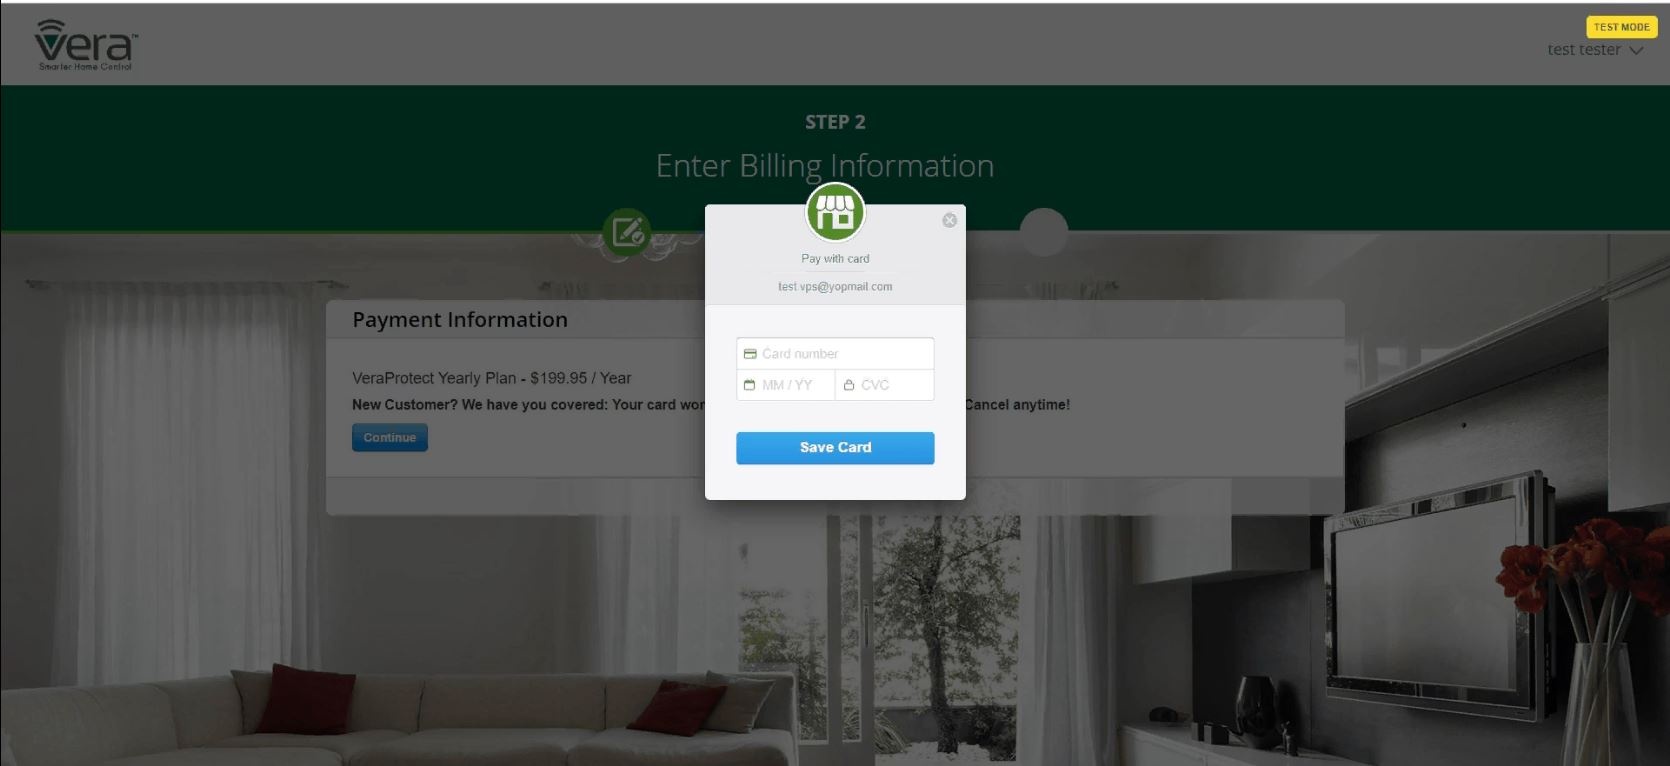

After having entered your billing information and clicking on 'save card', you should get a confirmation message letting you know that your subscription is now active and prompting you to go on in order to finish the sign-up.
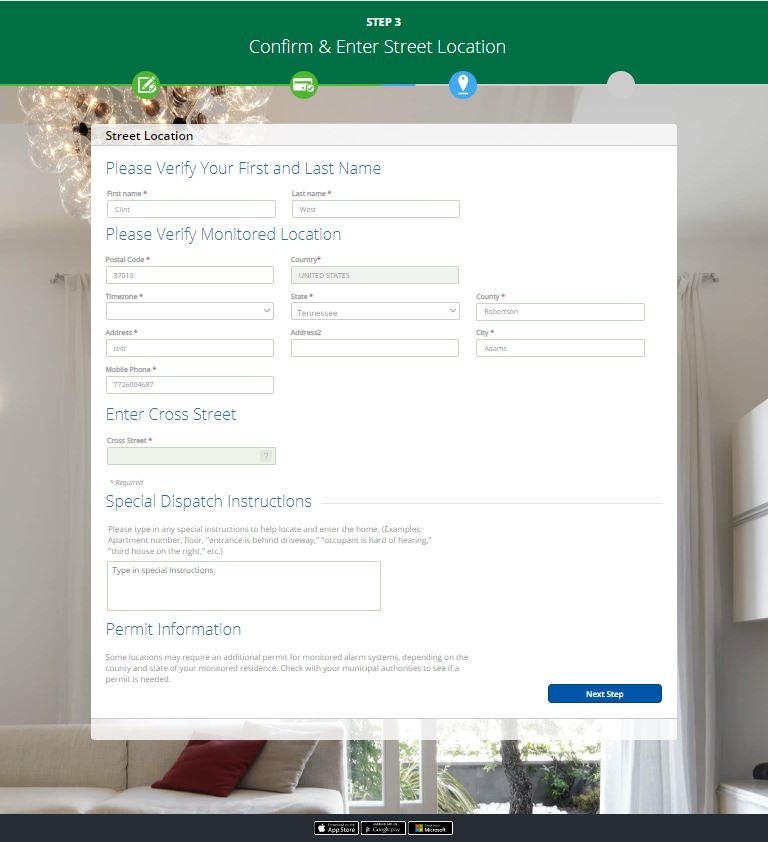
You should then be automatically redirected to the next step, where you need to fill in location-related and other details: your first and last name, Zip code, Cross Street, special dispatch instructions, etc.
Click Next, once finished, so as to move on to the next step.
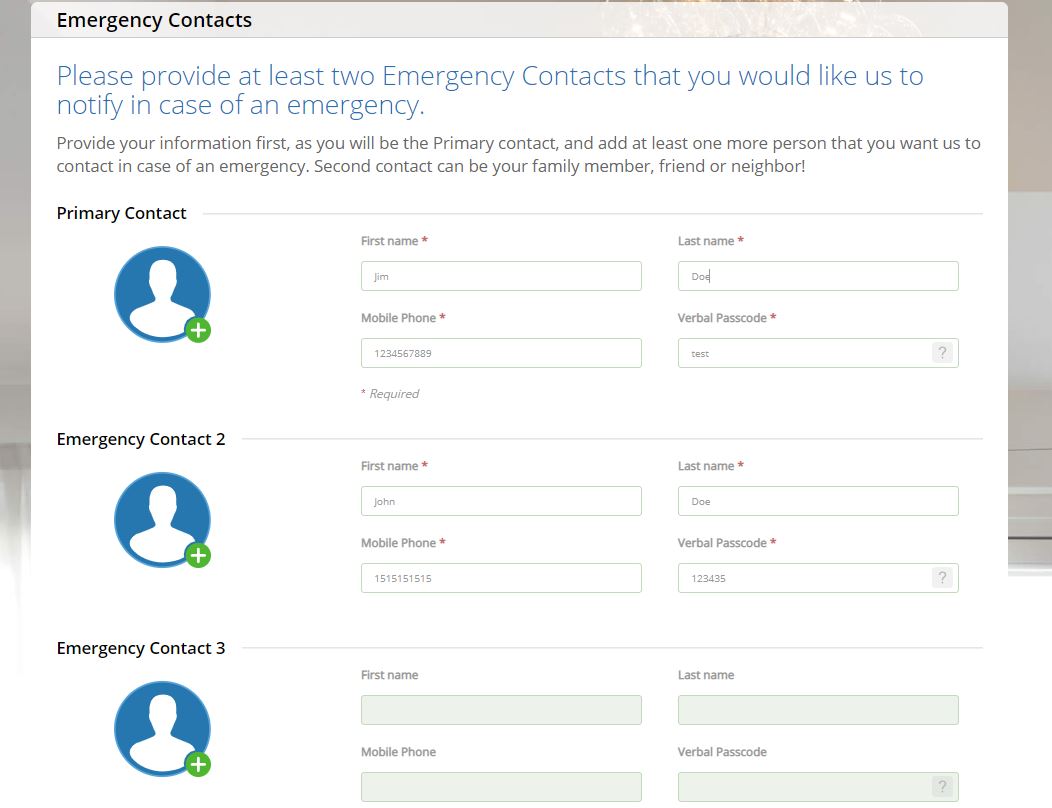
You'll then be redirected on to the emergency contacts page. Note that you have to enter at least two contacts to be able to proceed.
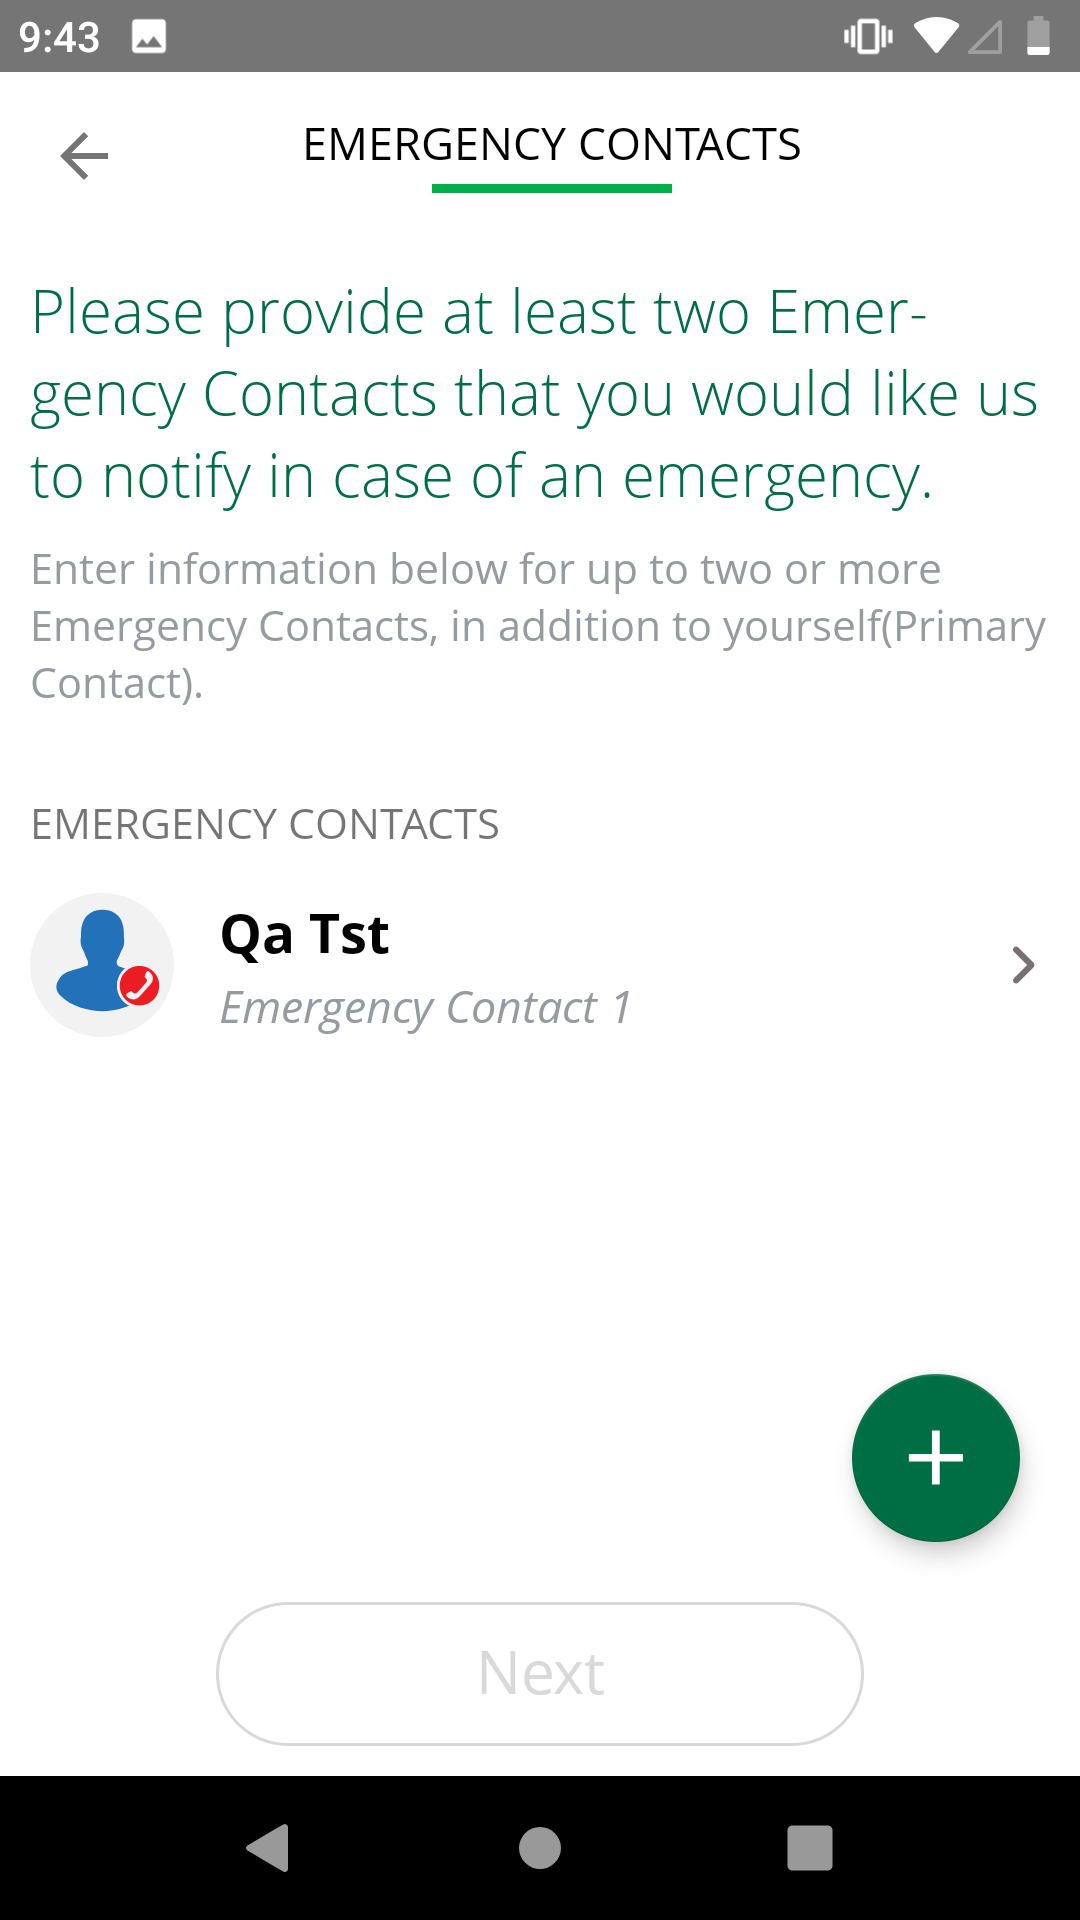
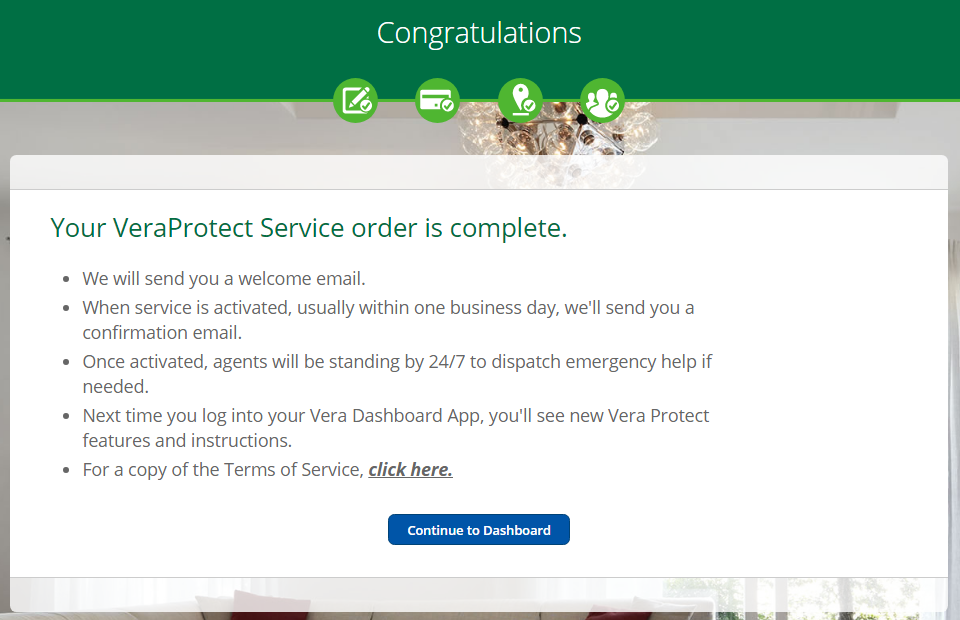
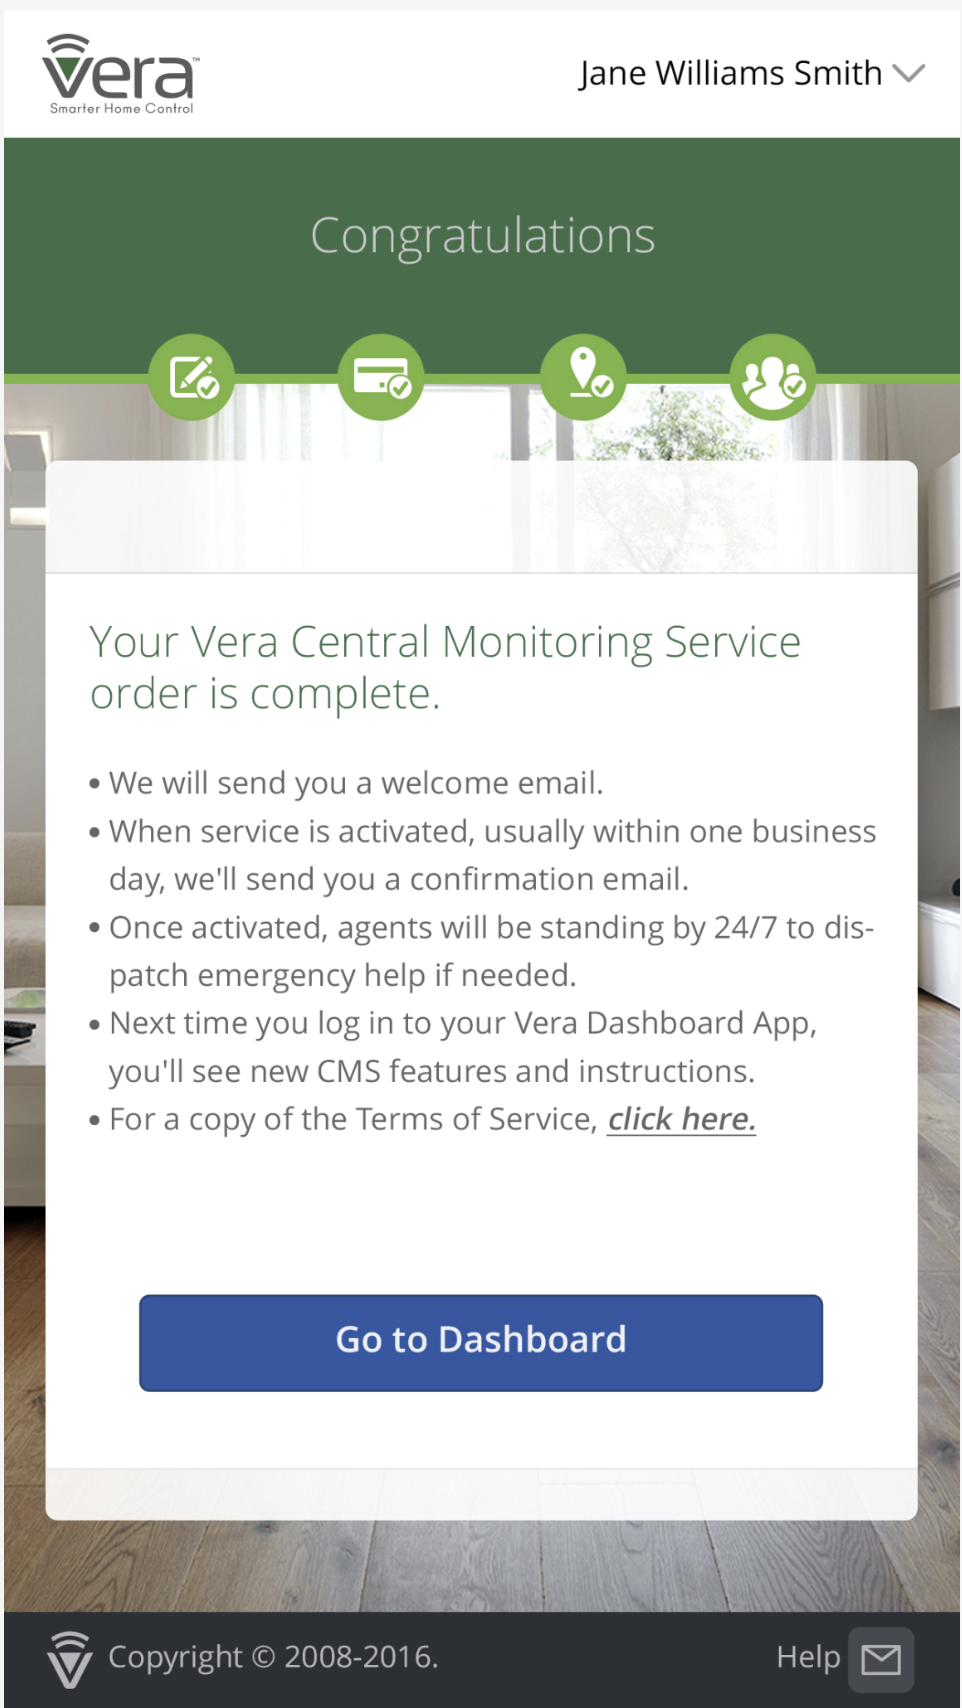
Click on Next Step when finished, after which you should see a congratulations message, confirming the completion of the sign-up (you'll also receive a confirmation email right after). You can then click on continue to dashoard to exit the VeraProtect sign-up wizard, as the process has been successfully completed.
How to check that my subscription is indeed active?
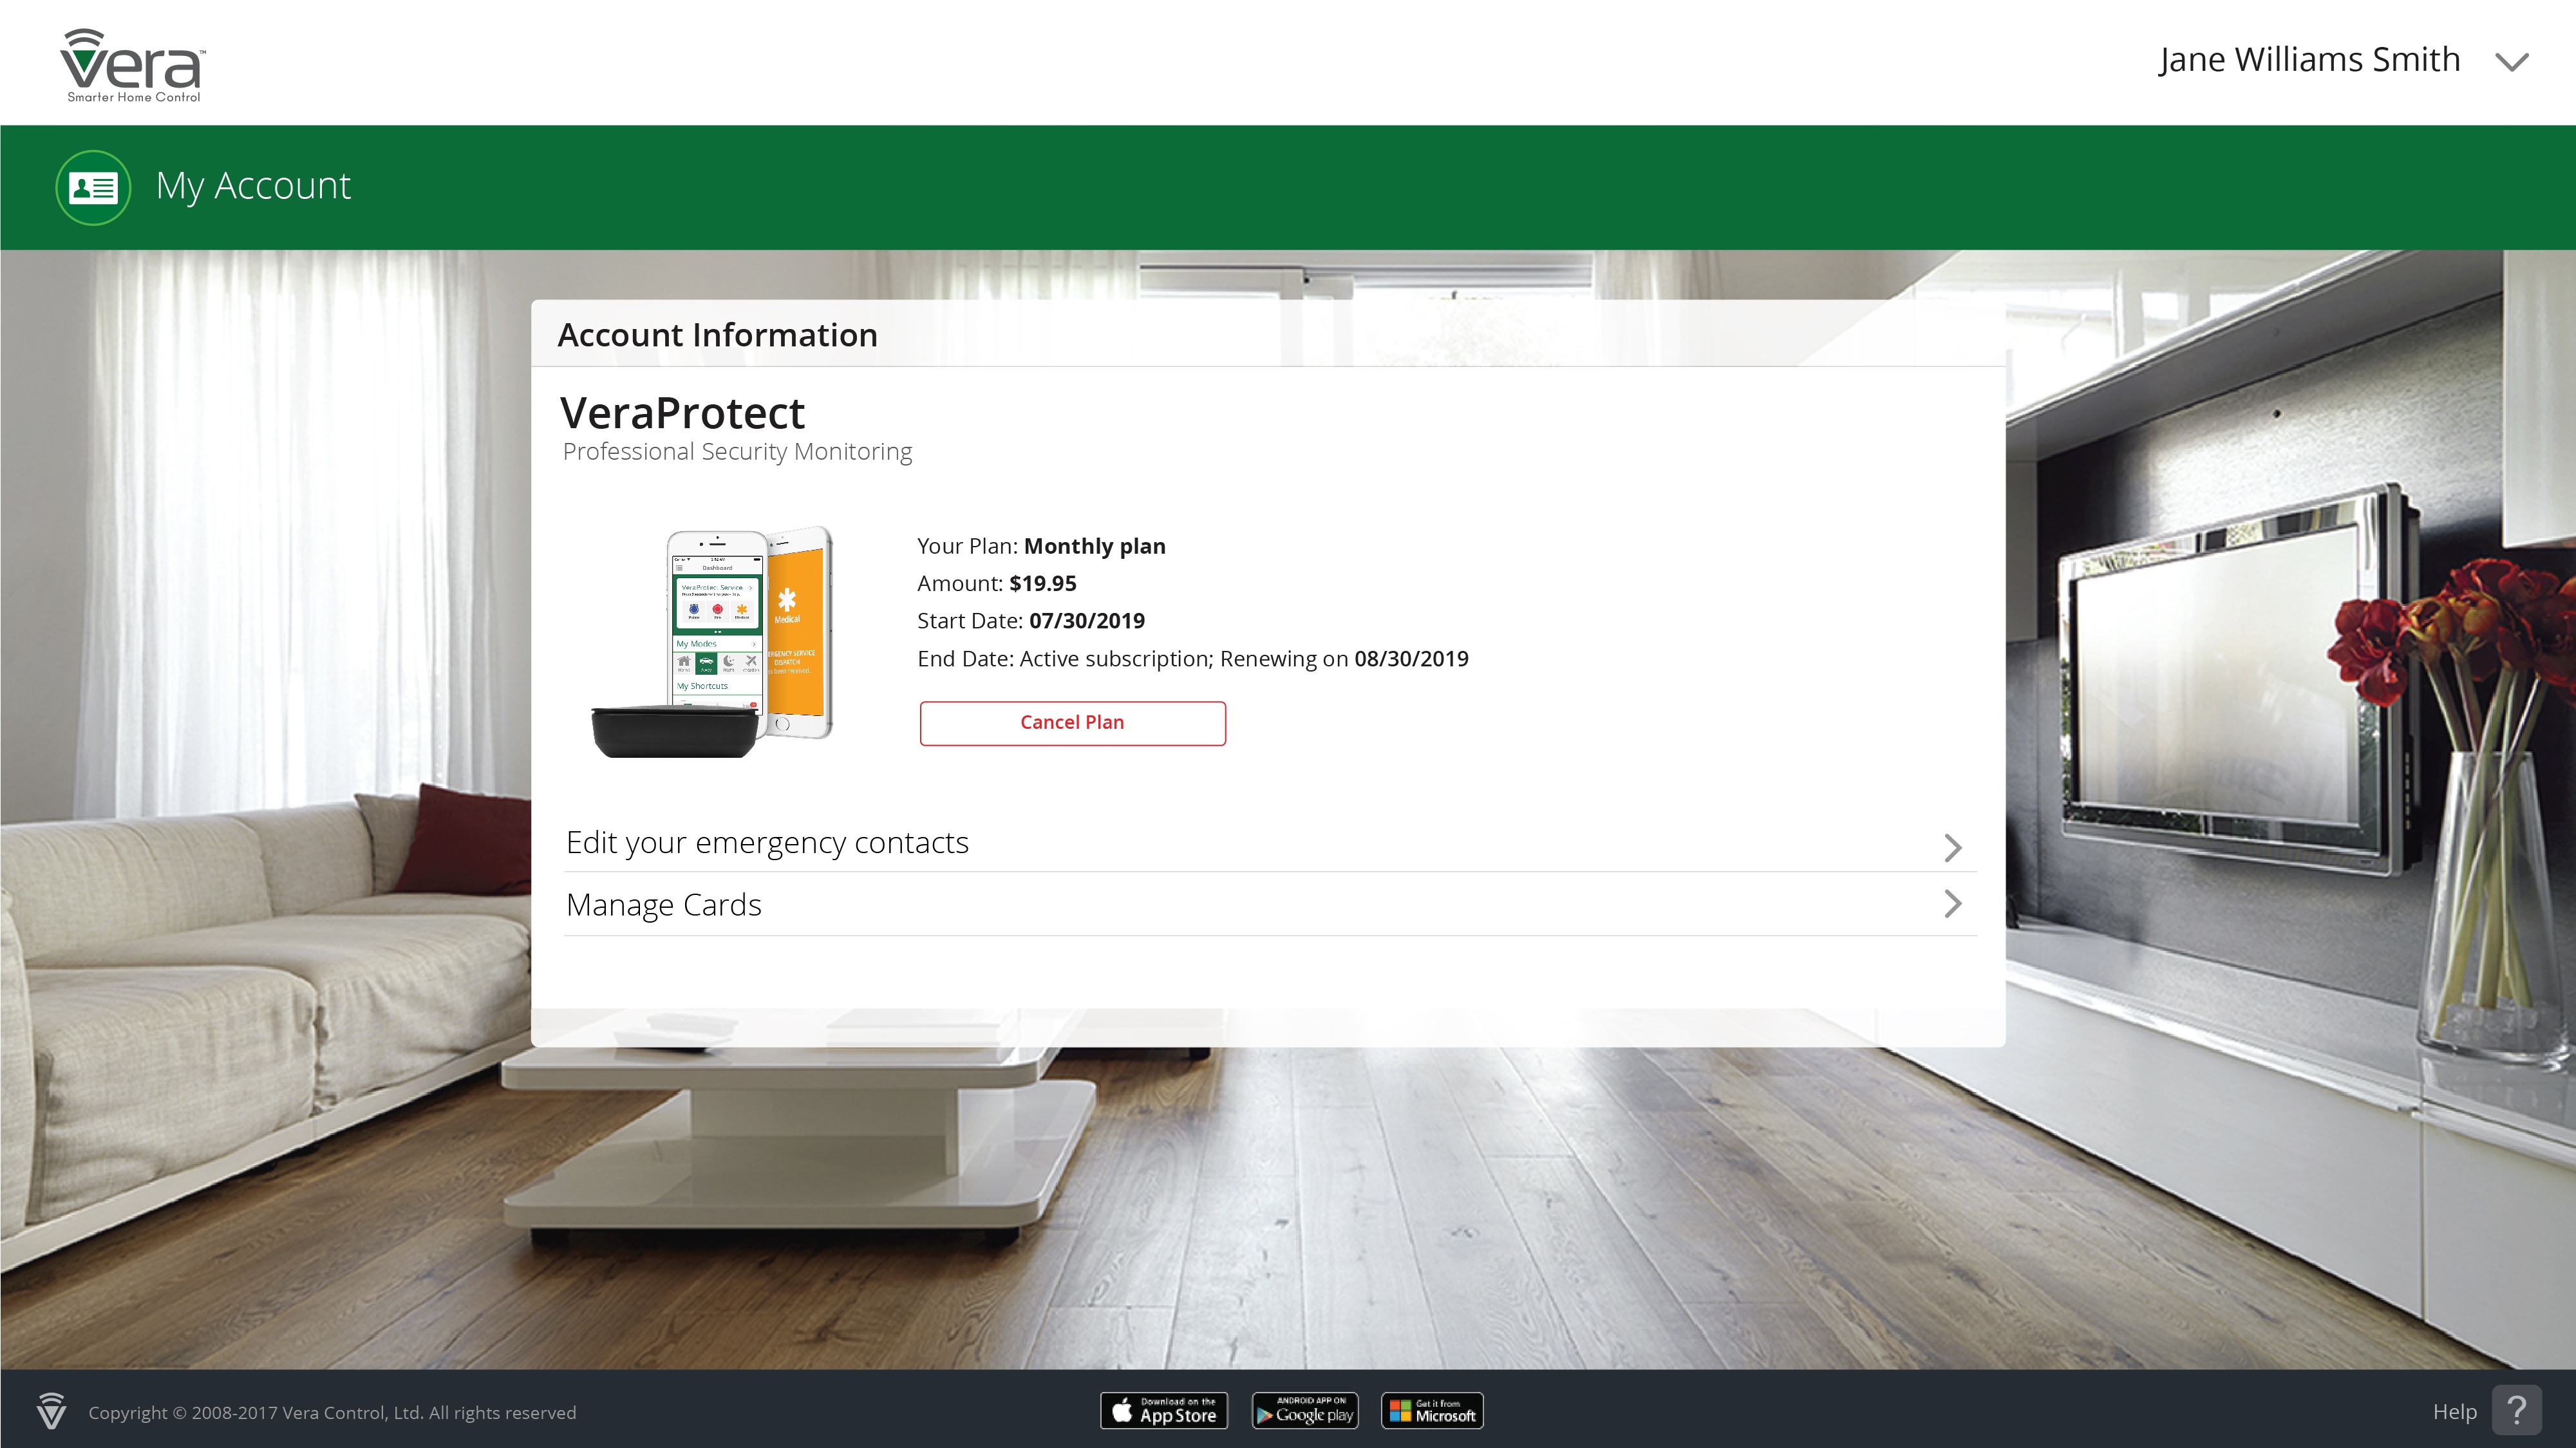
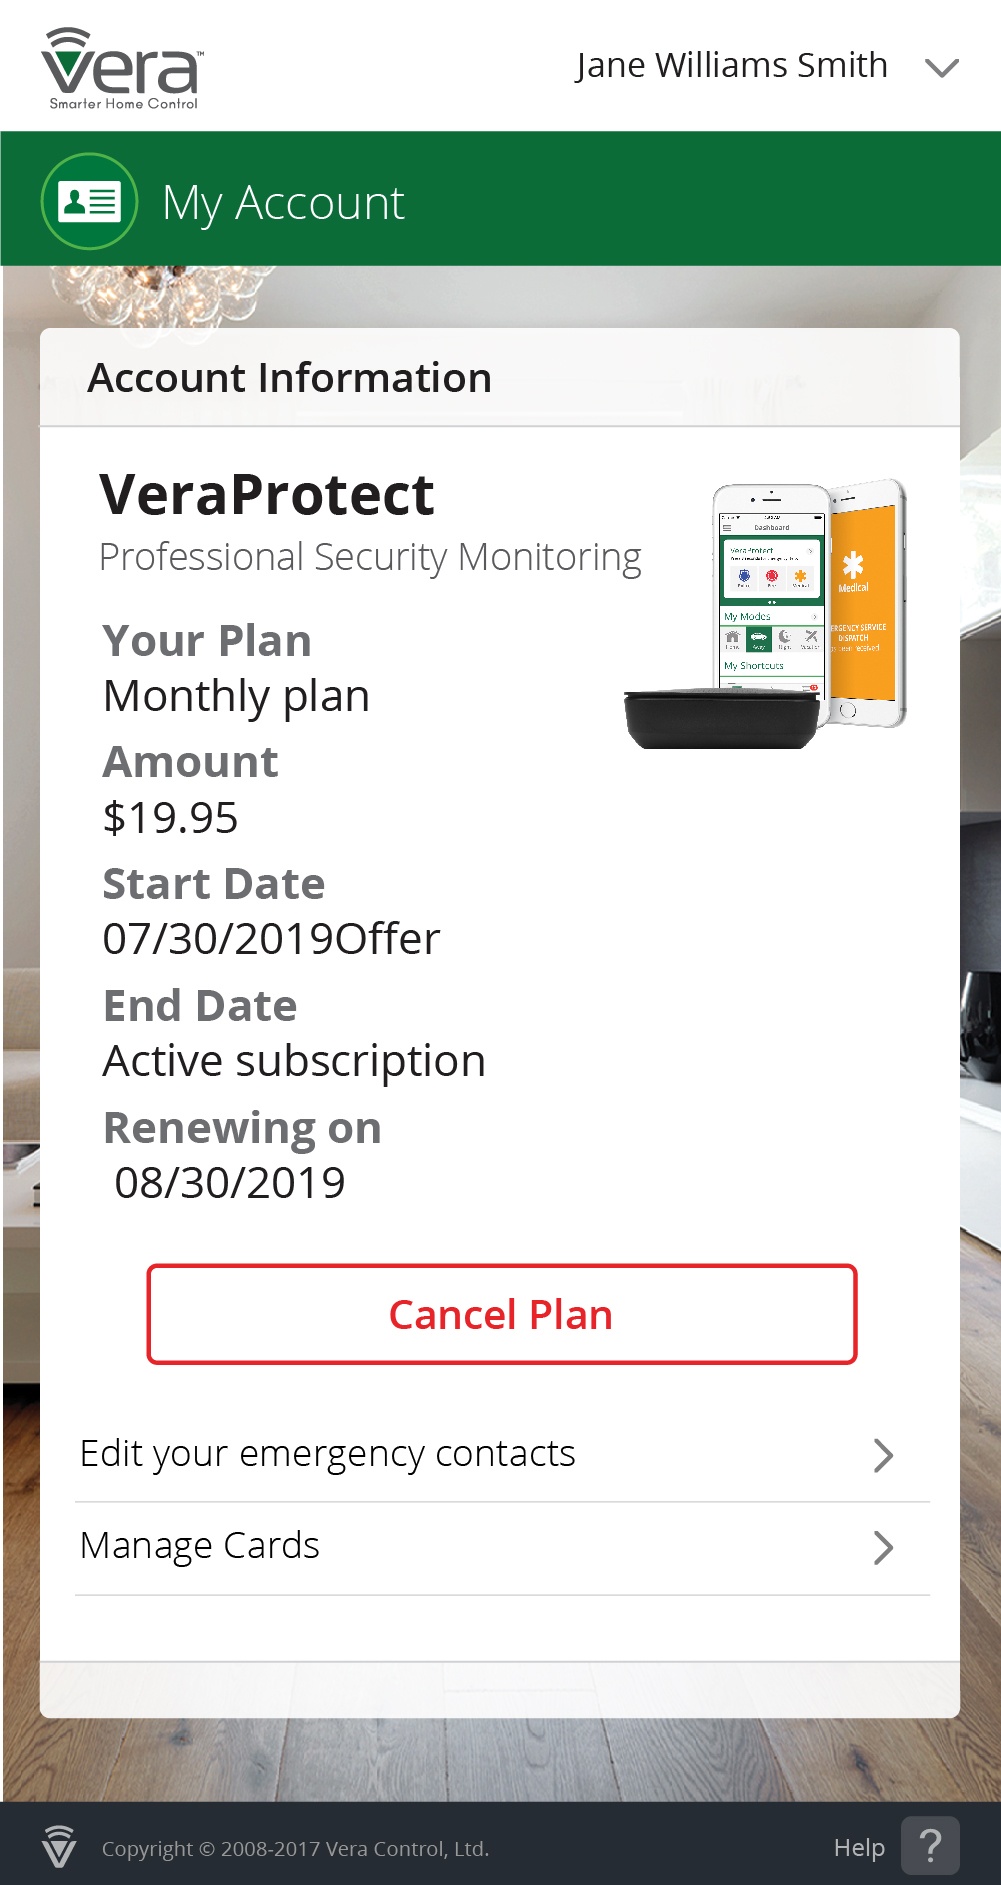
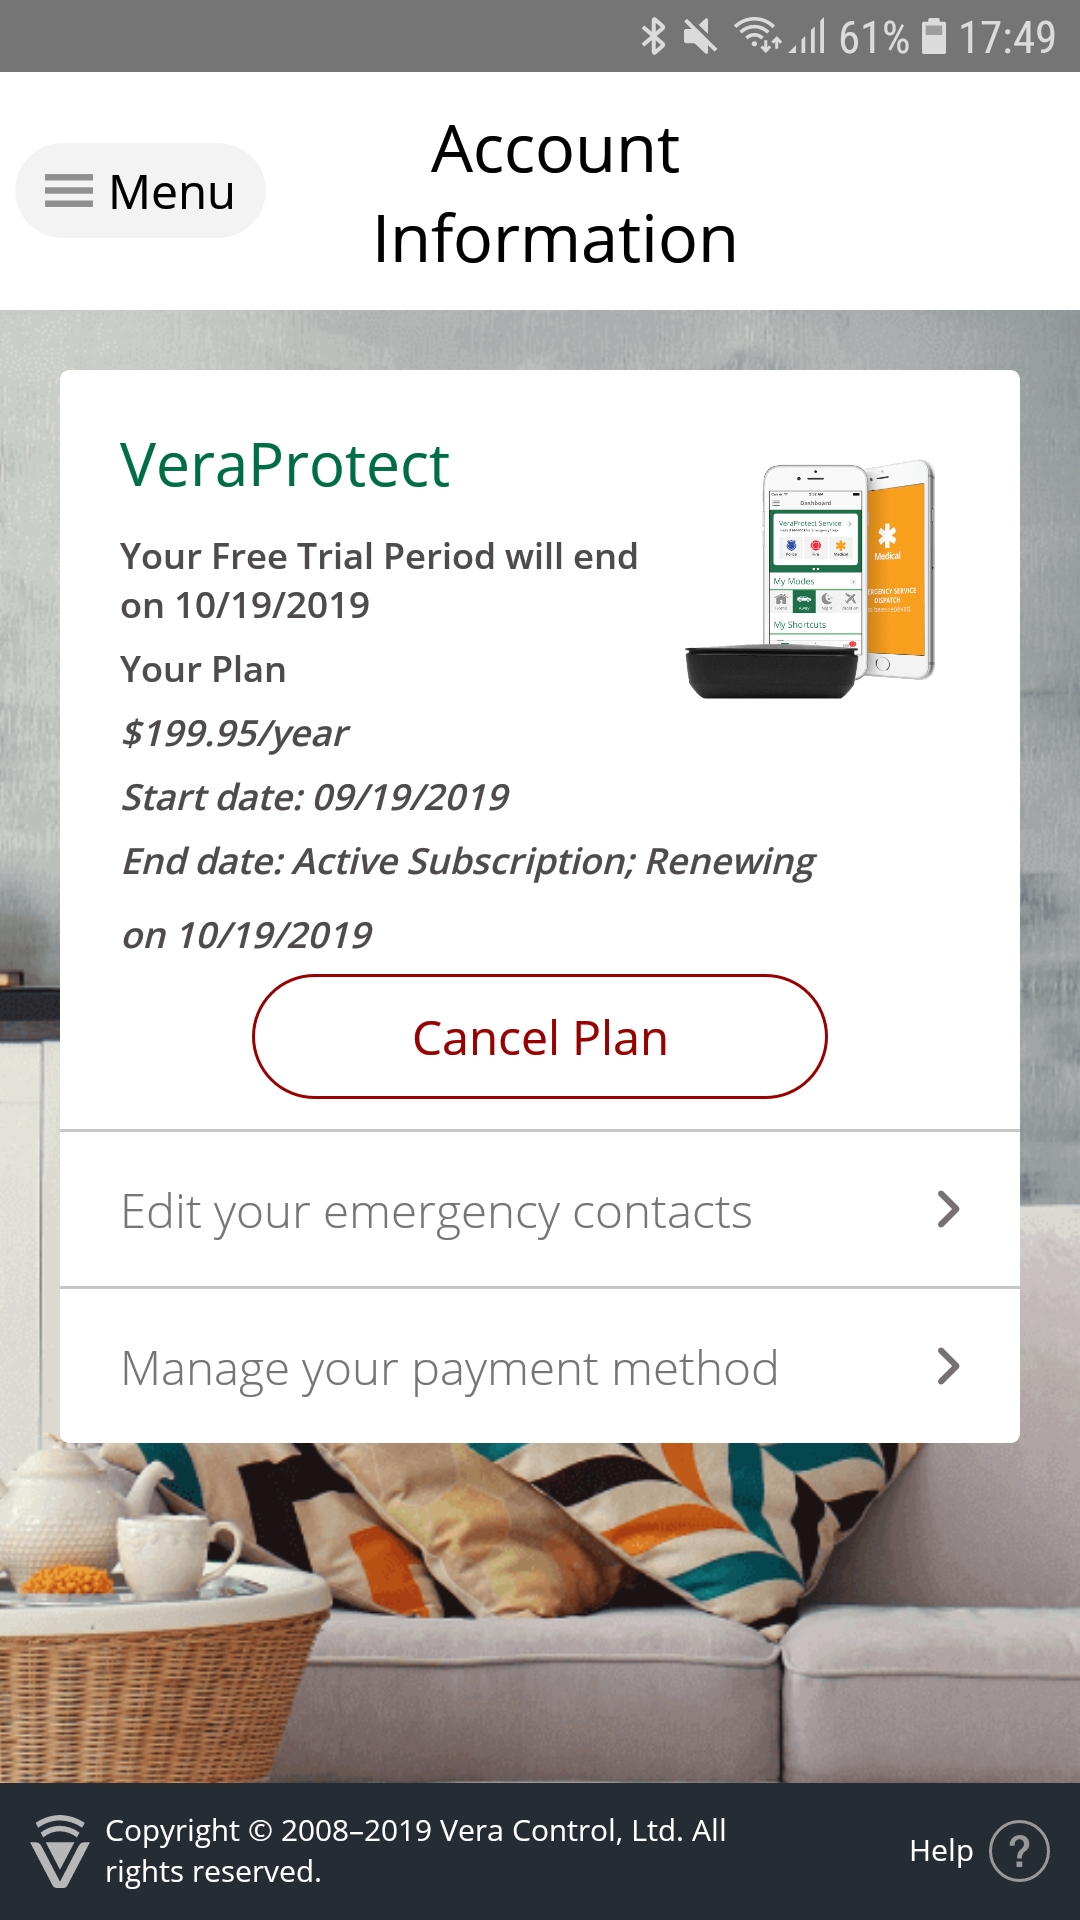
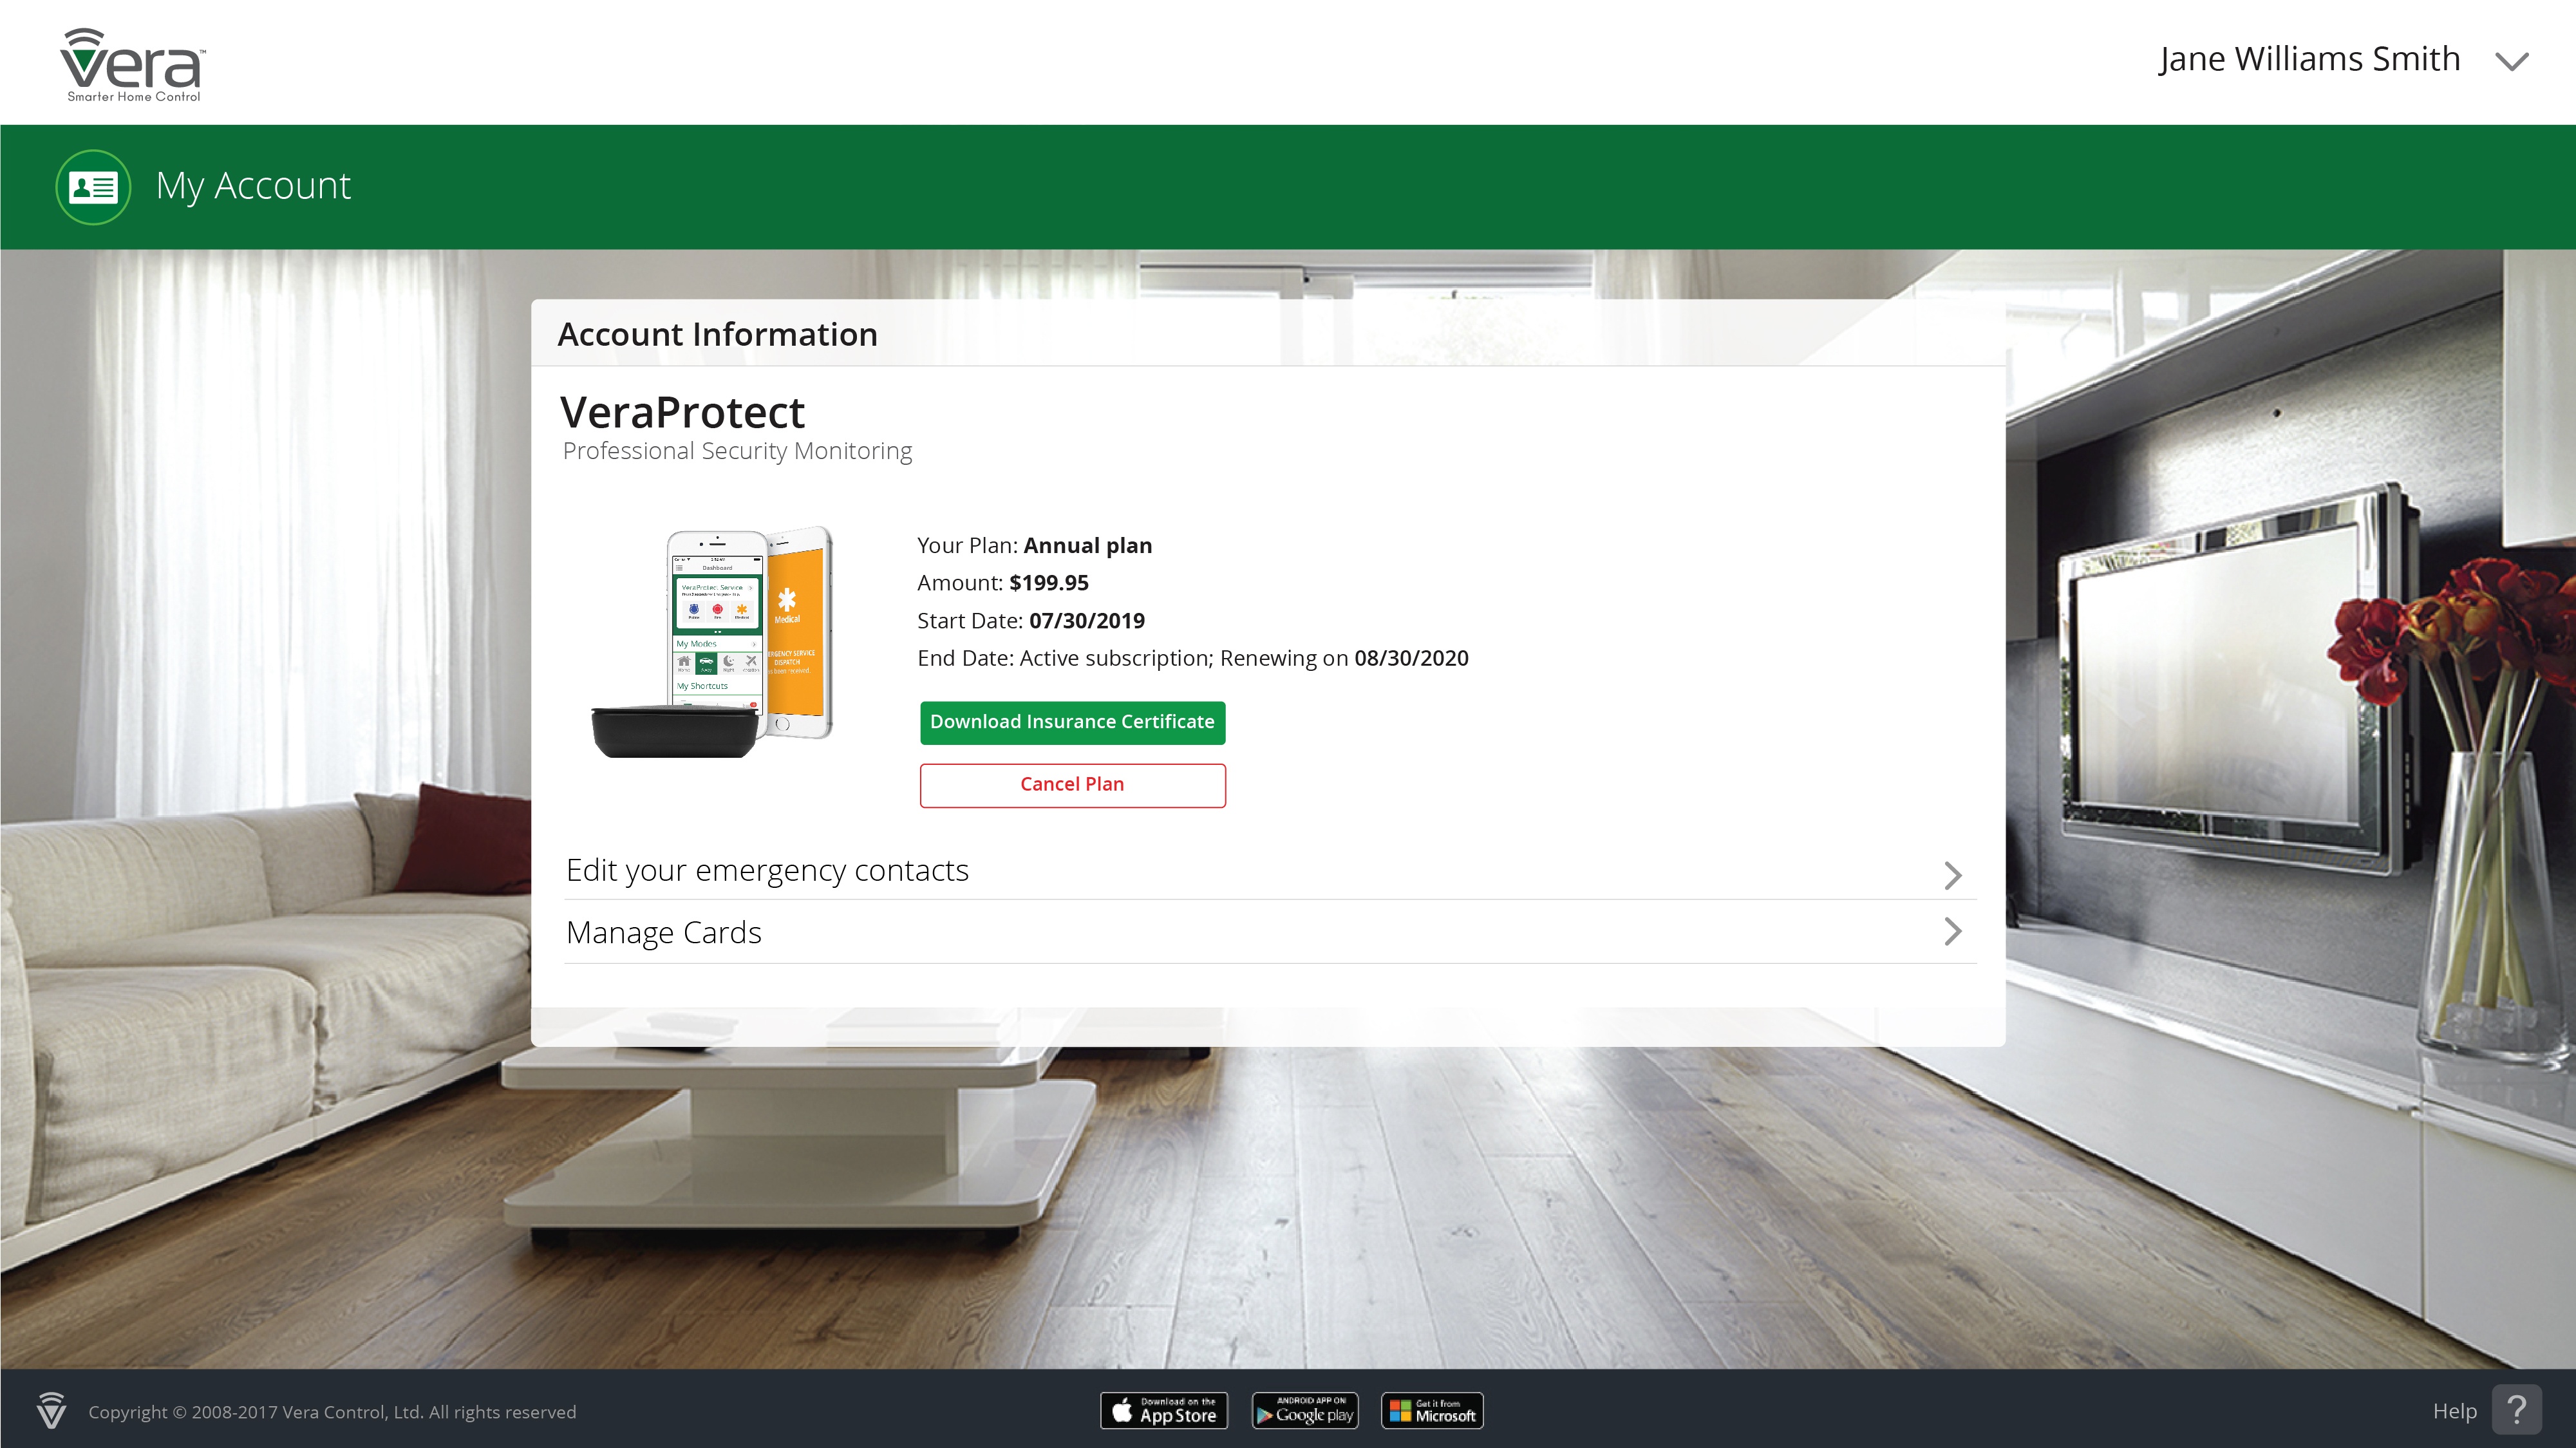
To verify that your subscription is active, you can go to your Account page. You can do that either from the drop-down menu you see immediately after logging in at home.getvera.com, like at the beginning,
or (from either the Web UI or the Vera Mobile app) by connecting to your Vera controller (by clicking on connect), and then in the left menu, on Additional Services, and then on My Account. You can see here whether the service is enabled, the start and expiration date of the chosen plan subscription, the start and end expiration dates of your trial period (if applicable), cancel the subscription, edit the emergency contacts entered earlier etc.
How can I edit my credit card information?
If after completing the enrollment process you'd like to change credit-card related information - like removing a credit card or adding a new one - on the My Account page mentioned just earlier (see above), click on Manage Cards. The existing card entered in the course of the enrollment process will be marked with a checkmark to highlight the fact that it's the credit card currently being used.
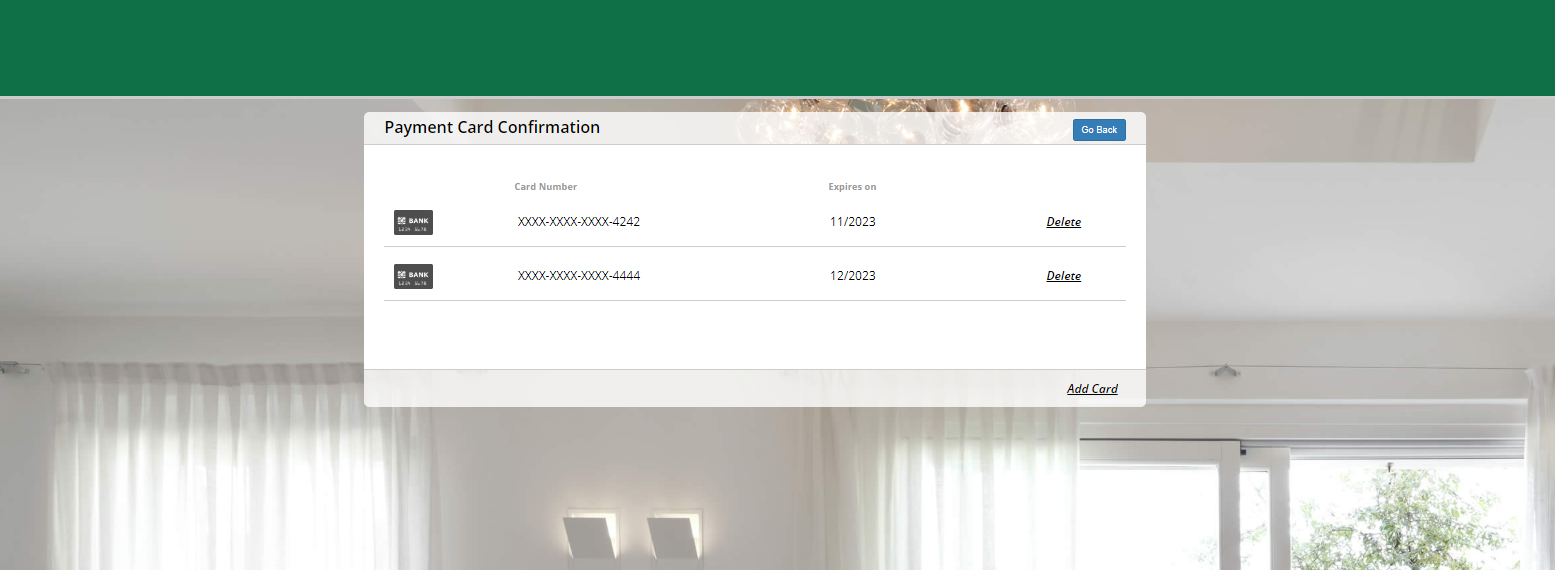
Note that you cannot delete the current card used for payment, and neither can an already added credit card be edited.
How can I cancel my subscription?
On the same page as above, you can click on Cancel Plan if you decide to cancel your subscription.

If this is during your free trial, you can cancel at any given point in this thirty-day interval, and the offer will end with immediate effect. You can re-enable the service at a later date if you change your mind, but note that you'll no longer have the benefit of a free trial, with the payment starting on the same day the service is enabled.
If during your free trial, as soon as you've clicked on Cancel Plan, you'll get a pop-up confirmation window. Click on yes to go through with the cancellation, or on no to go back and abort the process.

You can check that the process has been canceled by going to the My Account page again, where the message displayed should be "No Active Billing Plans Found" .

If it's not during the 30-day trial that you're cancelling your subscription, the pop-up you'll see after clicking on Cancel Plan and then yes will instead say "Please wait while we cancel your service", after which you'll be redirected to the start page of the VeraProtect service where the button at the bottom will now be "pending cancellation" instead of "let's get started".


Comments
0 comments
Please sign in to leave a comment.