The Vera app for Android comes with a redesigned scene creation flow, for a better user experience.
Hubs that will have the redesigned scenes flow: Android Vera Mobile app for Ezlo Platform ( Ezlo Atom, Ezlo PlugHub and next Ezlo hardware).
This guide will teach you how to:
- Create scenes in 3 steps
- Add triggers based on which the scene will run
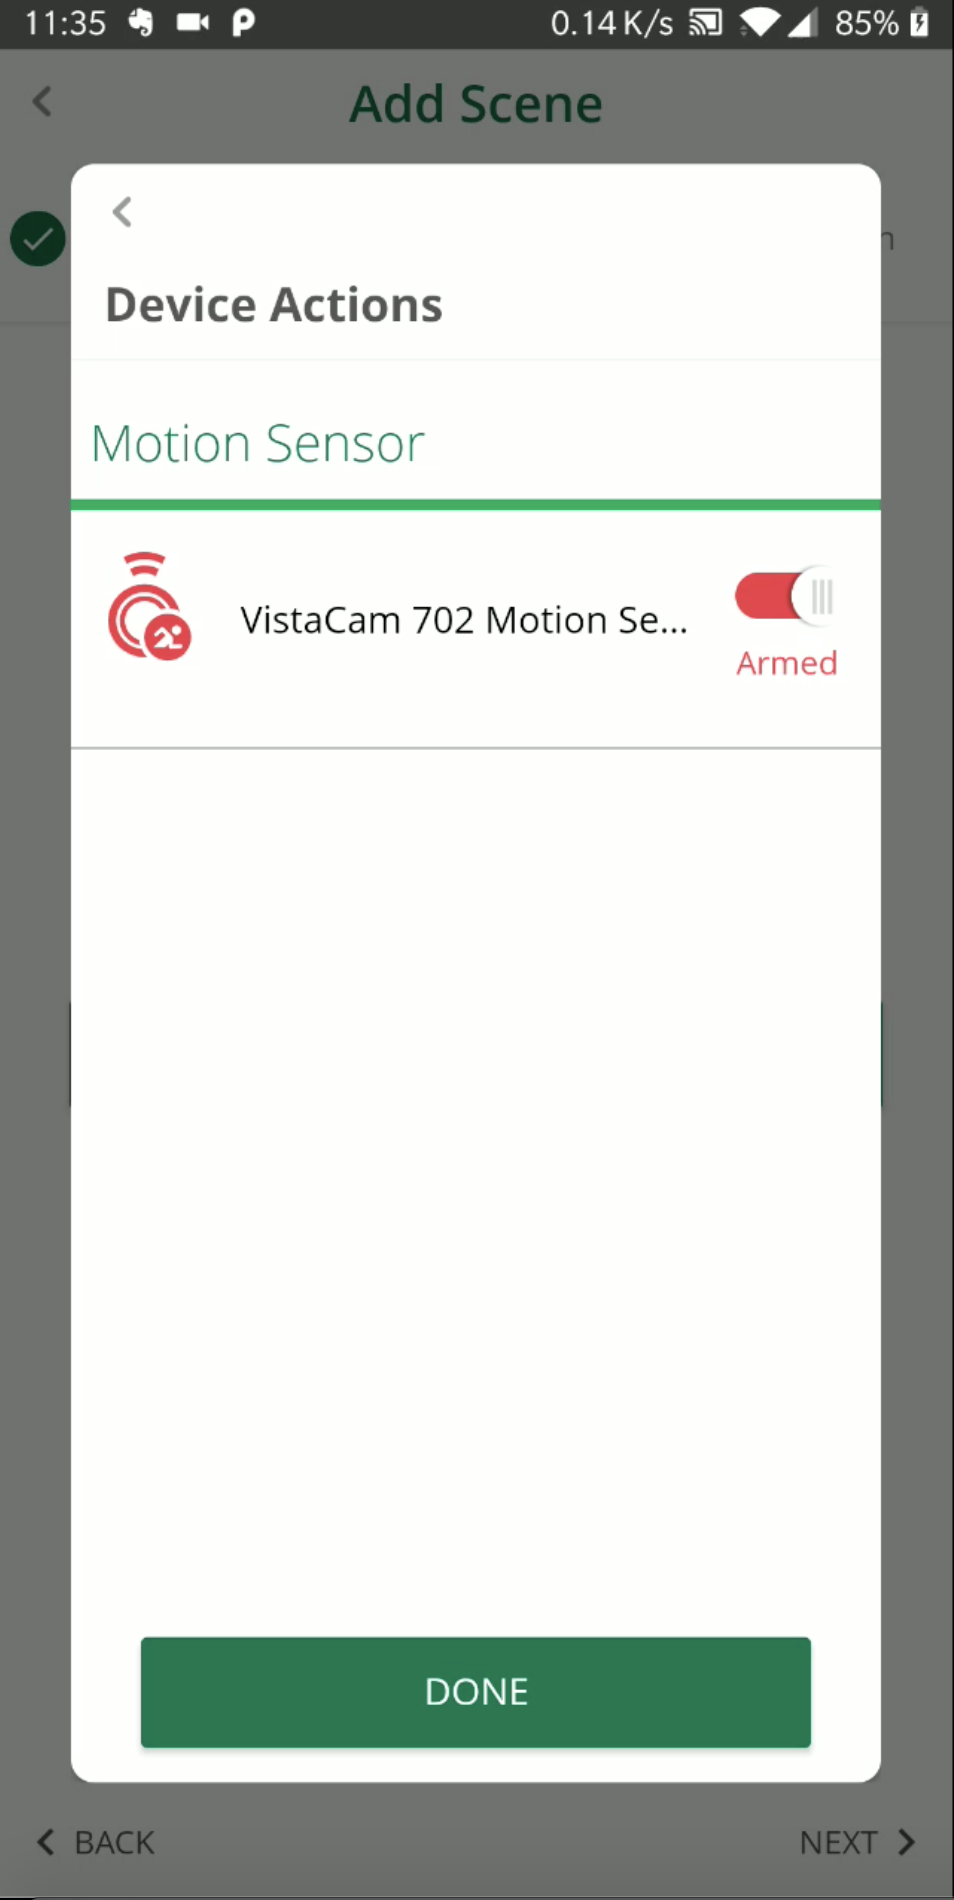
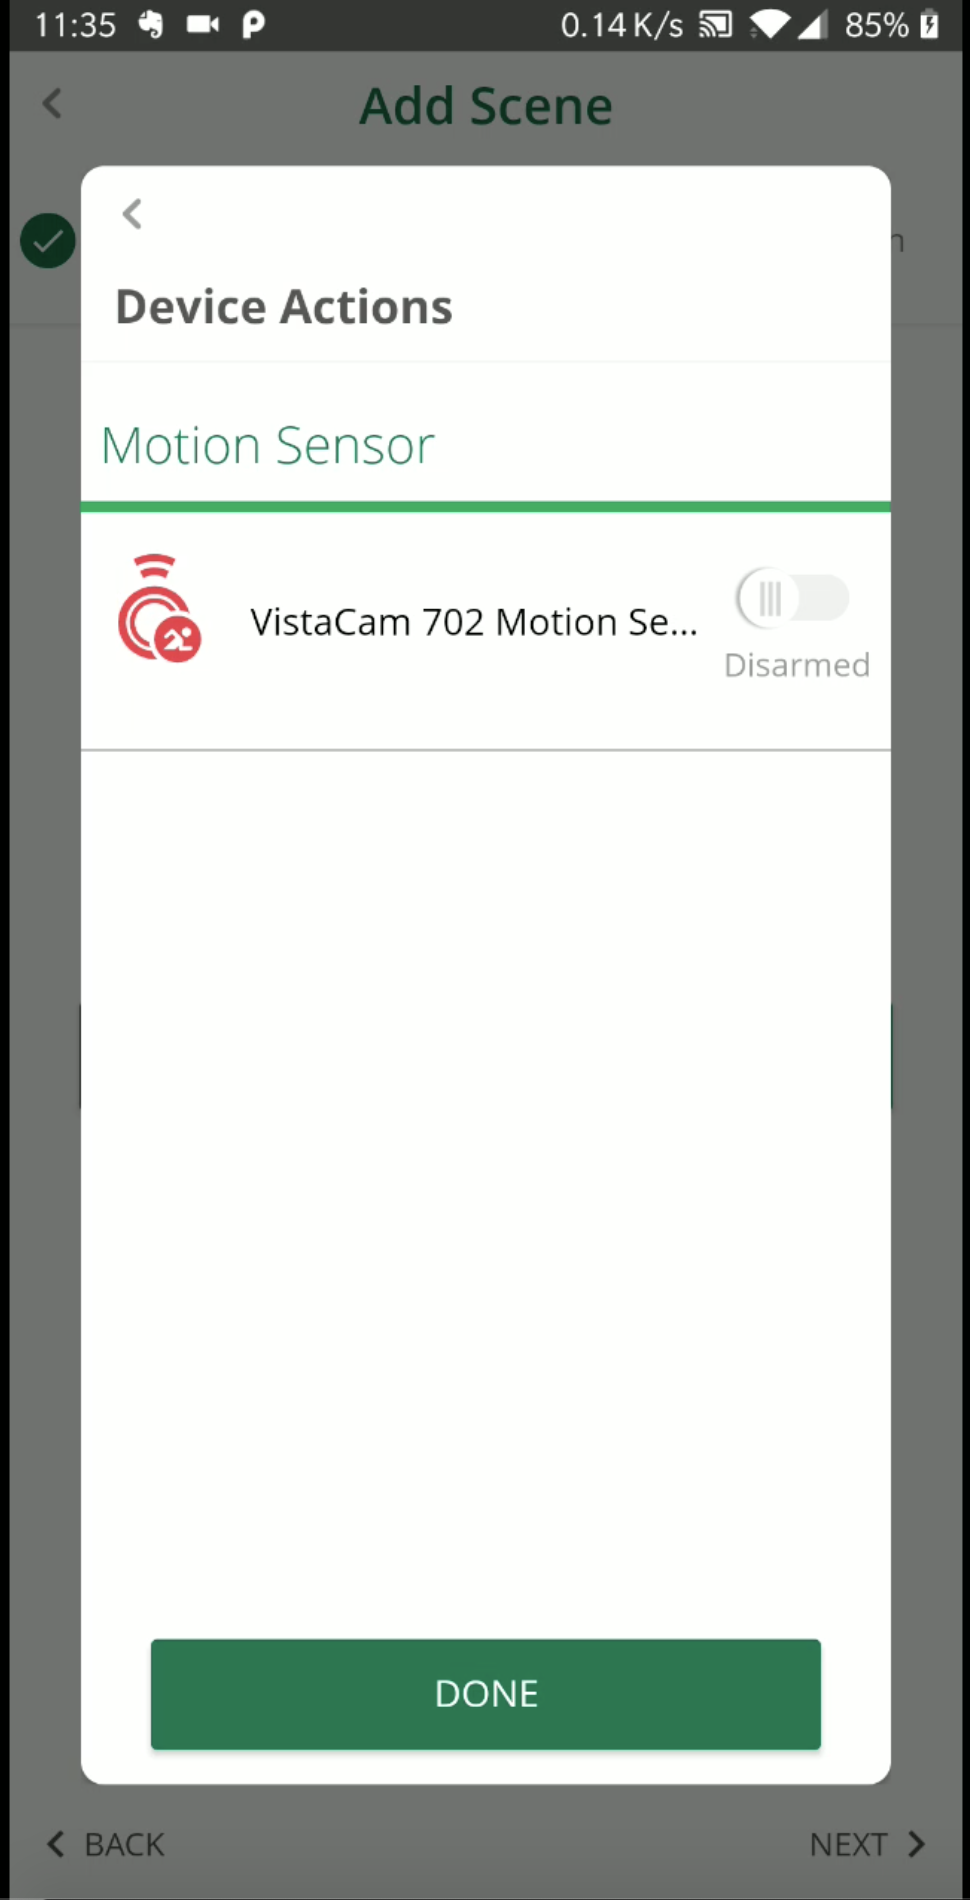
- Add actions in my scene to be executed when I run the scene
- Select a delayed action for when the action is sent to my devices/mode
- See the devices grouped by room or by type.
- See the summary of the actions/triggers that I added to the scene
- Delete an action from my scene
- Name the scene that I just created
- Assign the scene to an existing room
- Select in which mode the scene will run
- Select who to be notified when the scene runs
1. How to create scenes in 3 steps:
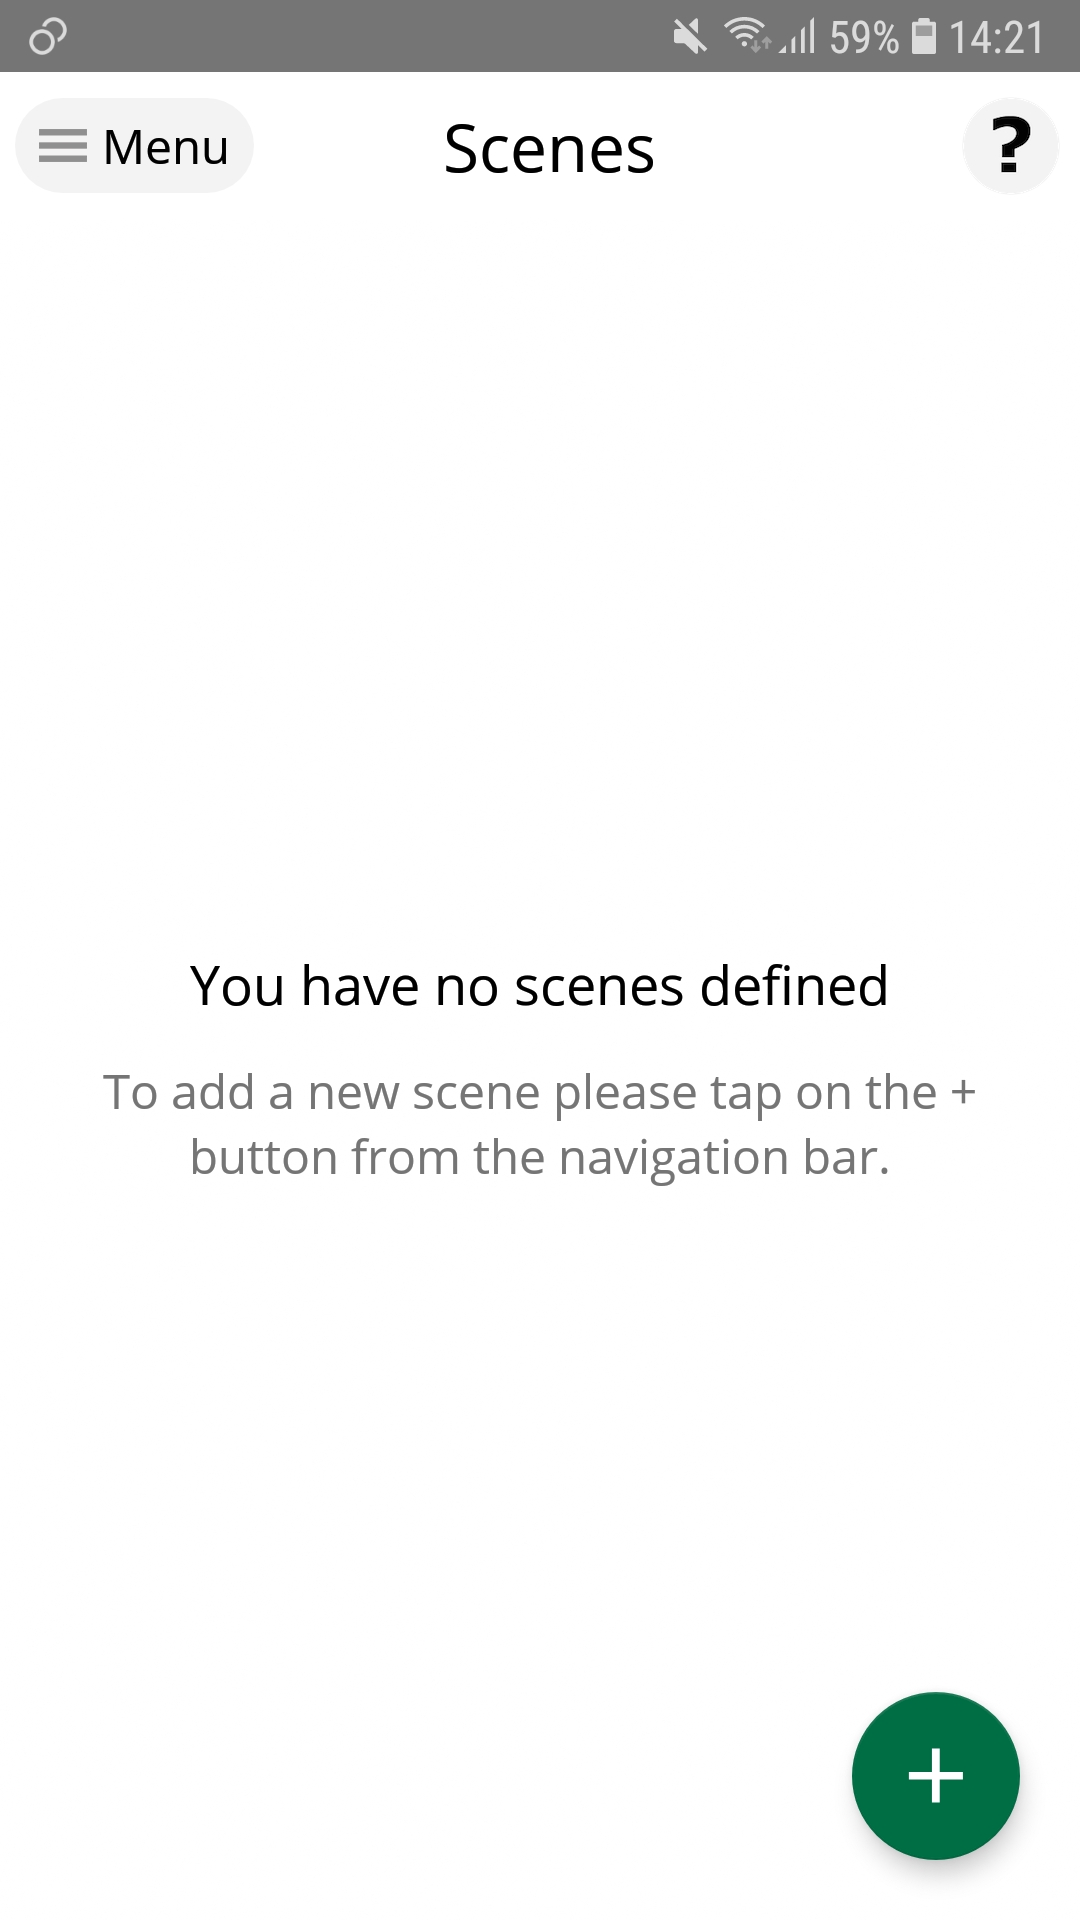
You have to tap on the Scene menu entry and then on "+" to create a new scene.
Steps:
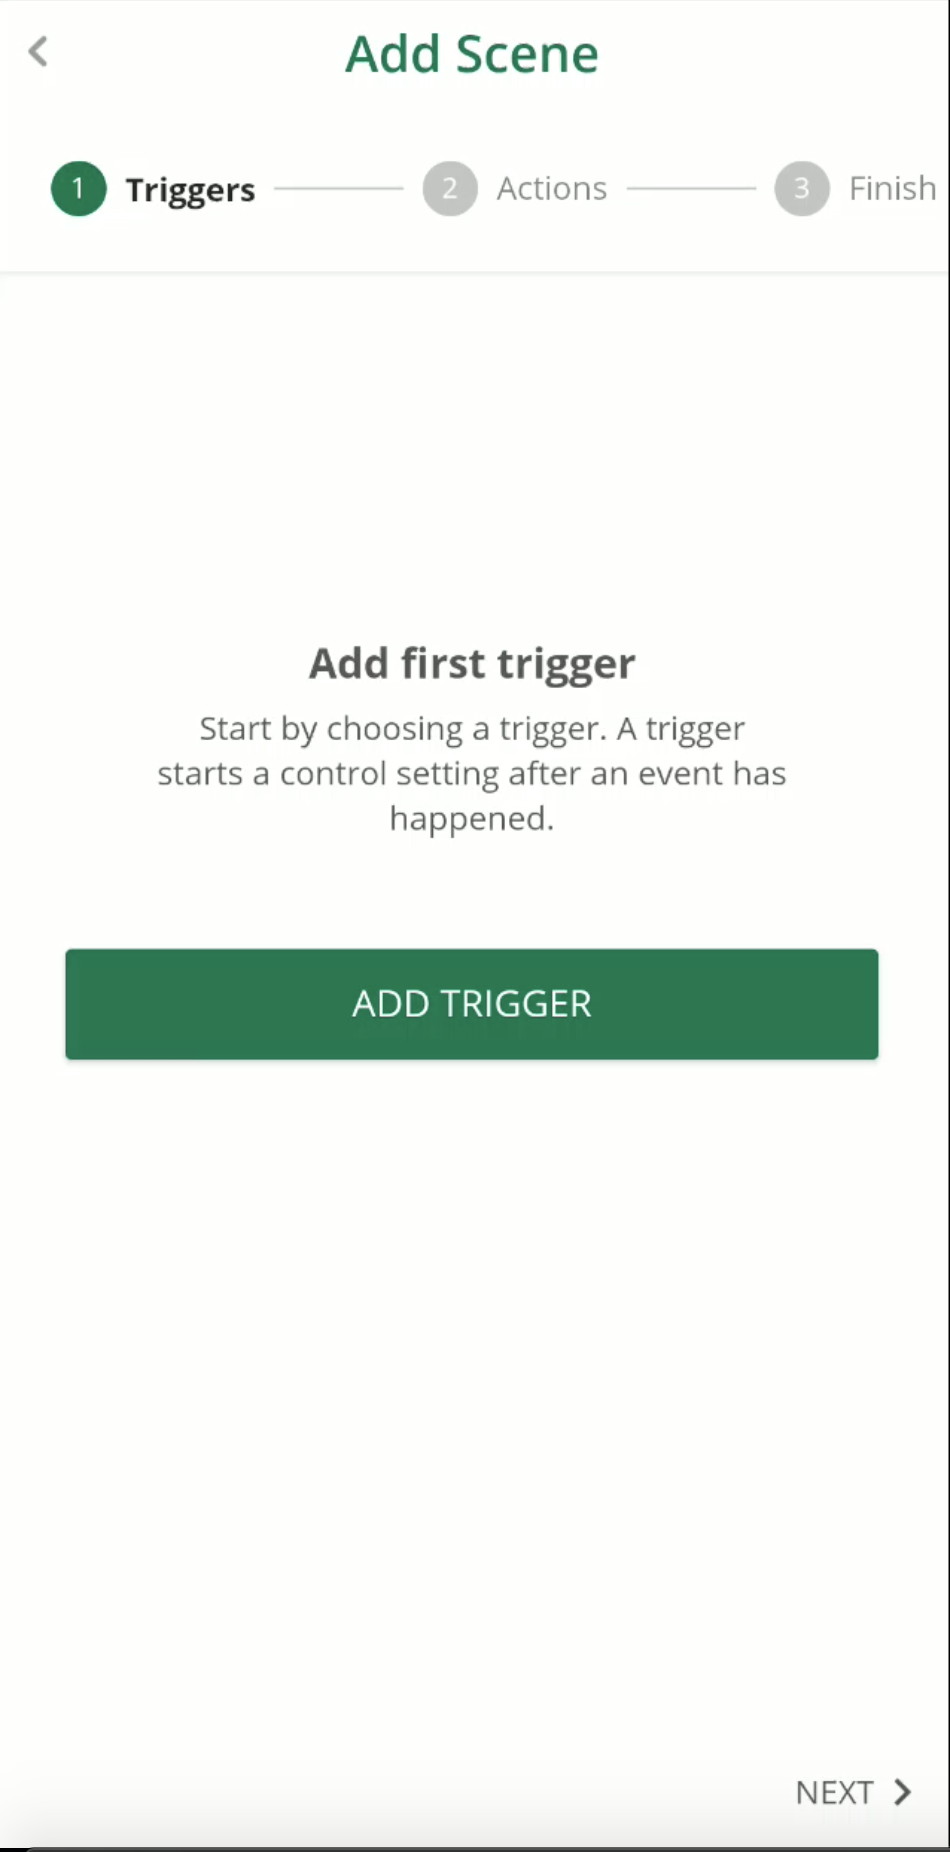
- You have the 3 steps in the upper part of the screen. By default, you'll see the first step - Triggers screen
- You can move to the next step by tapping on the upper part or by tapping on "Next" button located at the bottom, in the right corner.
- The "Back" button located at the bottom in the left corner will allow you to go to the previous step in the scene creation ( From Actions you will go to Triggers).
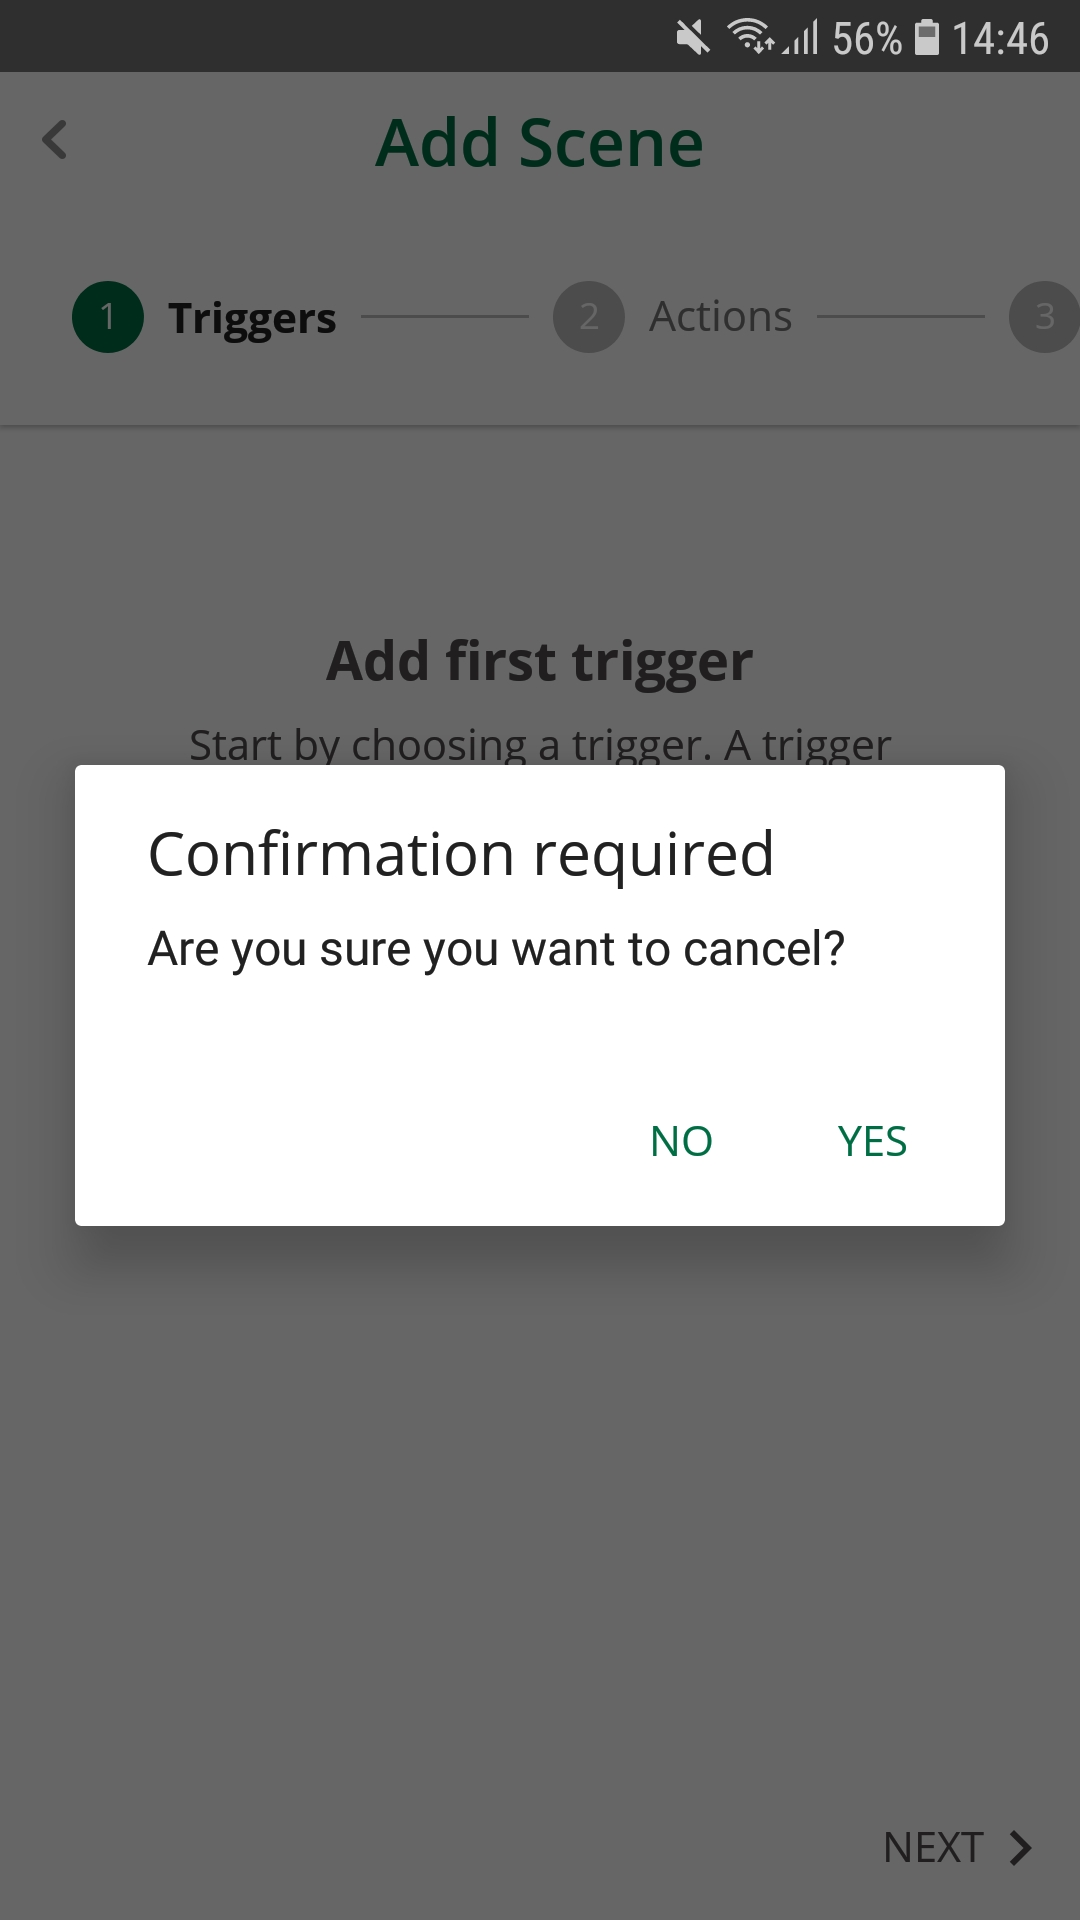
- The back arrow "<" located in the upper-left corner will allow you to exit the scene creation flow. When "<" is tapped you will see a prompt to confirm you want to exit the scene creation flow and nothing will be saved.
When exit the scene creation you have to confirm the action:
2. How to add triggers based on which the scene will run
You have to tap on Scene menu entry and tap on "+" to create a new scene.
Steps:
- You can tap on "+" to add a new trigger.
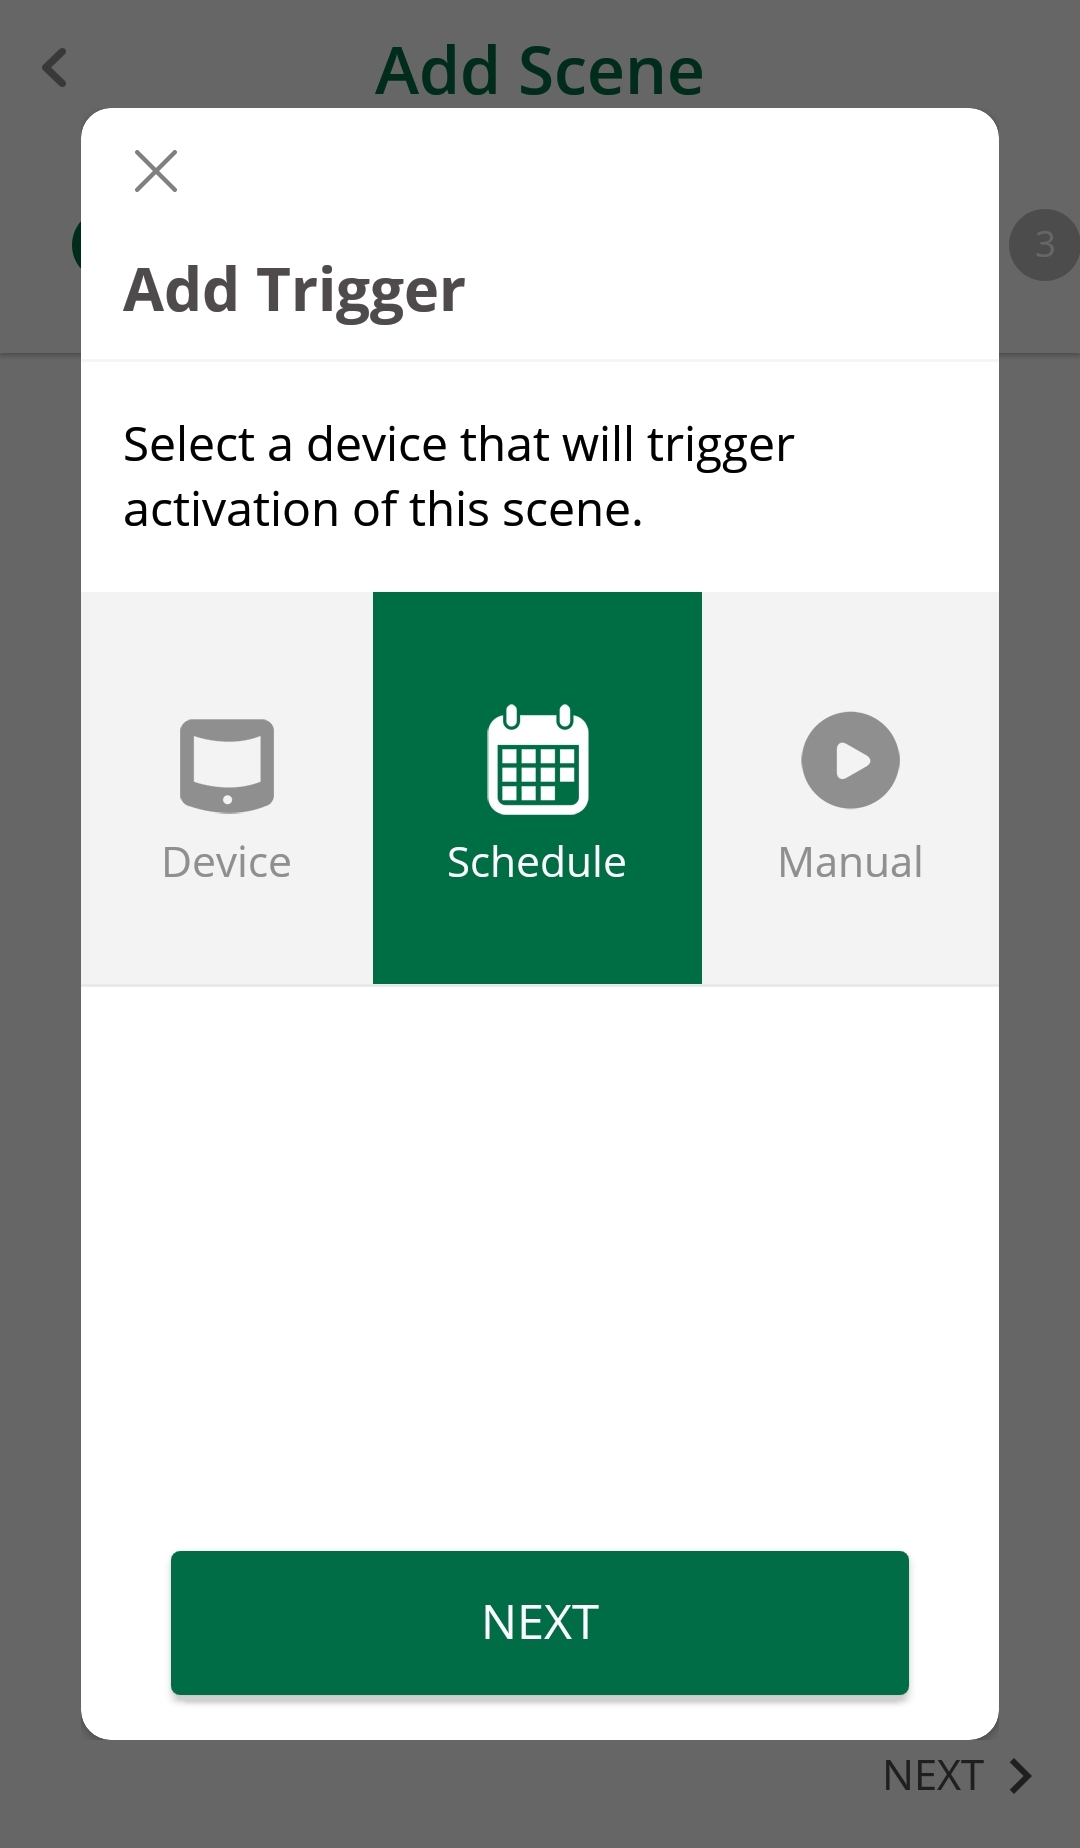
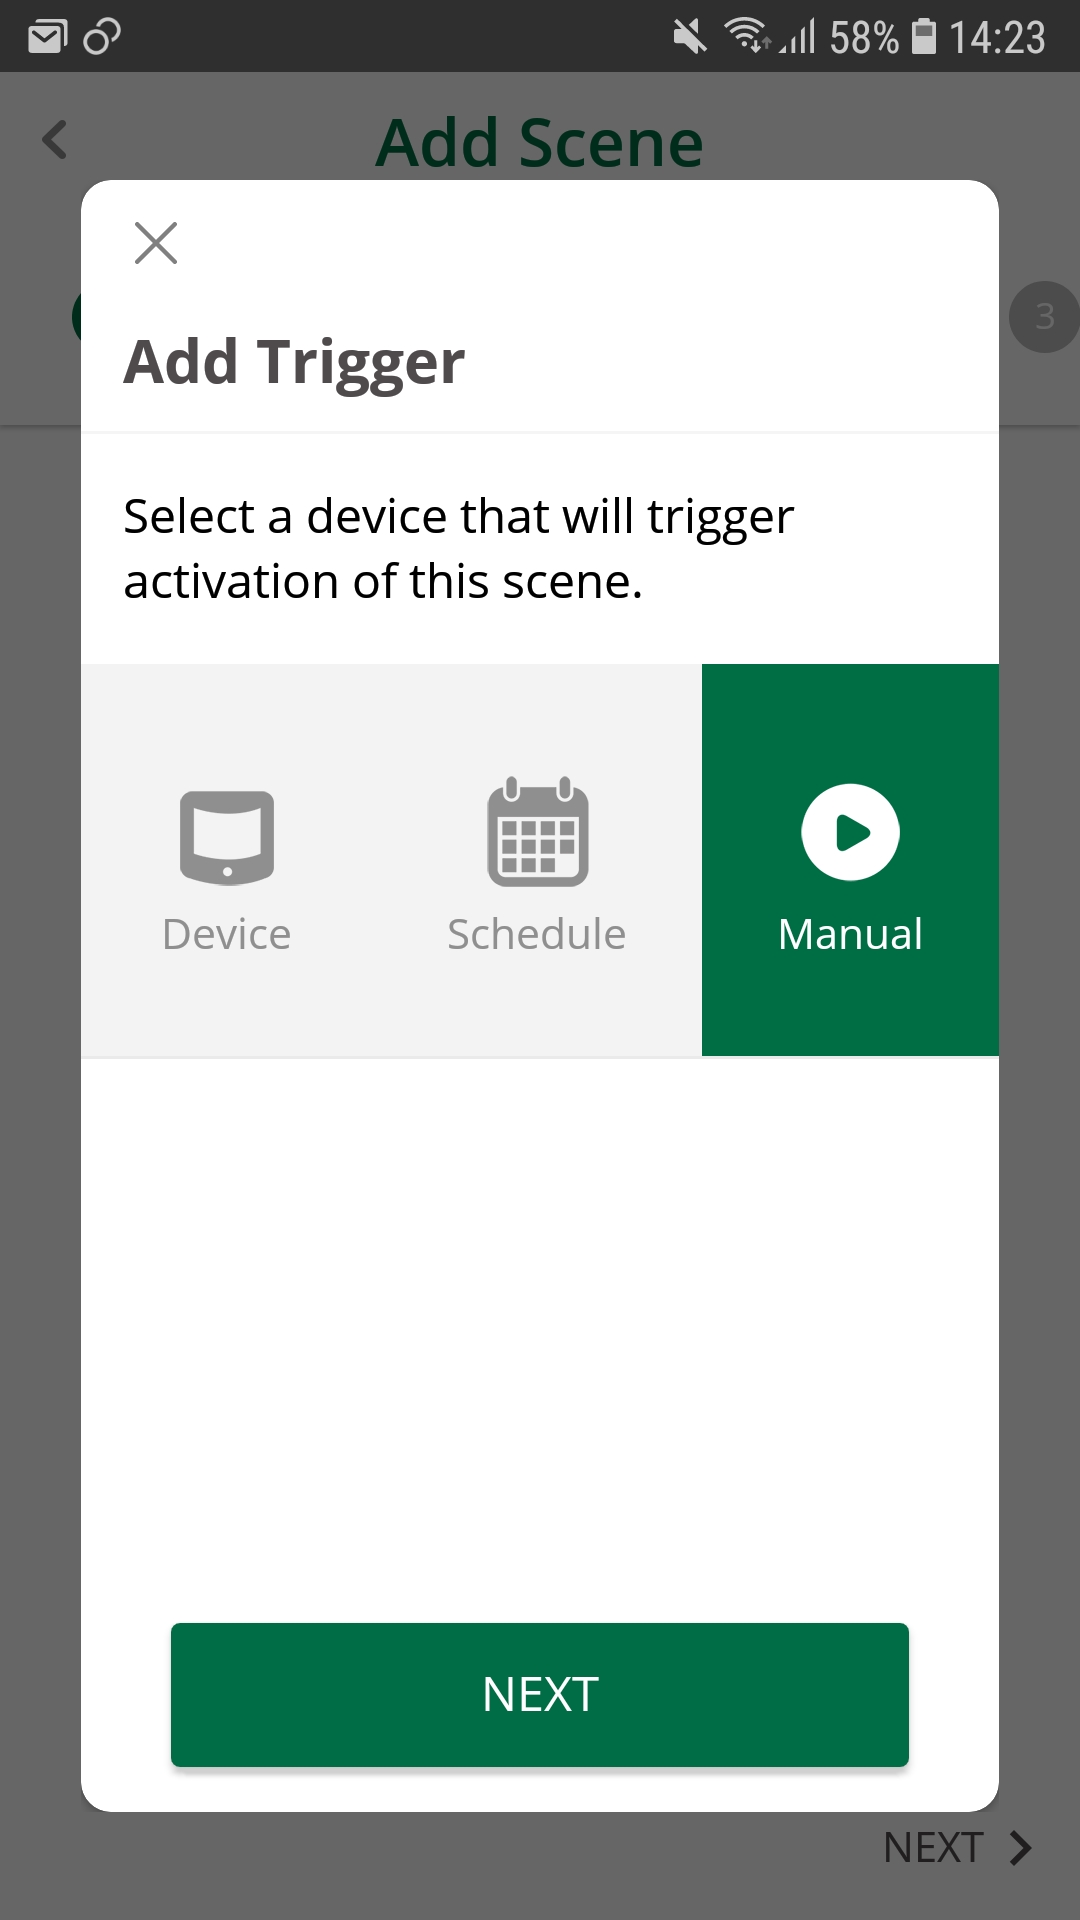
- You can select one of the triggers:
- Device
- Schedule
- Manual
- After you added the trigger you can tap on "Next" to go to Actions tab or tap directly on Actions.


3. How to add actions in the scene that will be executed when the scene runs
You are in the scene creation flow.
Steps:
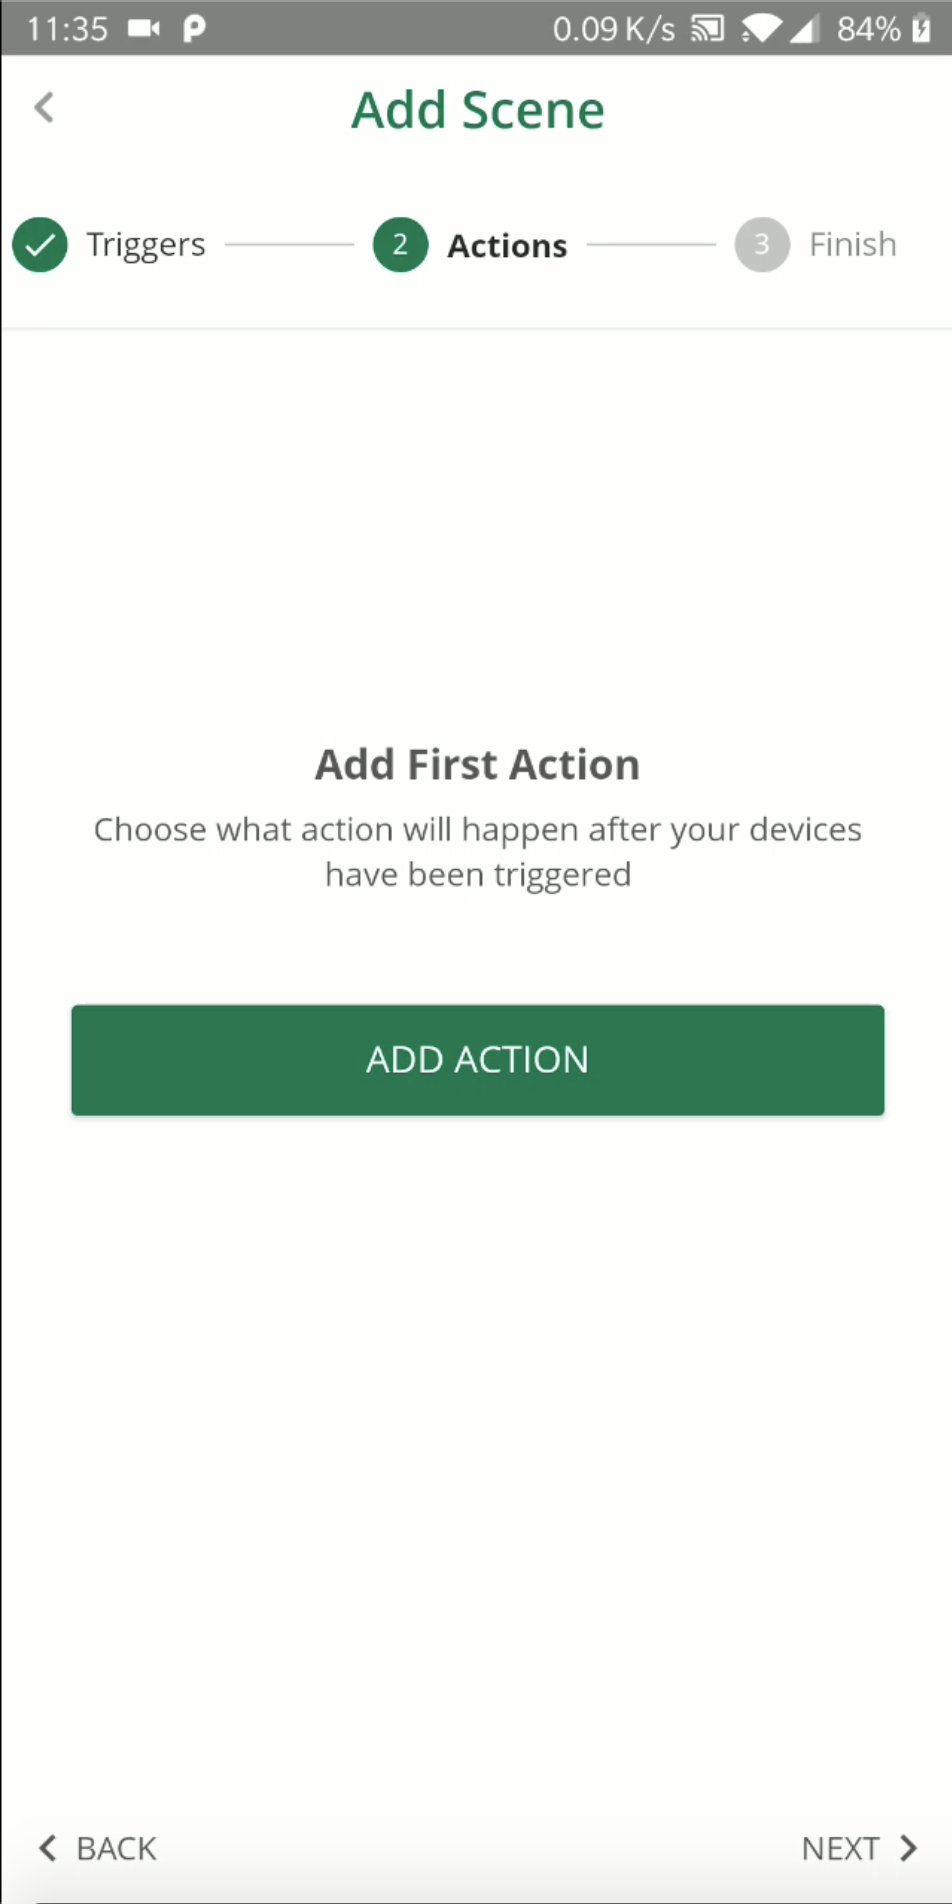
- You tap on "Next" or "Actions" tab
- If no action is added then you have to tap on "Add action"
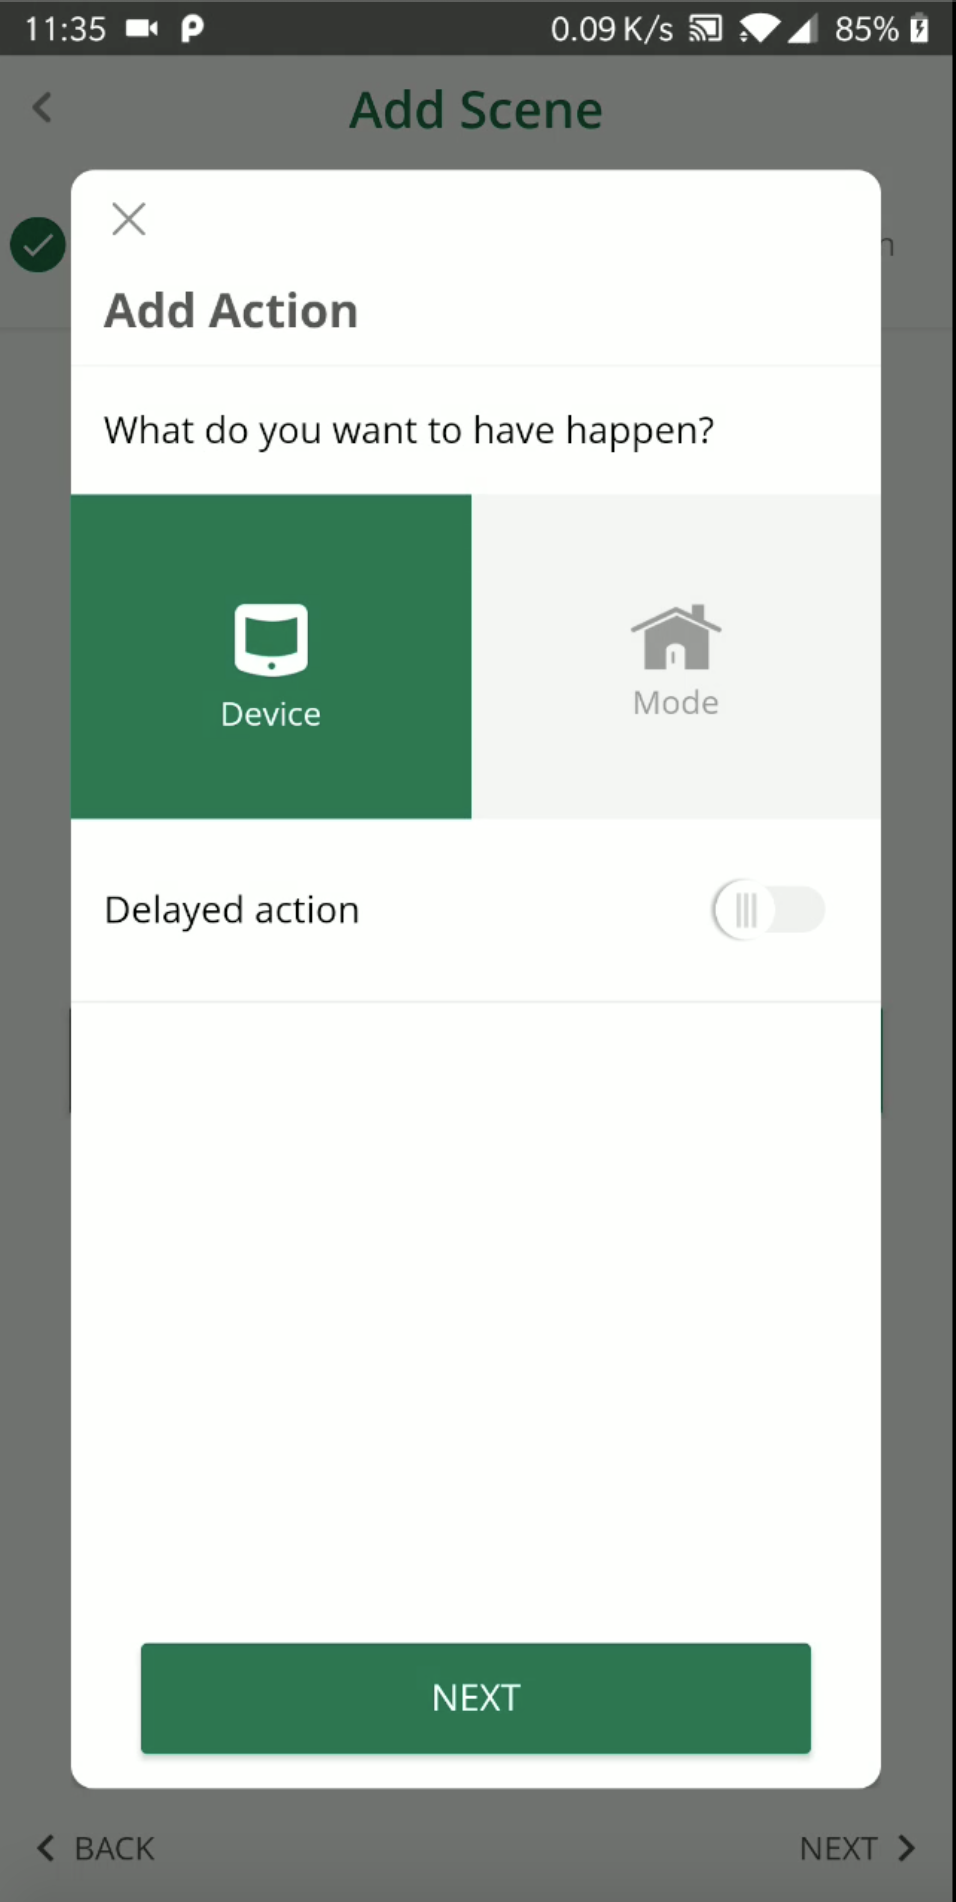
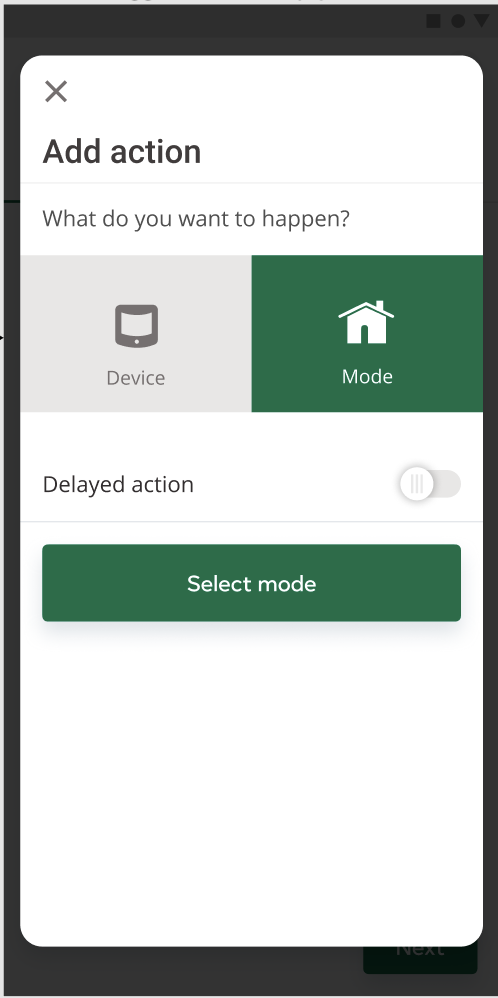
- You will be able to select between:
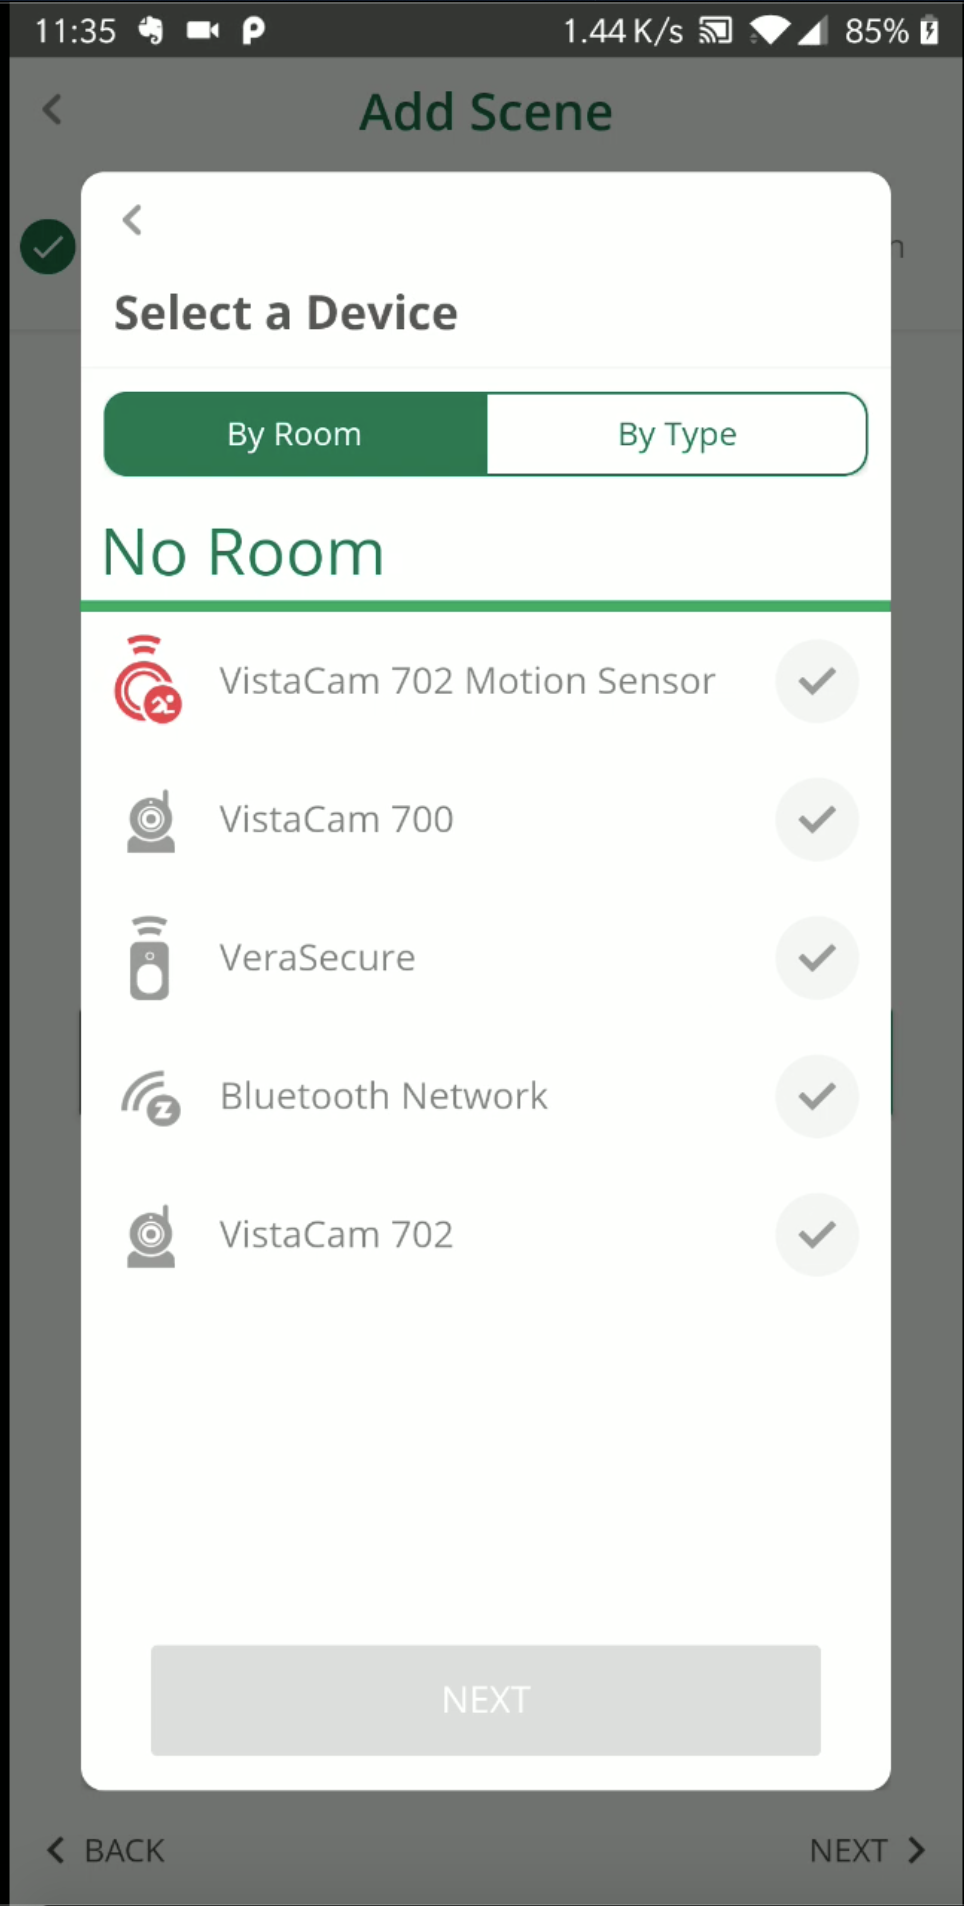
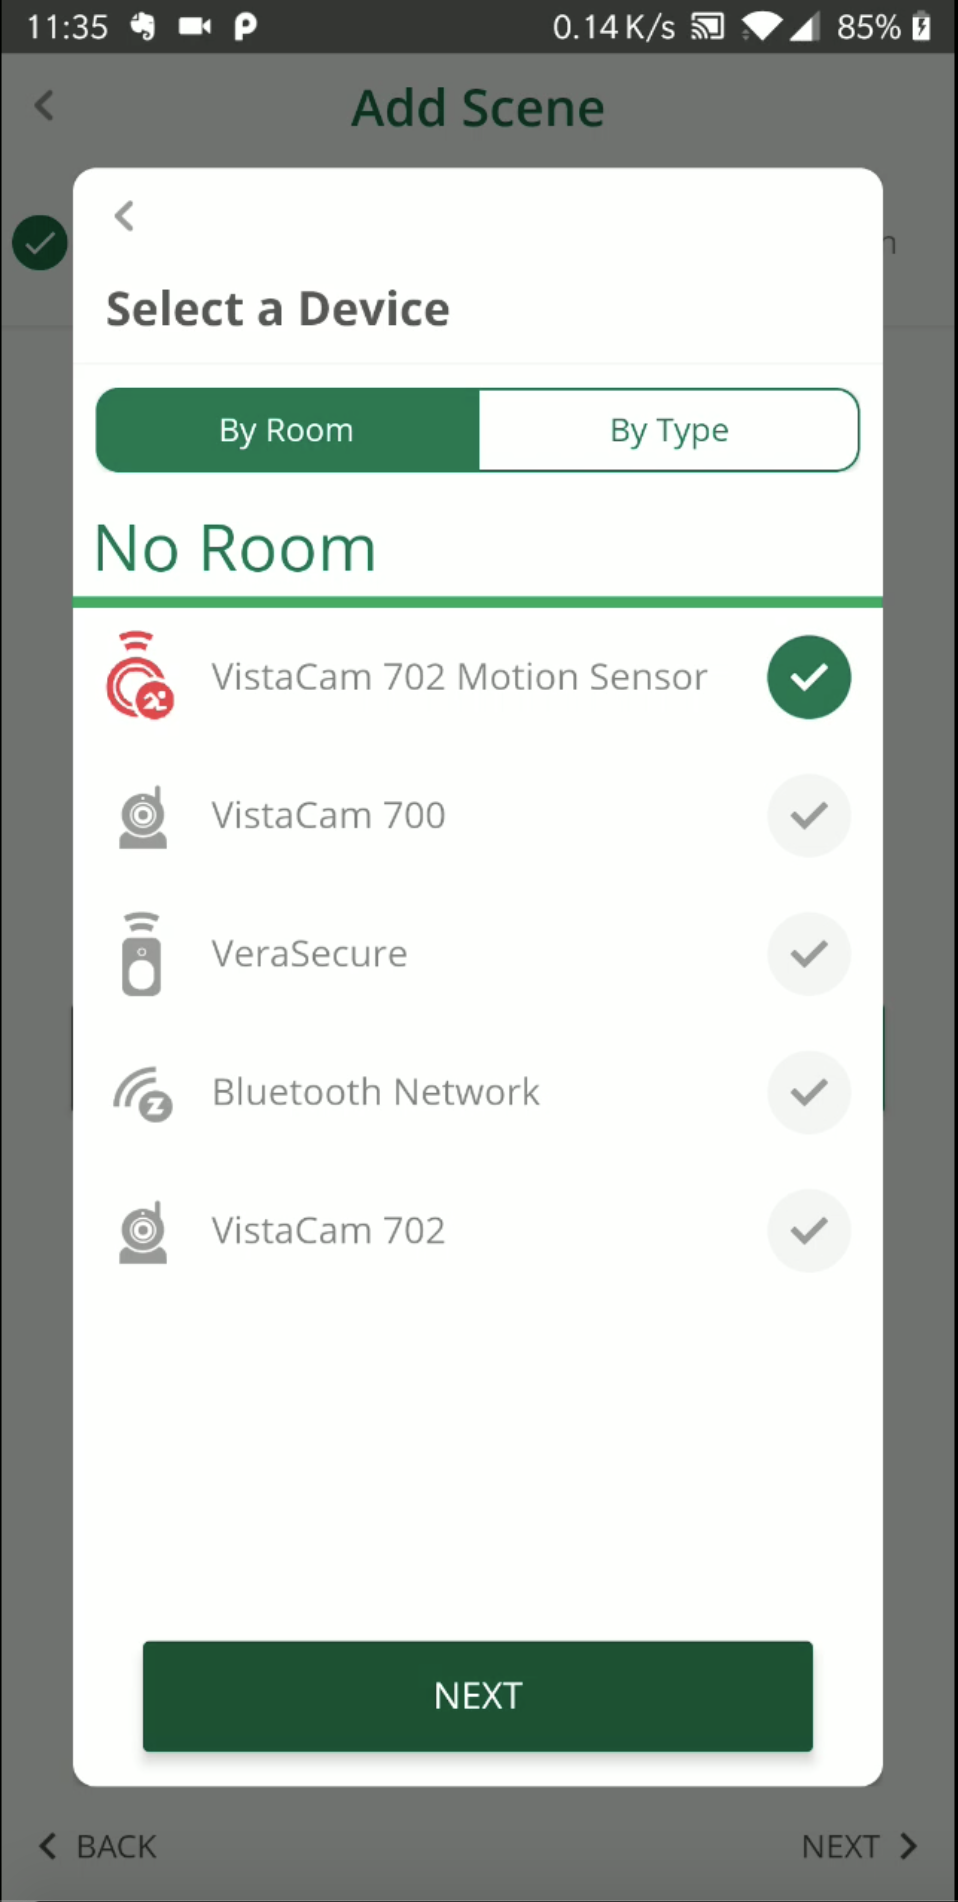
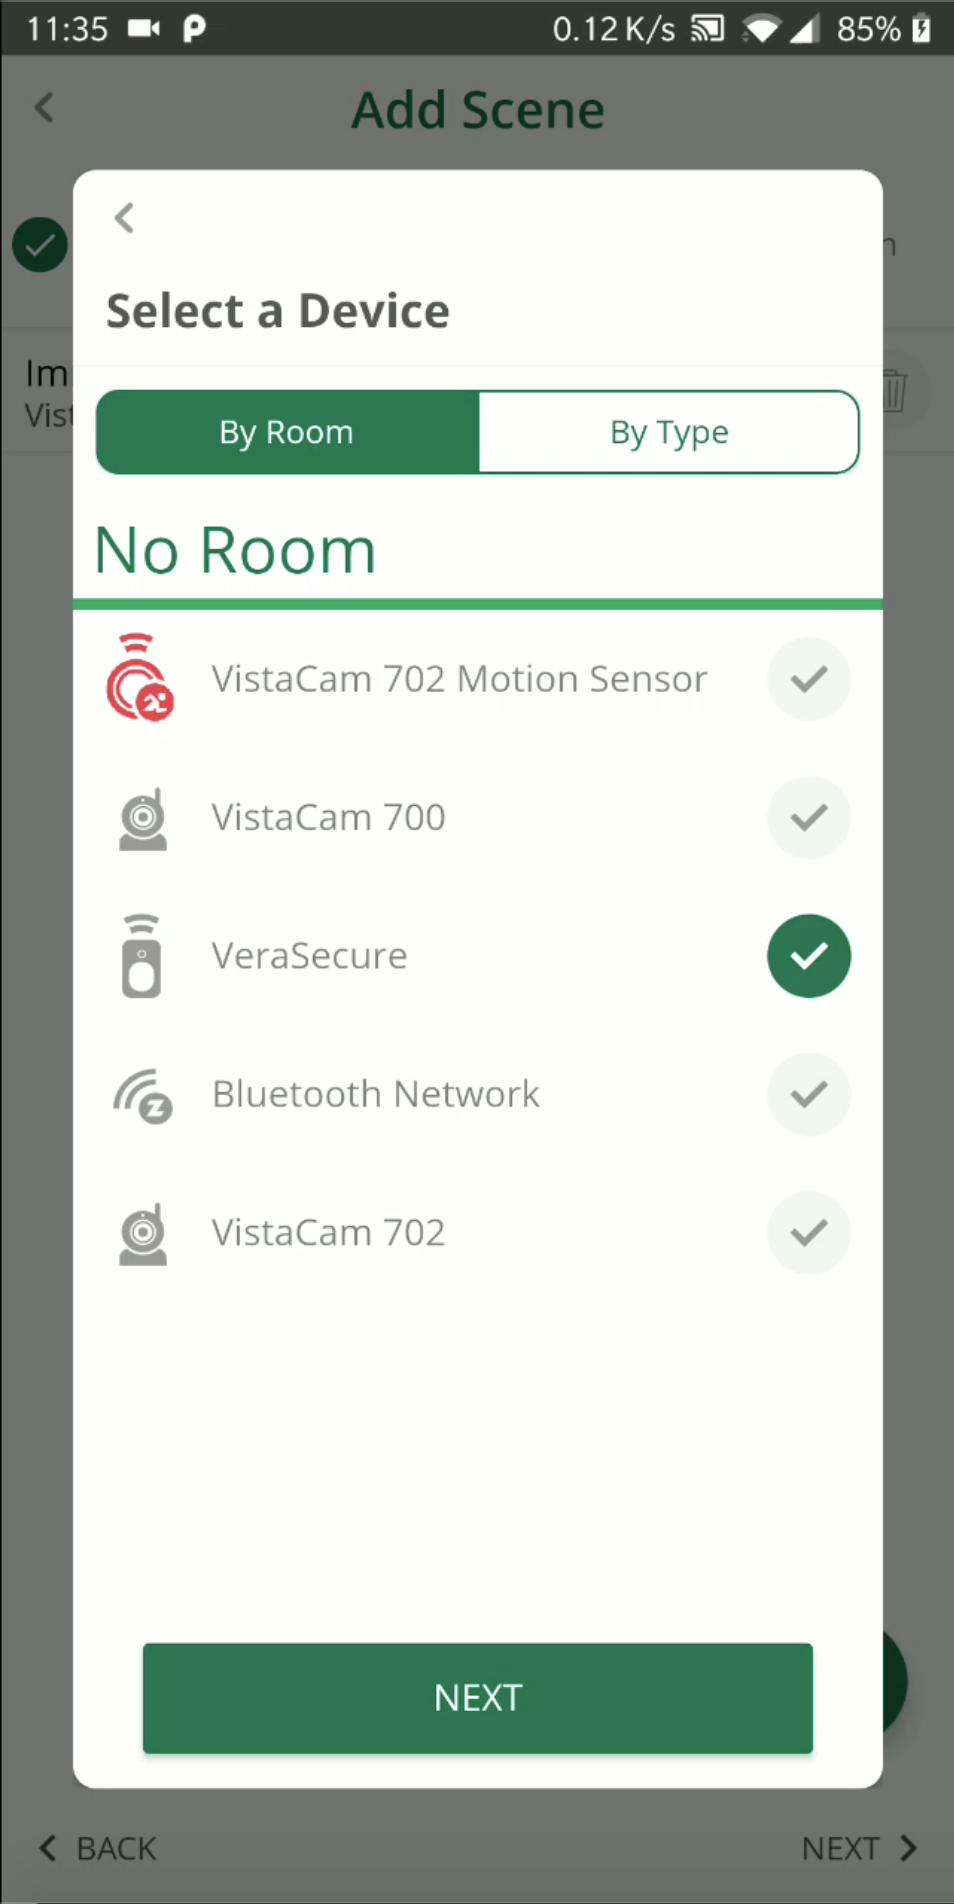
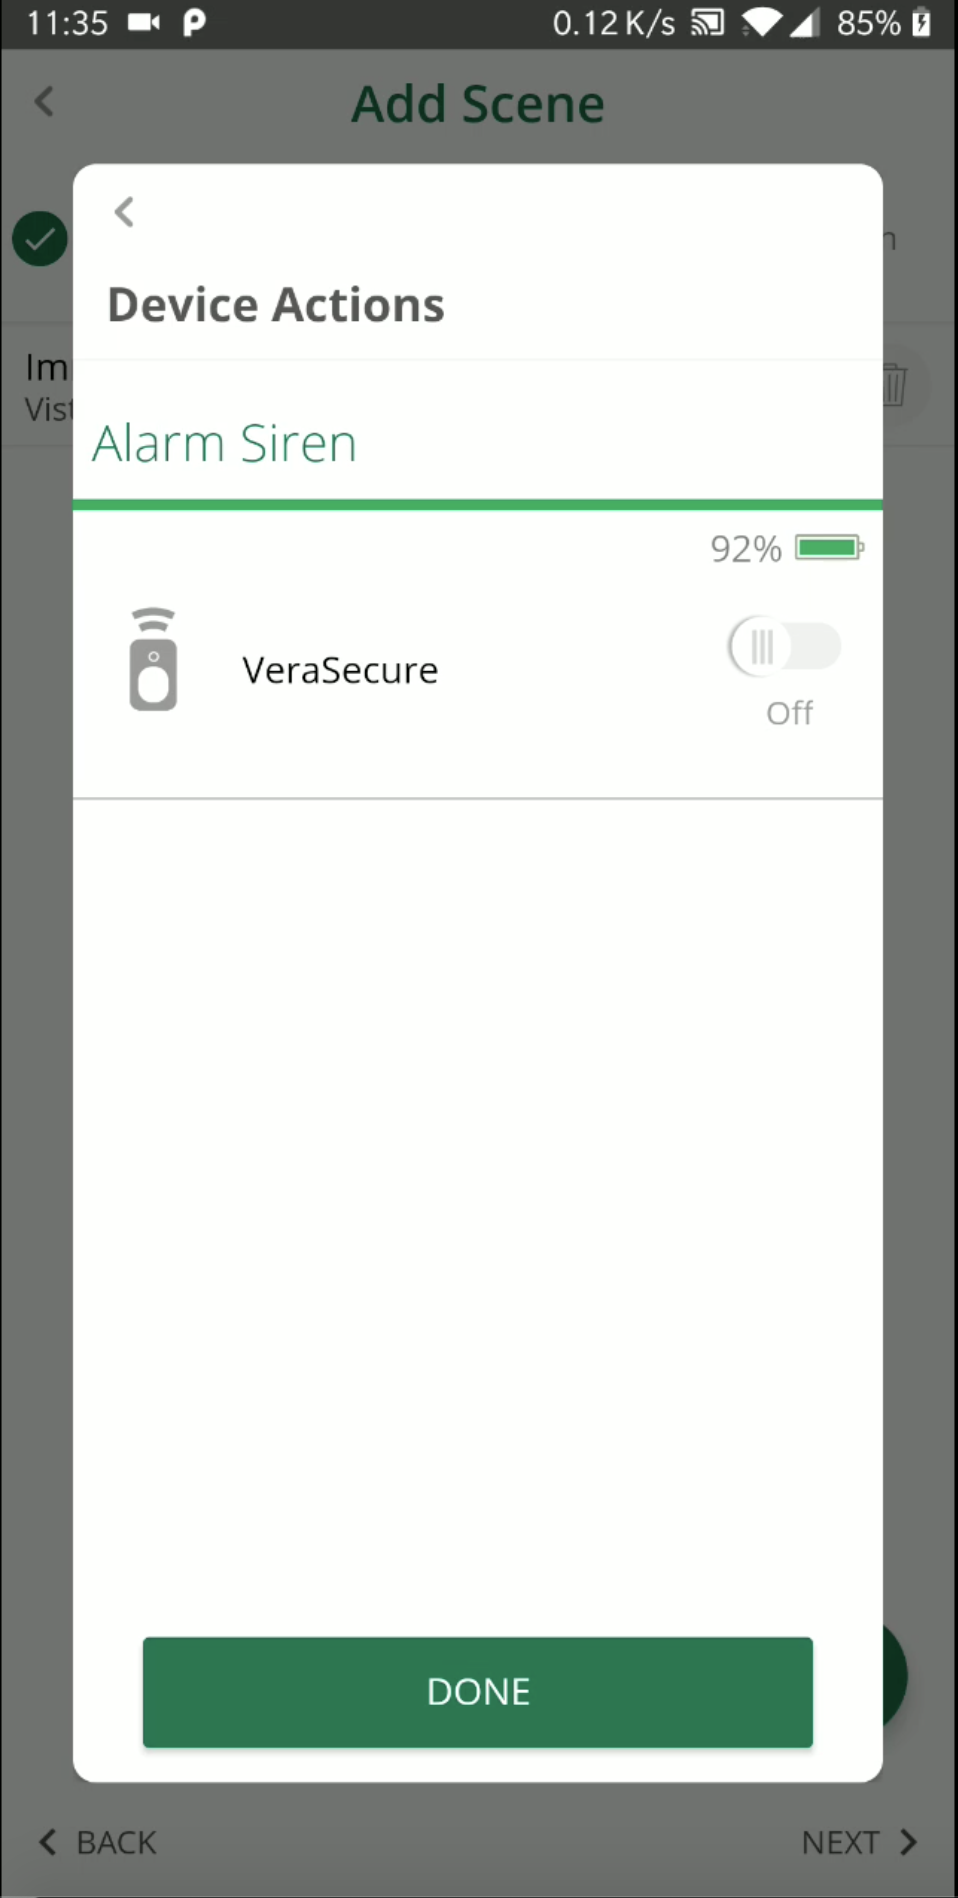
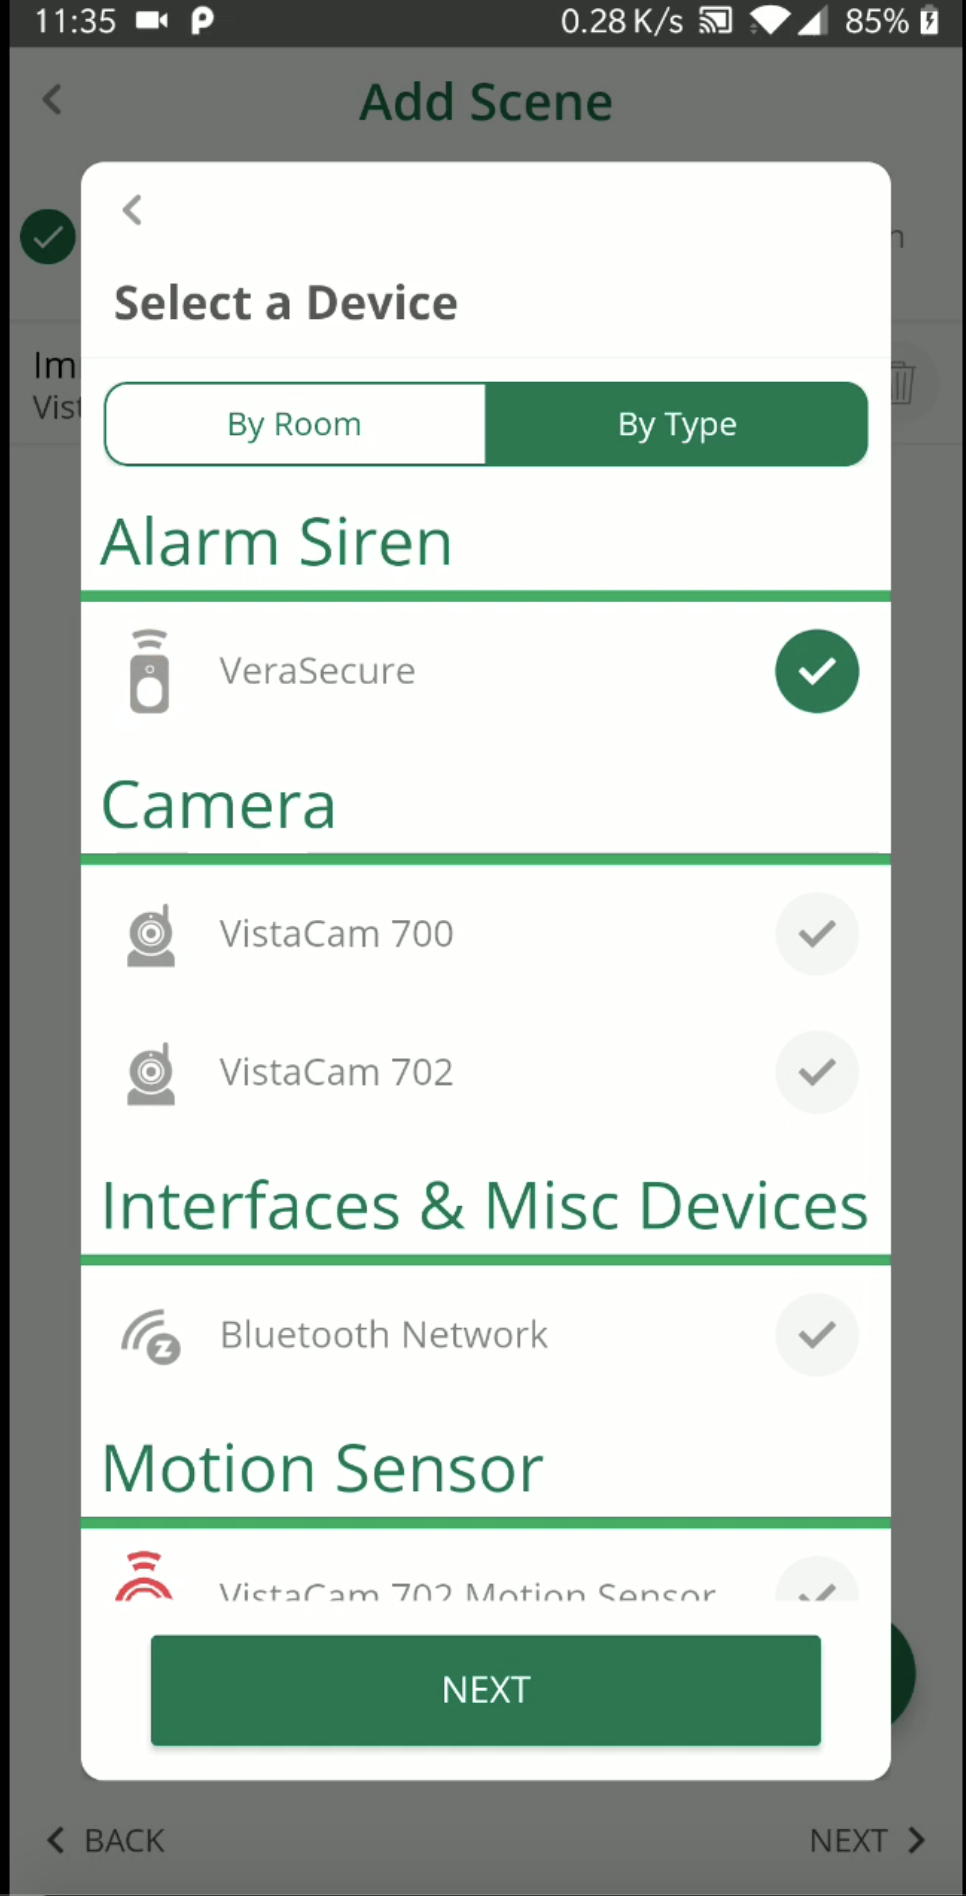
- Device - When selected, you will see the list of devices grouped by Room (default) or by Type.
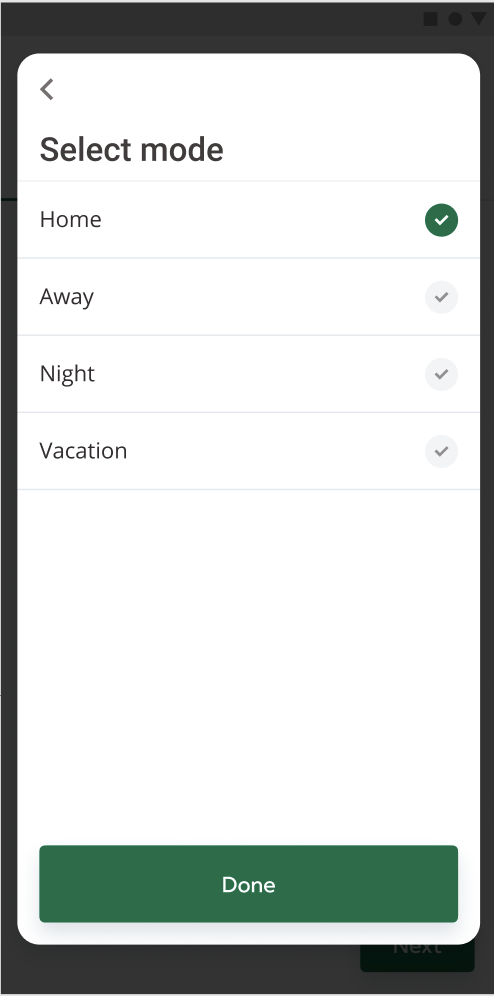
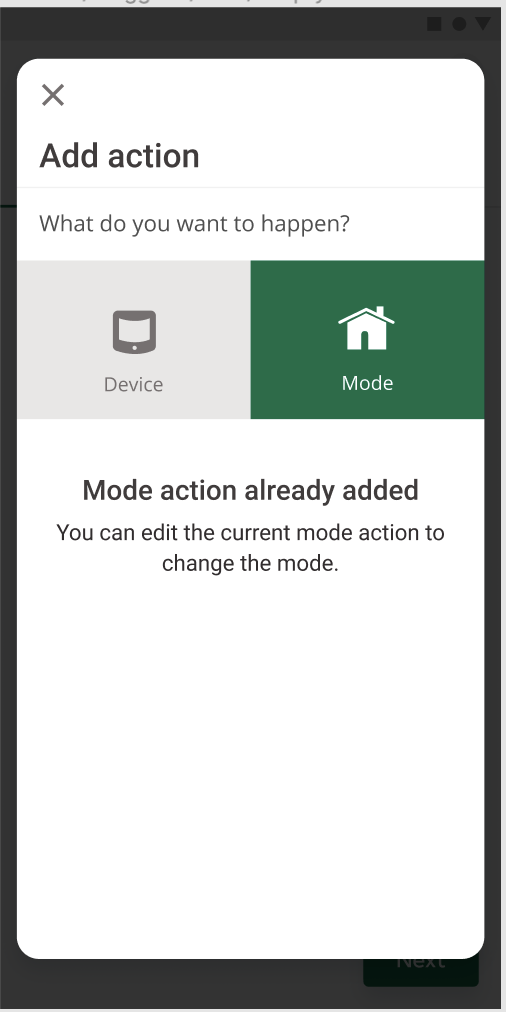
- Mode - When selected, you will be able to see the list with all the Modes. You can select just one Mode as an action - If you try to add a second mode as an action you will see a warning message: "Edit the current mode action to change it to another mode."
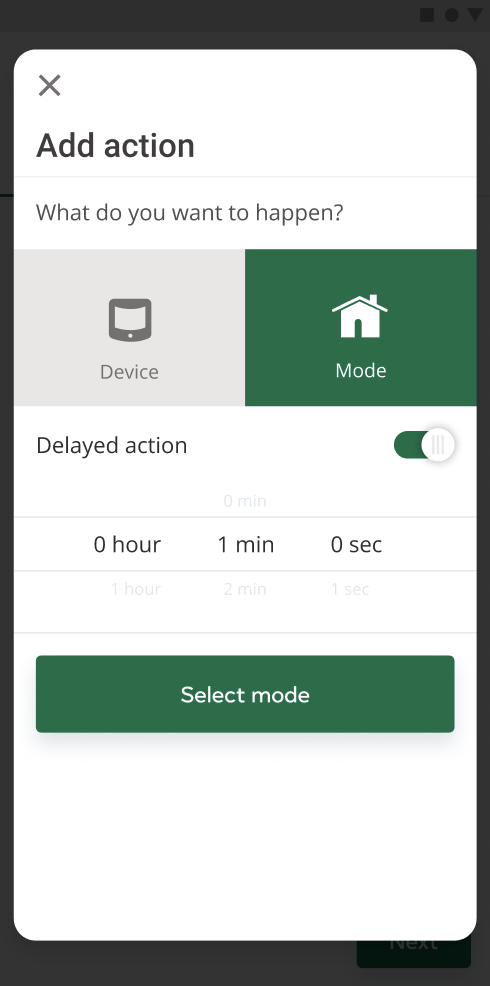
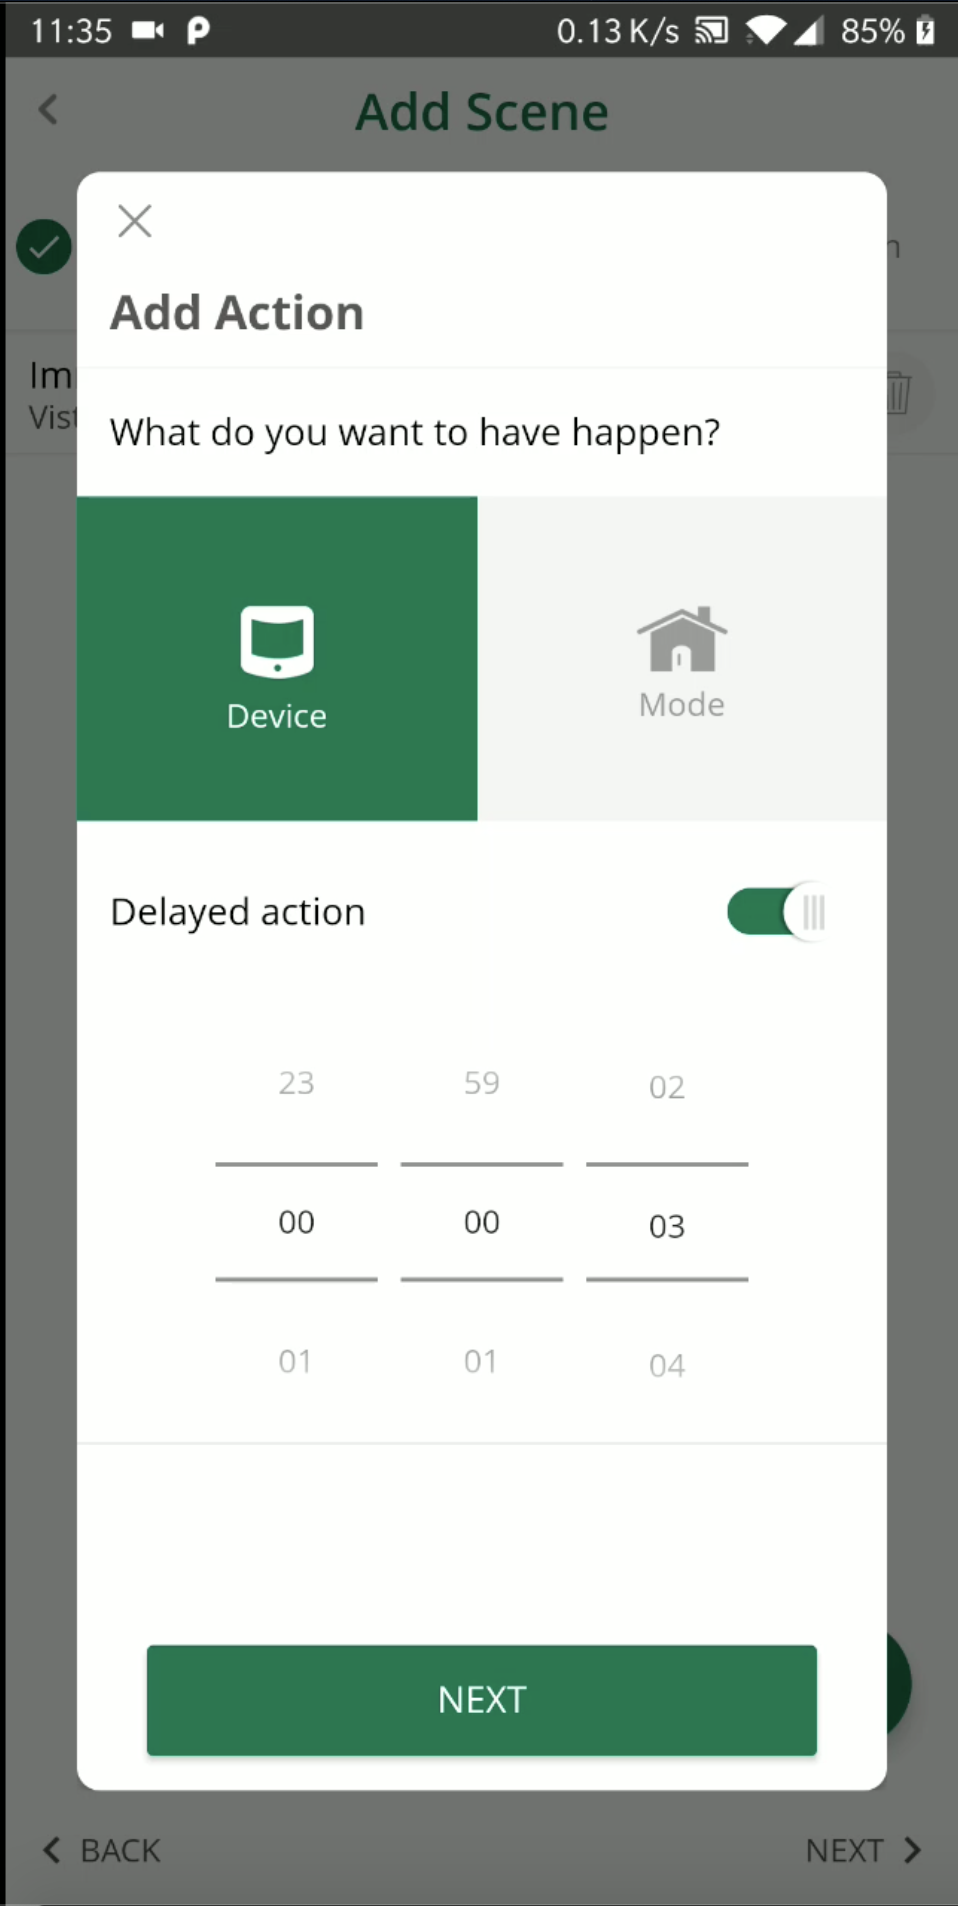
- If you want to add a delay then you will have to enable the toggle "Delayed action" - > more details in select a delayed action for when the action is sent to my devices/mode.

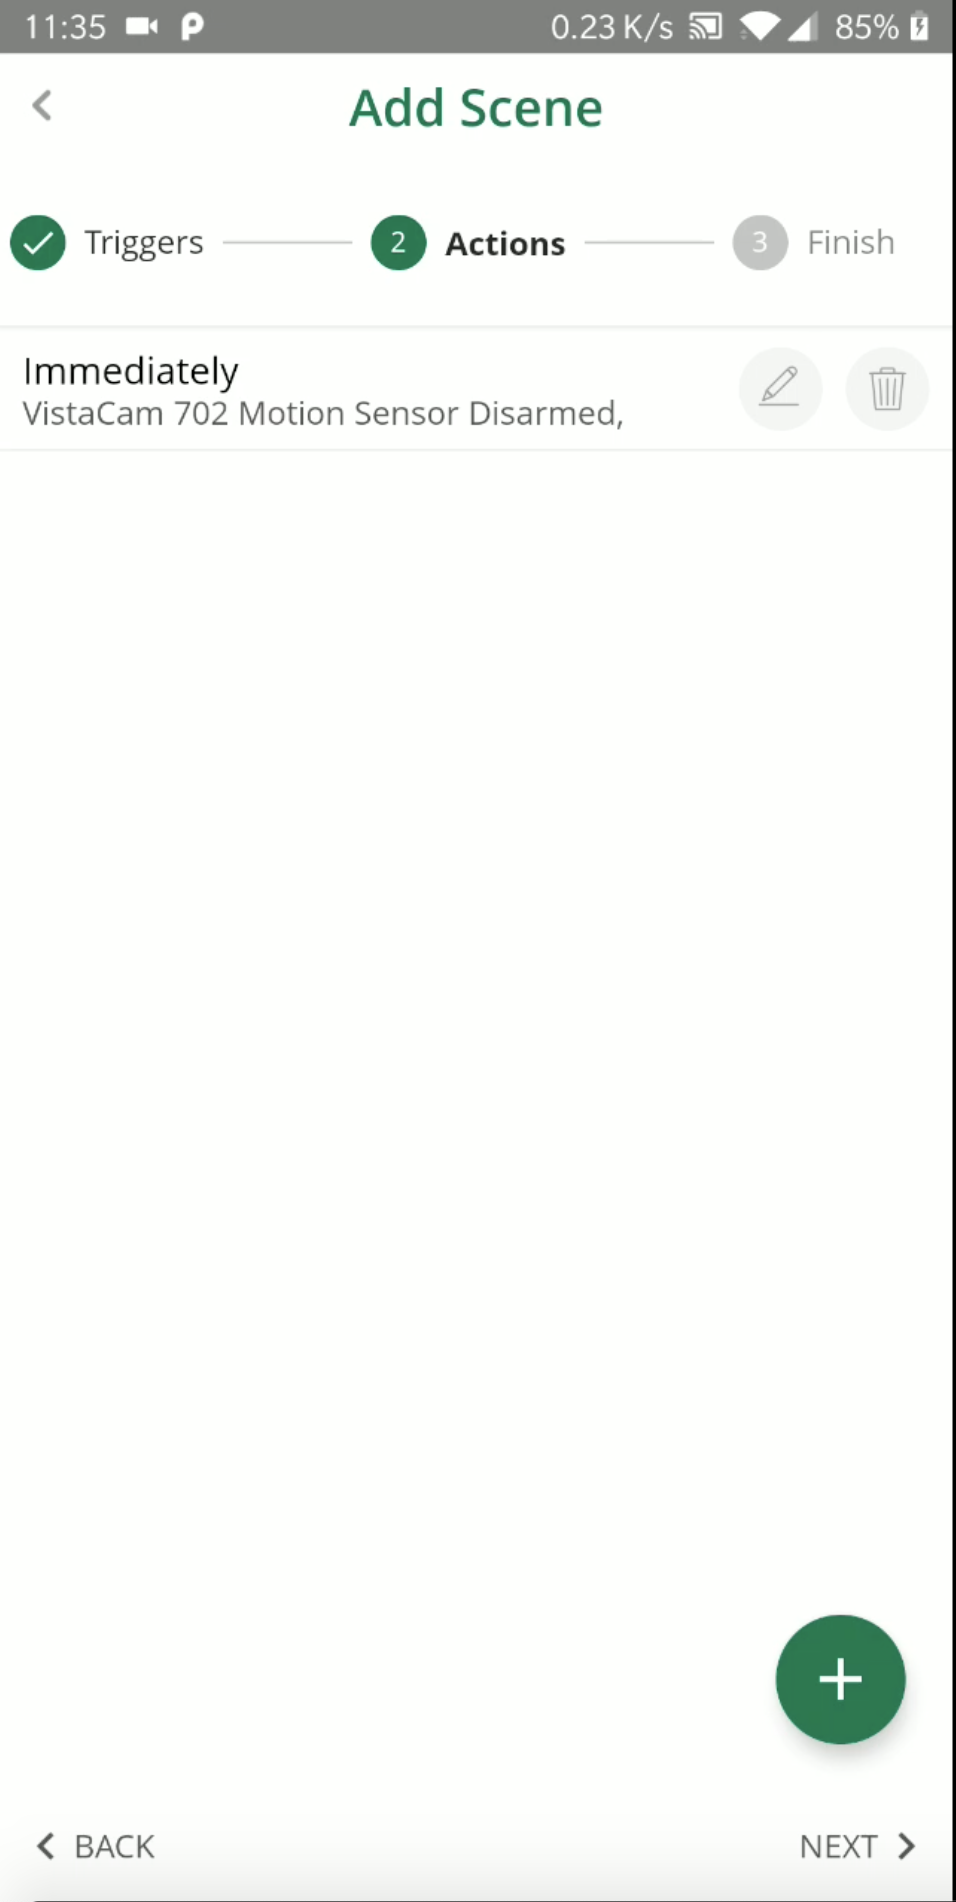
If mode as an action was previously added:
4. How to select a delayed action for when the action is sent to my devices/mode.
You are in scene creation in the Add action step.
Steps:
- You tap on Add Action
- You tap on Device/Mode
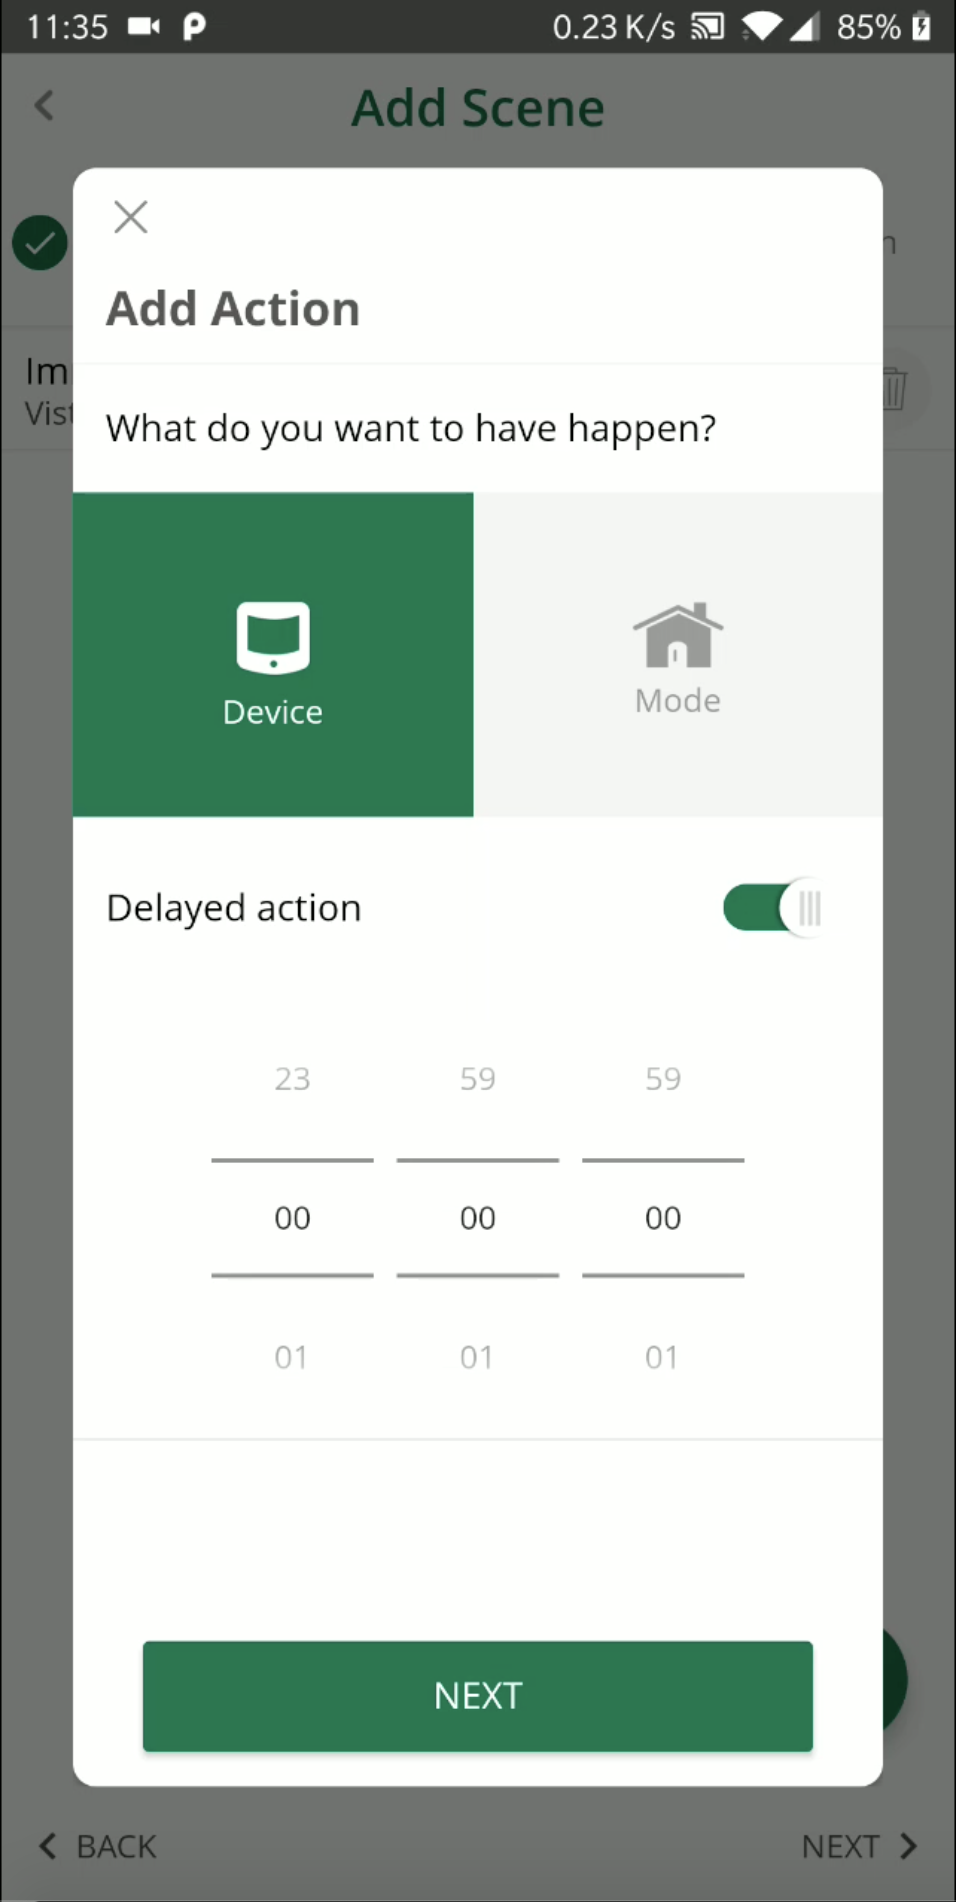
- You enable the toggle for Delayed action
- You will see under the label the selector for hh:mm:ss
- If you don't enable "Delayed action" the action will be by default immediately executed when the scene runs.
5. How to see the devices grouped by room or by type.
You are in scene creation in the Add trigger or Add action step.
Steps:
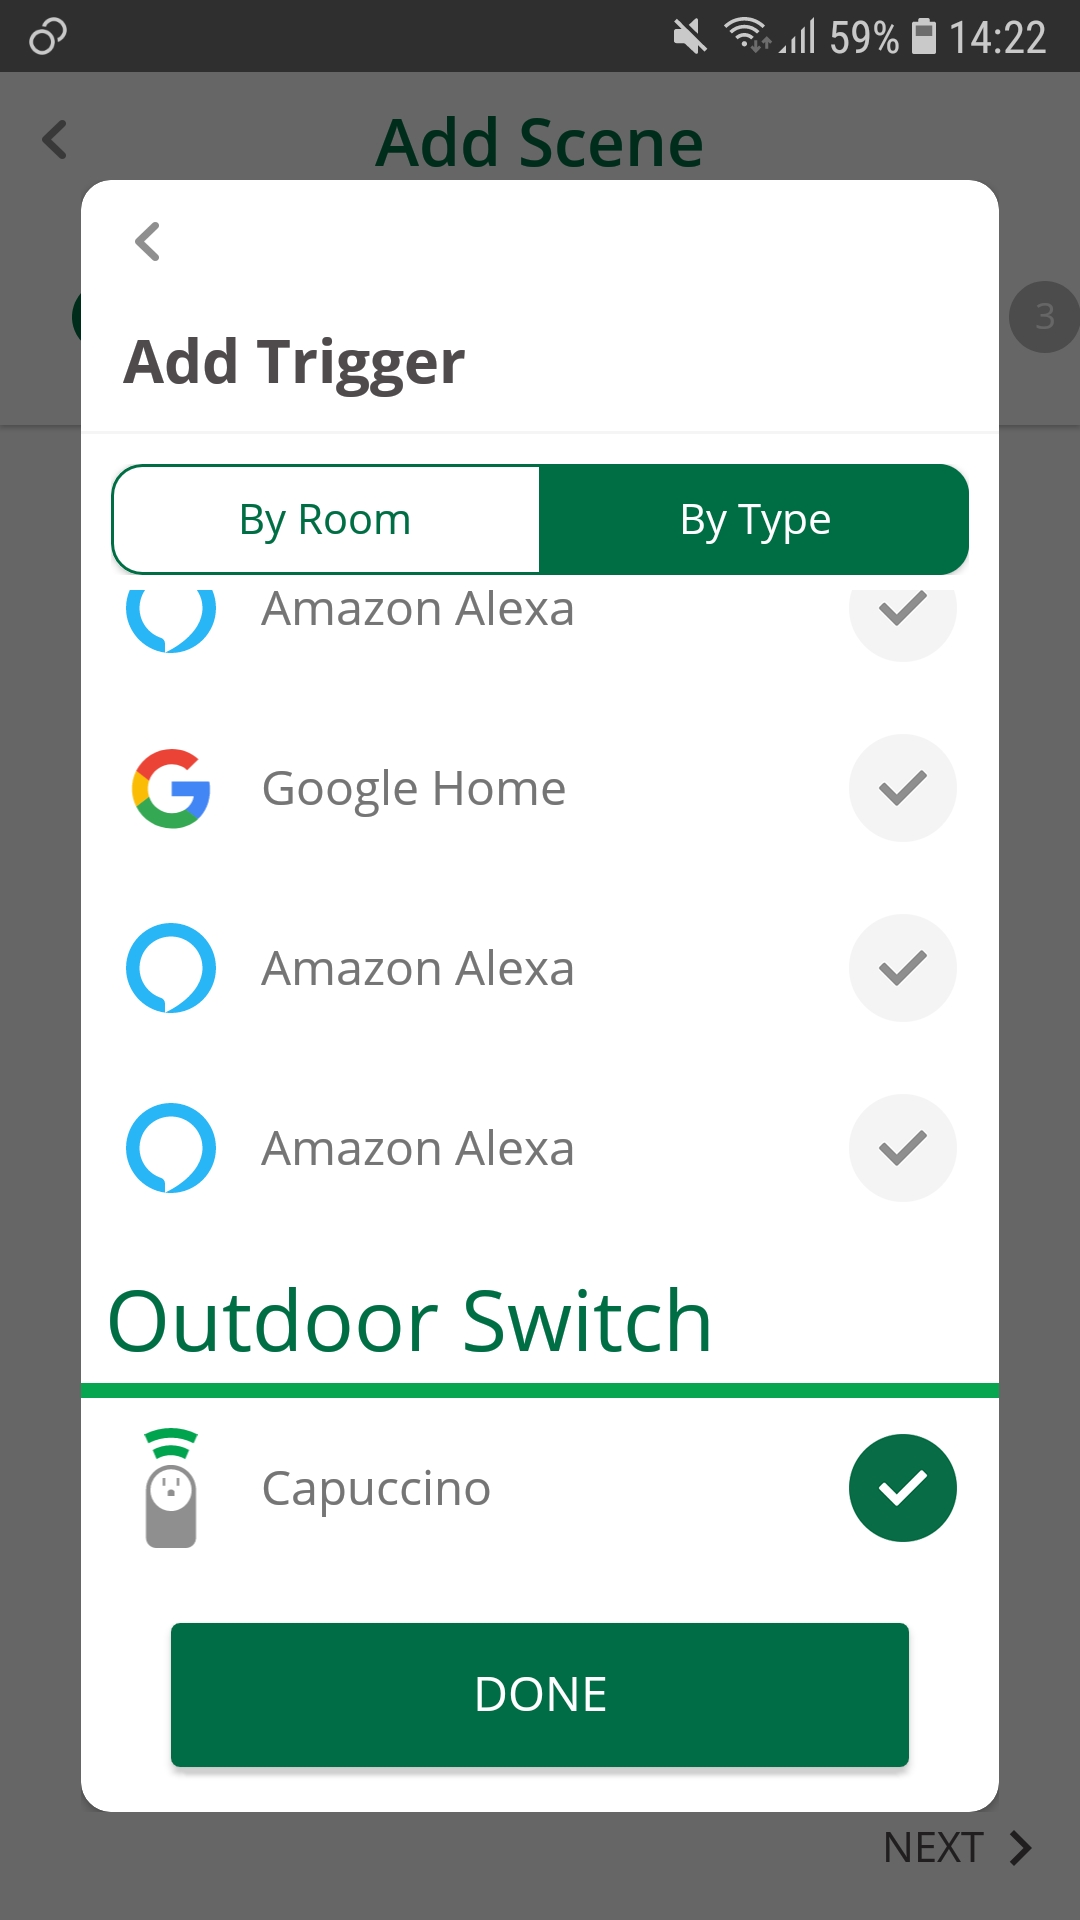
- You select a device (either as a trigger or as an action)
- You will see the devices by default grouped by Room
- You can select to see them grouped by Type using the button in the upper part of the screen


6. How to see the summary of the actions/triggers that I added in the scene
You are in scene creation in the Add trigger or Add action step.
Steps:
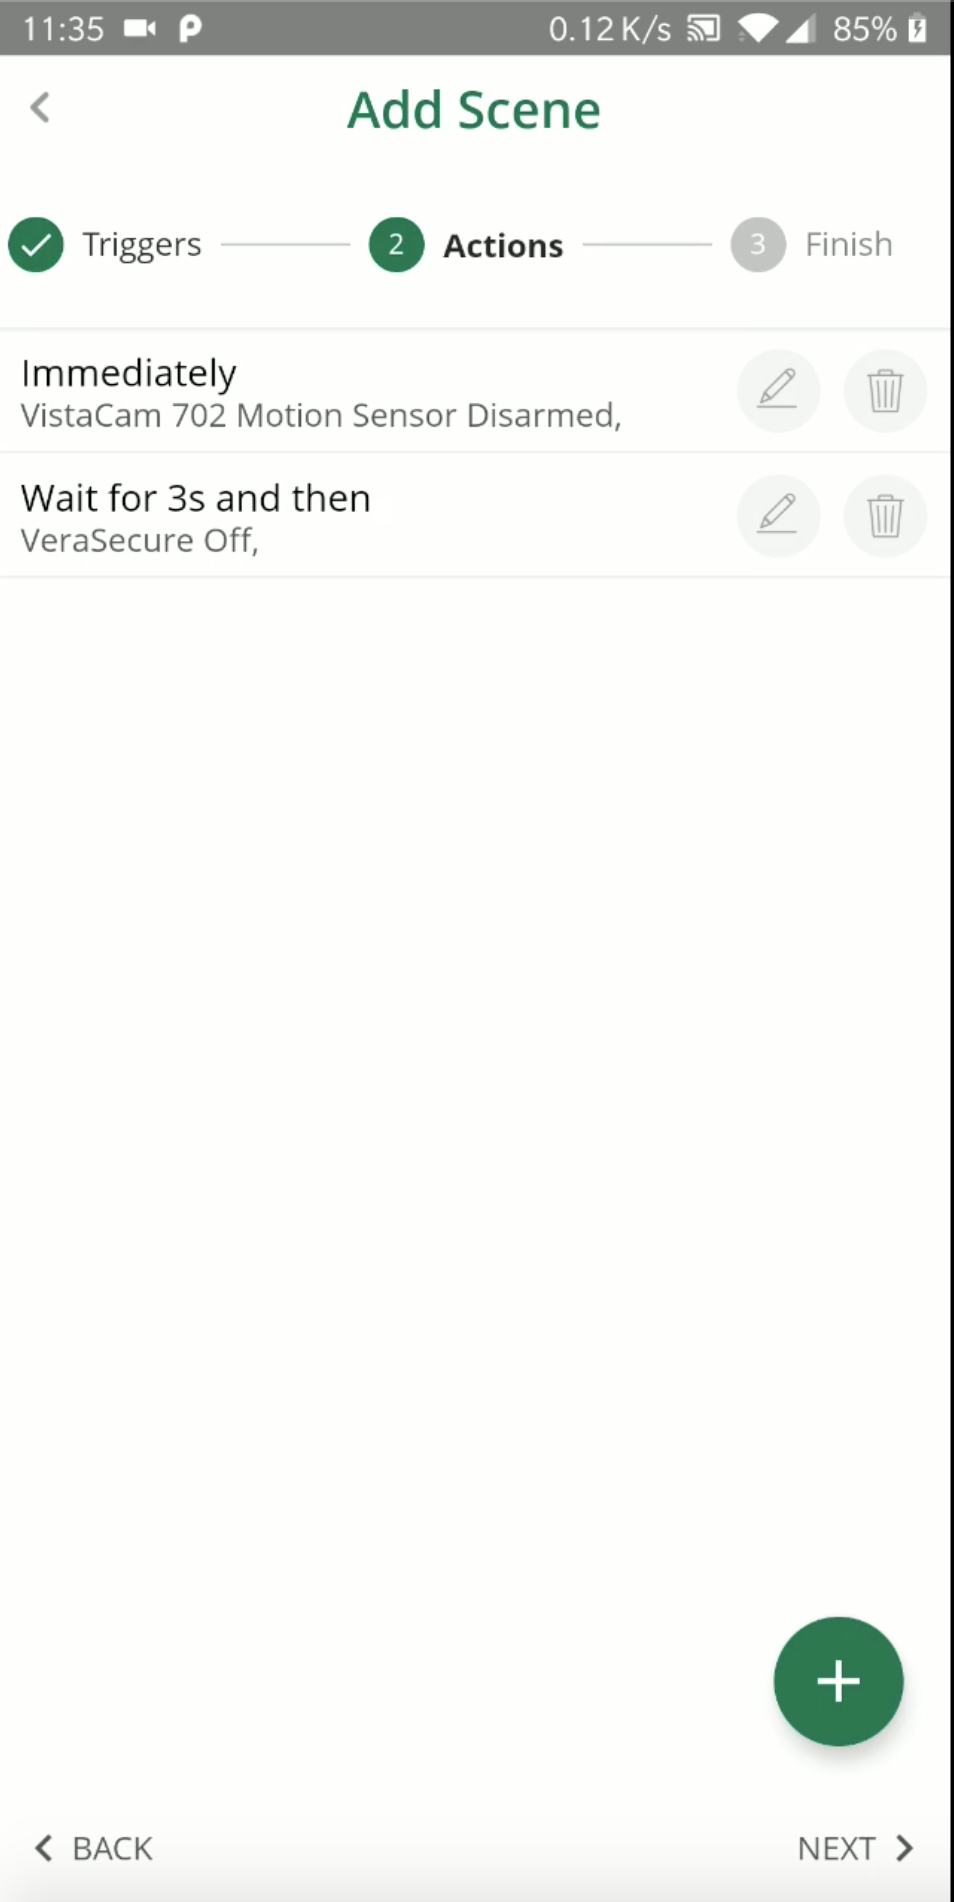
- You added a trigger/action In the scene
- You should see all the triggers/actions with a summary in the main page (under Triggers/Actions page)

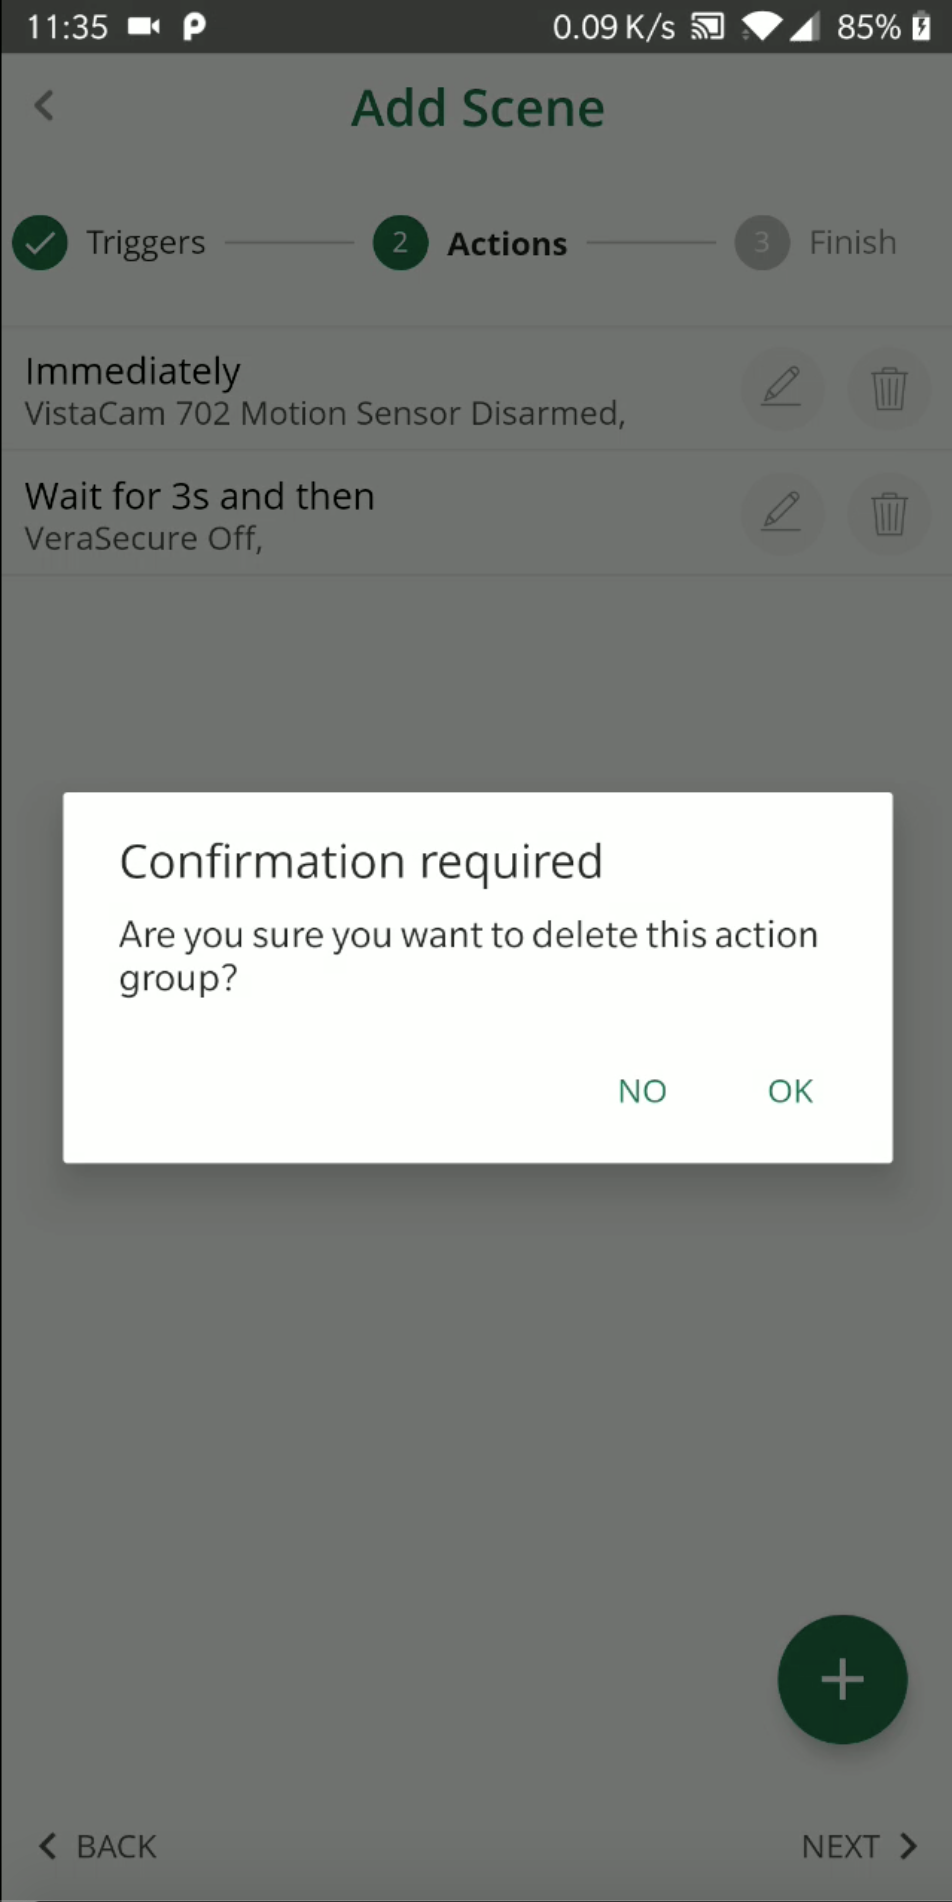
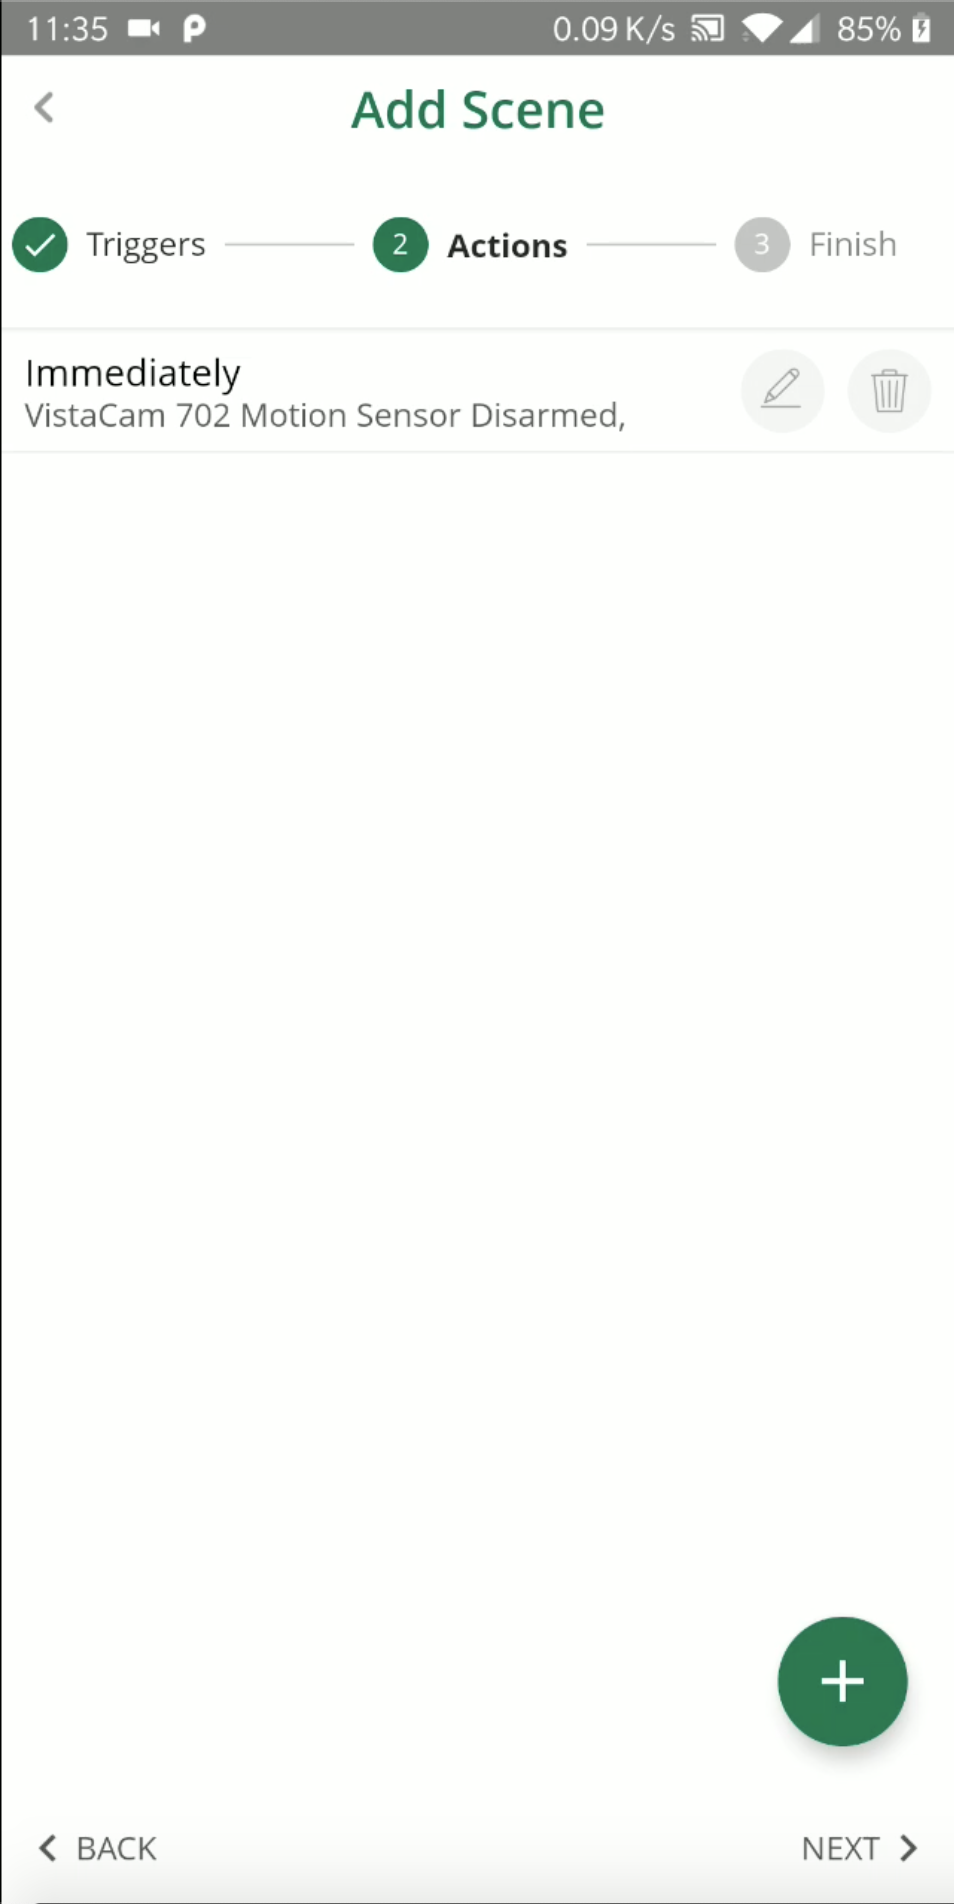
7. How to delete an action from my scene
You are in scene creation in the Add trigger or Add action step.
Steps:
- You tap on the trash bin icon from one of the triggers/actions
- You are asked by a popup to confirm the action
- If you tap "Yes" → the trigger/action is deleted from the scene
- If you tap "No" → the trigger/action remains in the scene.

8. How to name the scene that I just created
You are in scene creation in the 3rd step.
Steps:
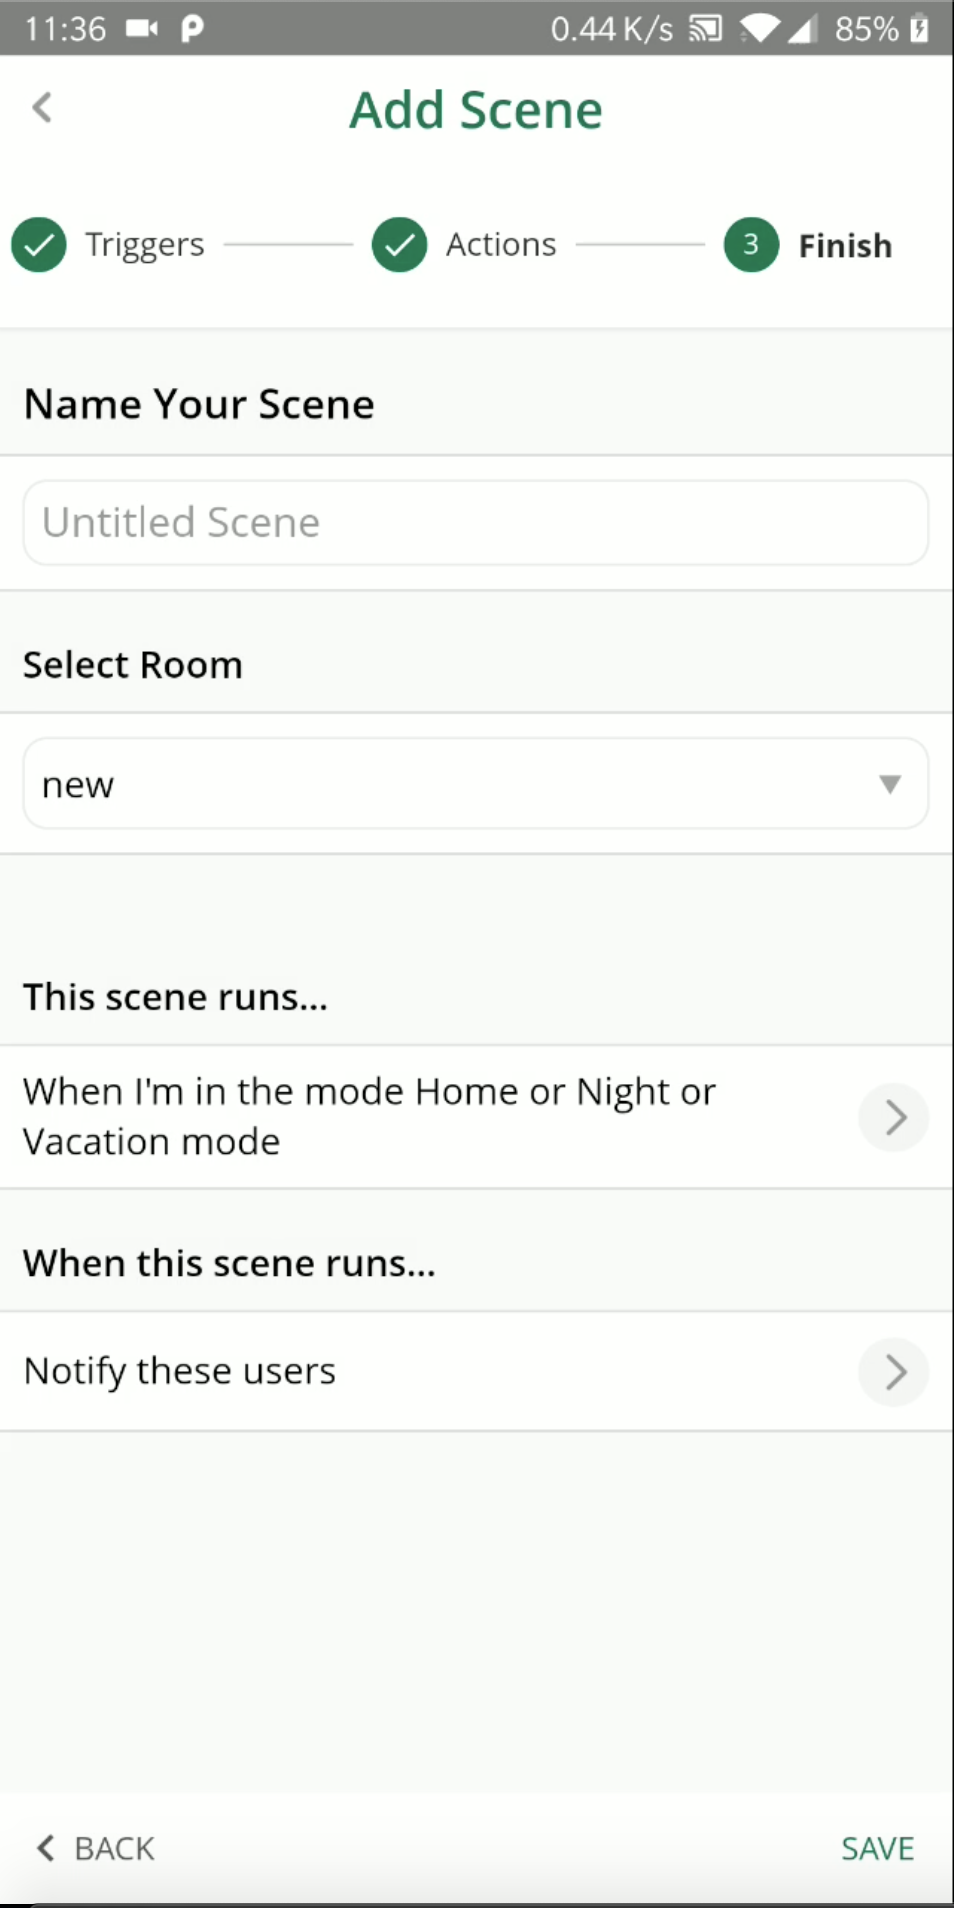
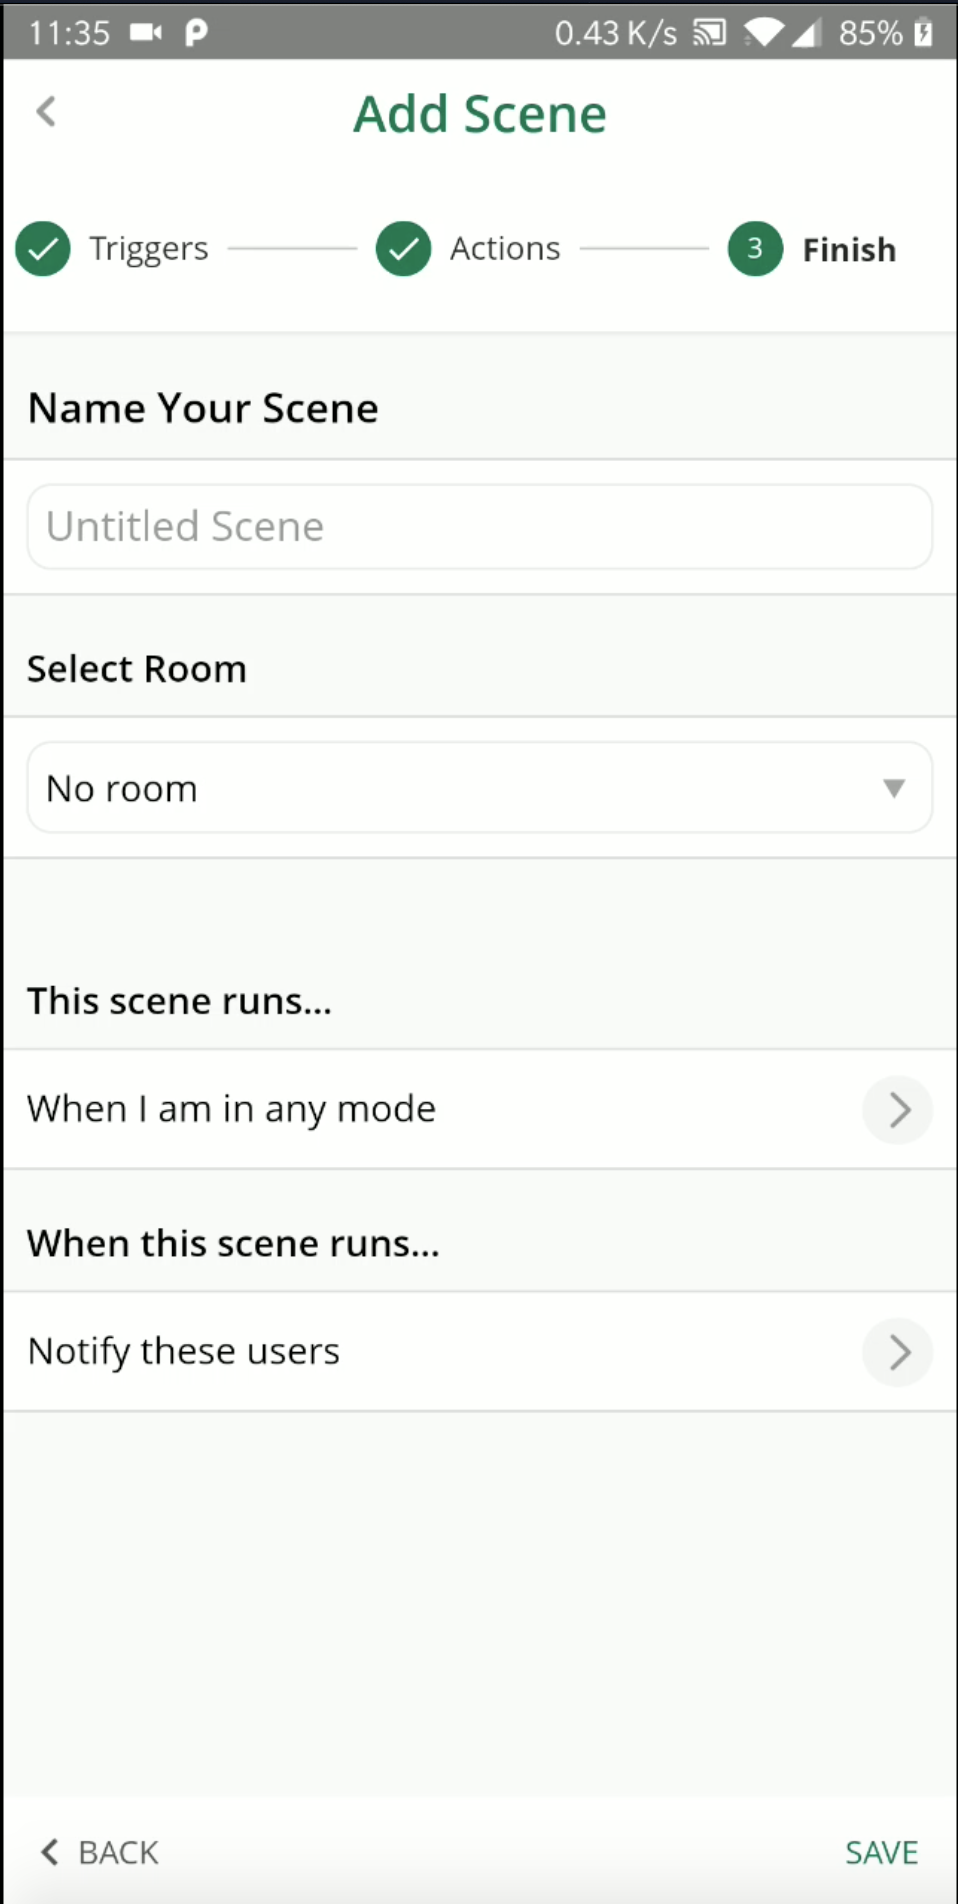
- You tap "Next" or on the "Finish" label to add the last information about the scene.
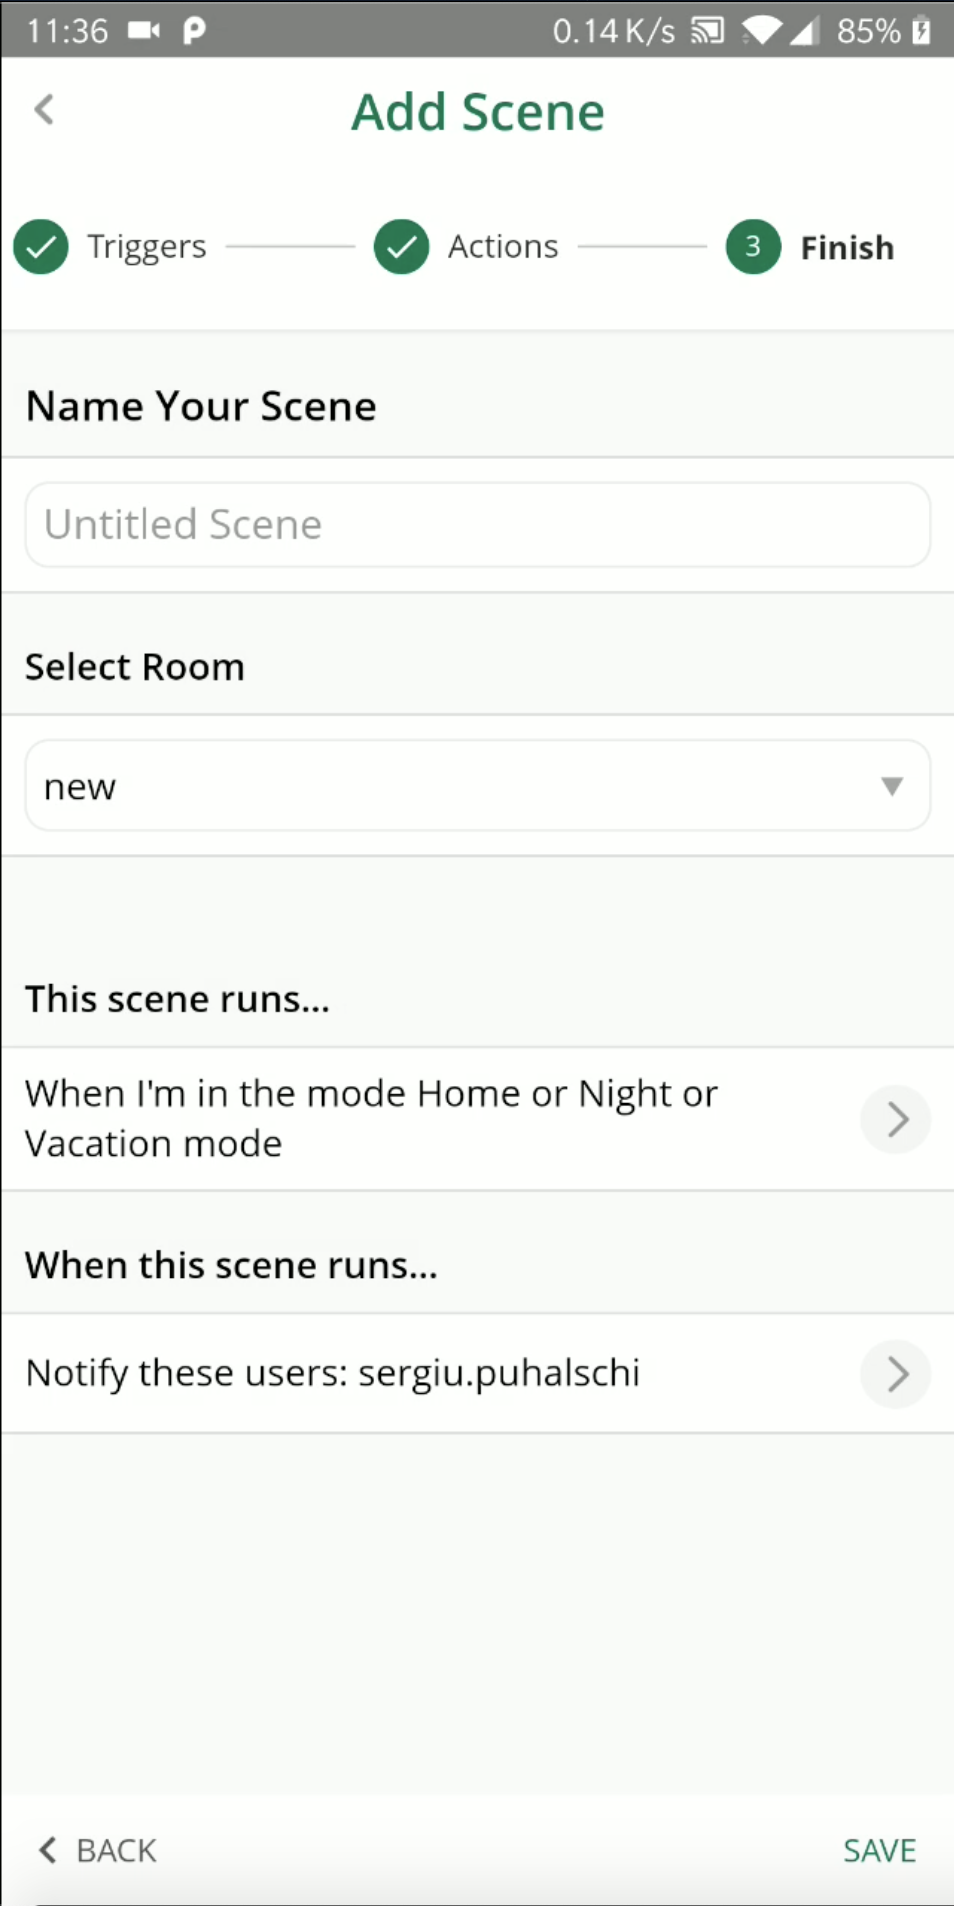
- You have to name the scene as you want under "Name Your Scene" label
- You can assign the scene to a Room using the dropdown - by default is assigned to "No room"
- You can select in which mode the scene will run - by default will be in any mode
- You can select if someone will be notified - by default nobody is notified.
- You have to tap on "Save" to save the scene
9. How to assign the scene to an existing room
You are in scene creation in the 3rd step.
Steps:
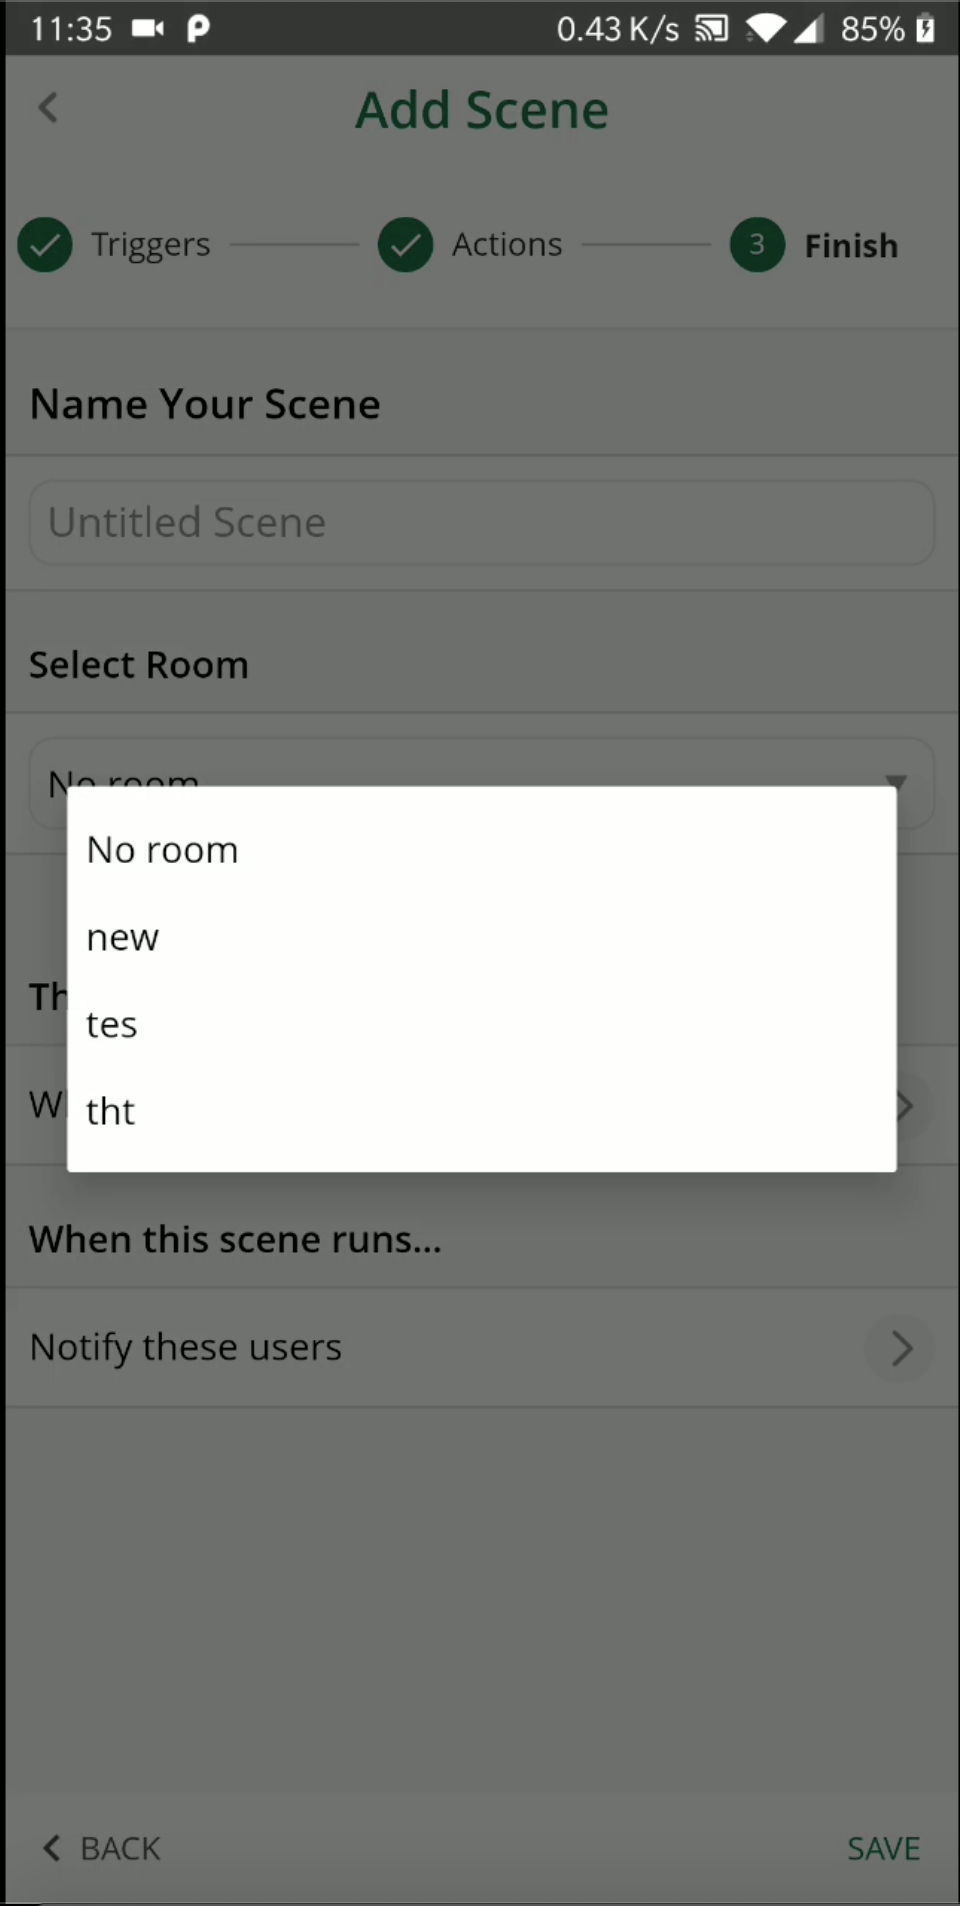
- You can assign the scene to a Room using the dropdown - by default is assigned to "No room"
- You will tap on the dropdown
- You will see a popup with the rooms you have created on your hub
- You can select one of the rooms

10. How to select in which mode the scene will run
You are in scene creation in the 3rd step.
Steps:
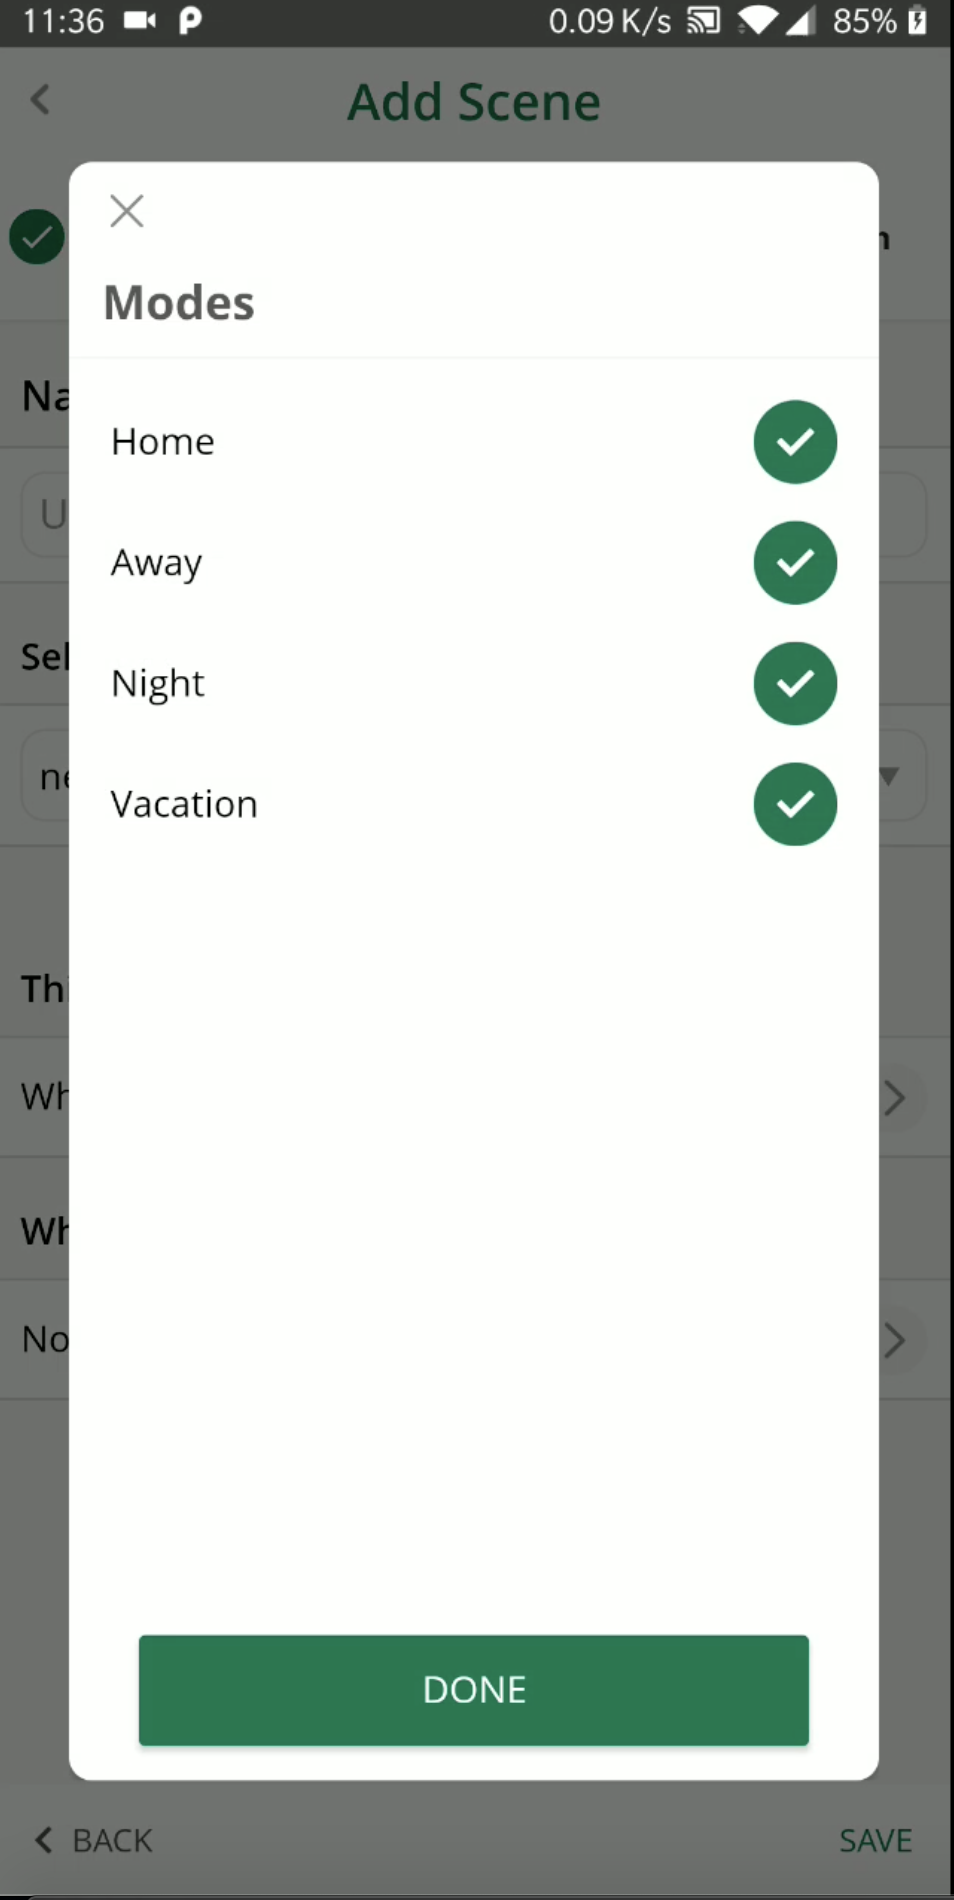
- You can select in which mode the scene will run - by default will be in any mode
- You tap on the ">"
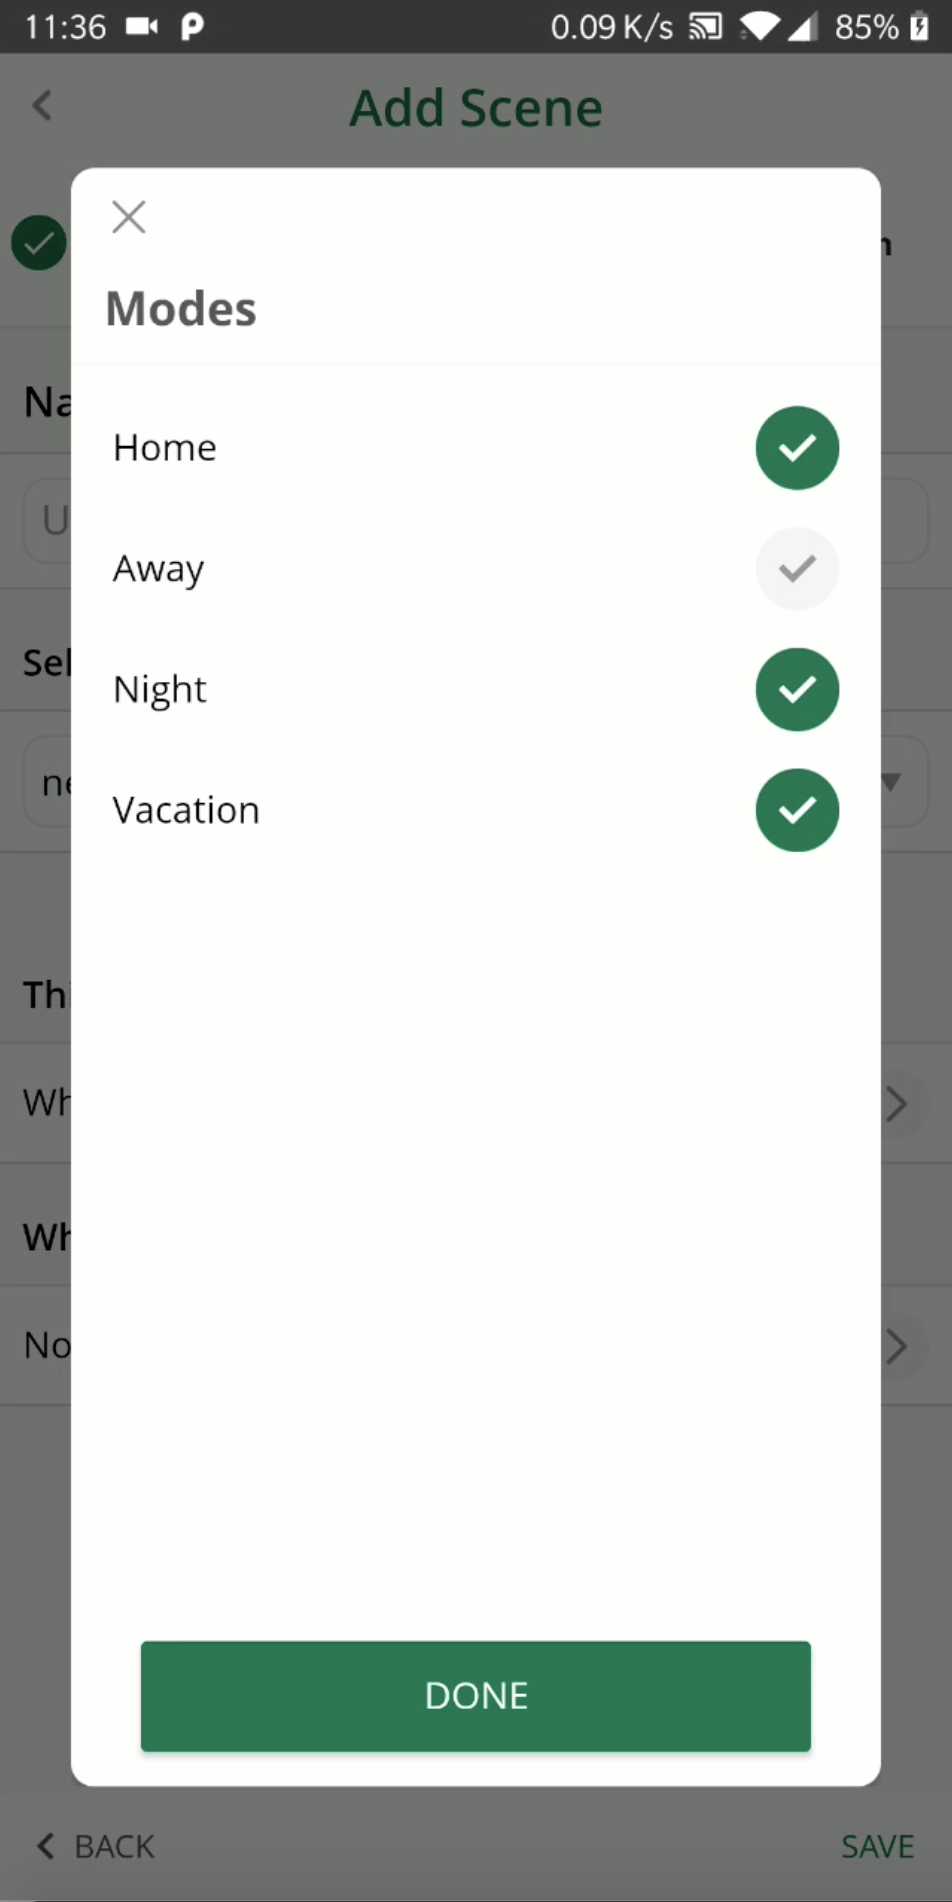
- You will see a screen with all the modes already selected
- You can deselect/select as many modes as possible - you must have at least one mode selected (if you deselected all modes, then the "DONE" button is disabled).
- The "x" from the upper-left corner will exist on the screen and no changes are applied.

11. How to select who to be notified when the scene runs
You are in scene creation in the 3rd step.
Steps:
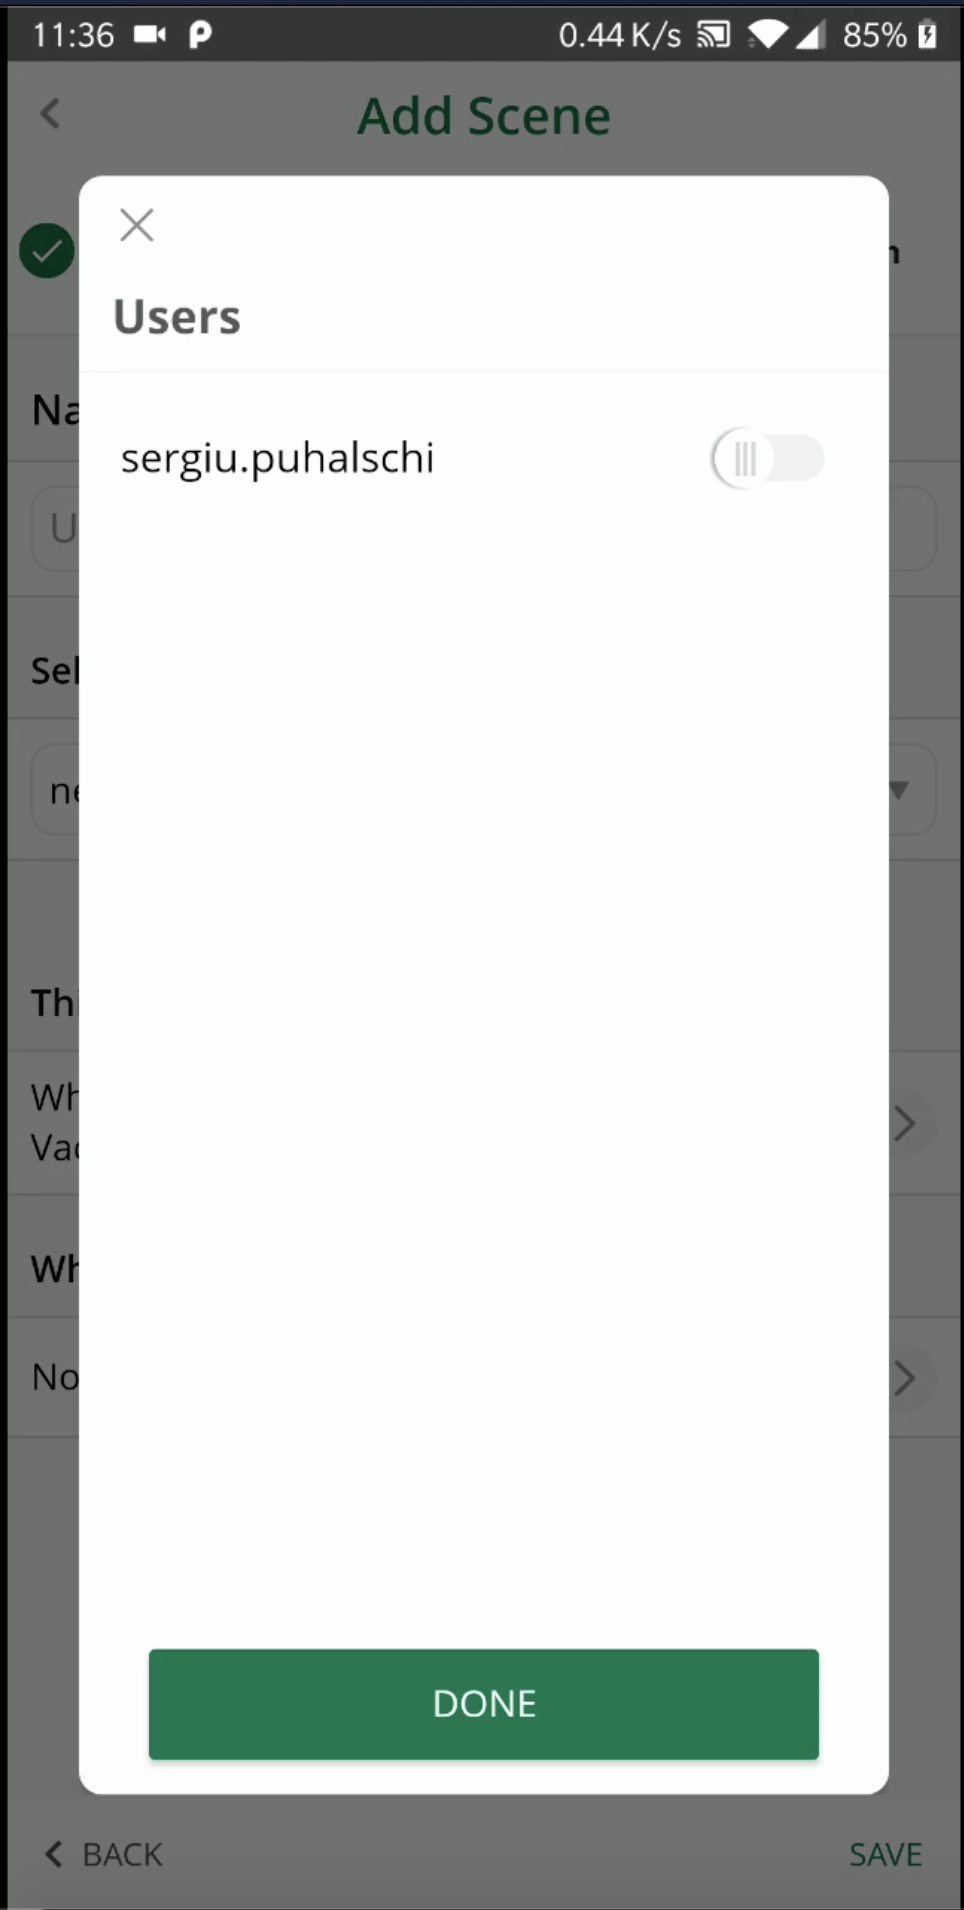
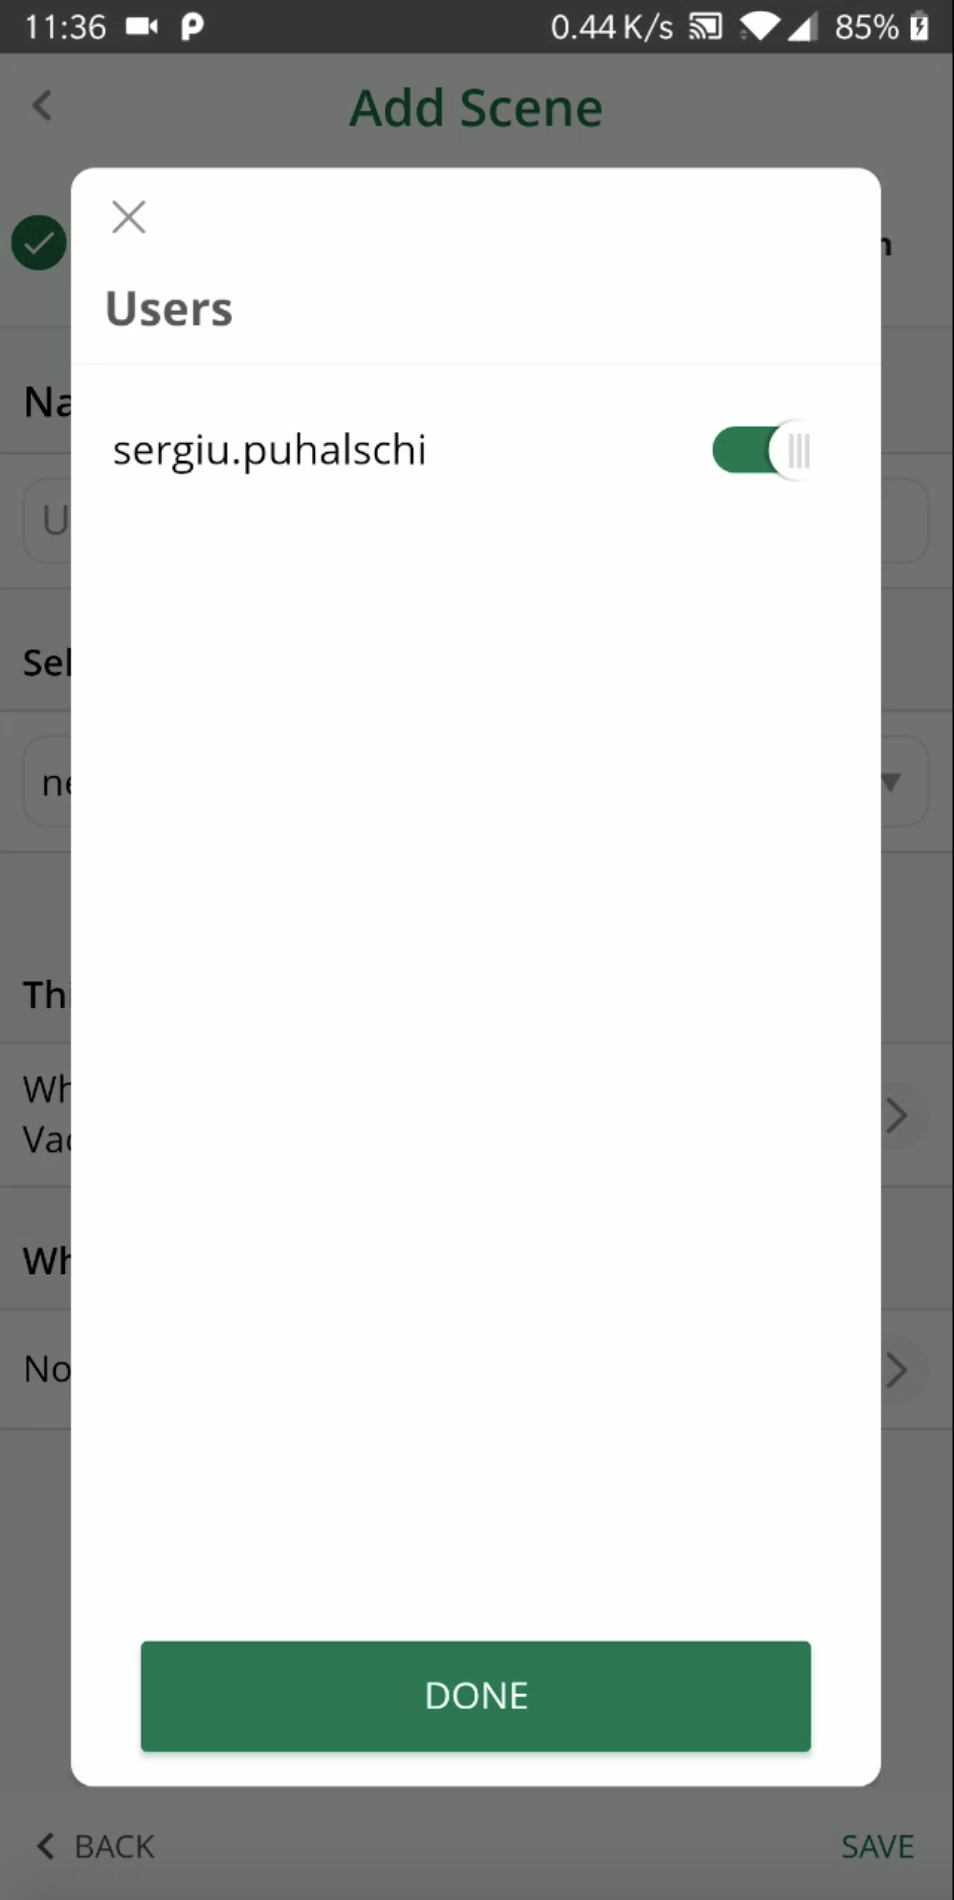
- You can select if someone will be notified - by default nobody is notified.
- You tap on ">"
- A popup is opened and you will see the list with all the users that are added to that controller
- You can select for notifications to be sent by enabling the toggle for that user/those users
- When finished you have to tap on "DONE"
- The "x" from the upper-left corner will exist on the screen and no changes are applied.


Comments
0 comments
Please sign in to leave a comment.