The Settings tab provides several useful features for changing the settings on your Vera Controller and system. Generally speaking, you probably won't ever need to visit the Settings unless you want to change something that has already been set. Most of the Settings you find here have already been populated with information you previously provided when you set your system up. But if you move to a different location, or did not finish the initial Setup Wizard when you first installed your system, or need to upgrade firmware or hardware or need to restore your system to previous settings, this is the place to do it.
Click on Settings and a number of sub-menu items will appear, including Rooms, Location, Net & Wi-fi, Backup, Logs, Z-wave Settings and Firmware. Let's look at each of these.
Rooms
The Rooms Settings simply lists the available Room names you've already created, and provides you with the opportunity to edit these room names and/or create new ones.
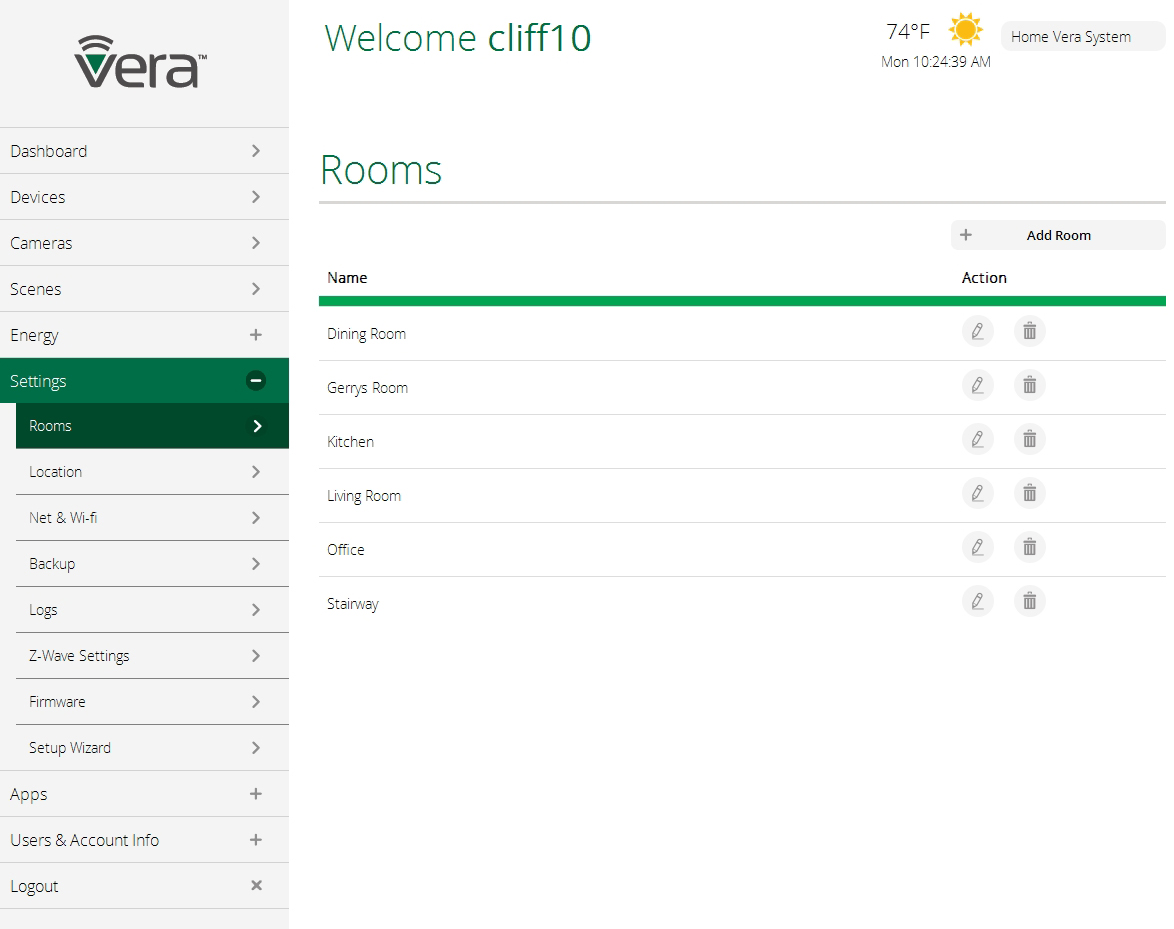
Select the pencil icon to make changes to any of the room names, or the garbage can icon to delete a room.
Location
The next Settings item lets you change the location of your system. The Location information is used for showing you the local time and weather conditions at the top of the Dashboard. The more precisely you tell Vera what the system's location is, the more accurate the weather info will be.

Note: You only need to enter the city or town to change the location. The longitude and latitude information is filled in automatically by Vera from the city name.
Net & Wi-Fi
The Net & Wi-fi sub-menu includes features to help you troubleshoot your Internet access and local network should any problem arise. There's also an option here to activate 3G (cell phone) backup of your notifications in the event the Internet fails (this requires a Vera Controller with built-in 3G capability, or a cellular accessory dongle for your Vera Controller.)
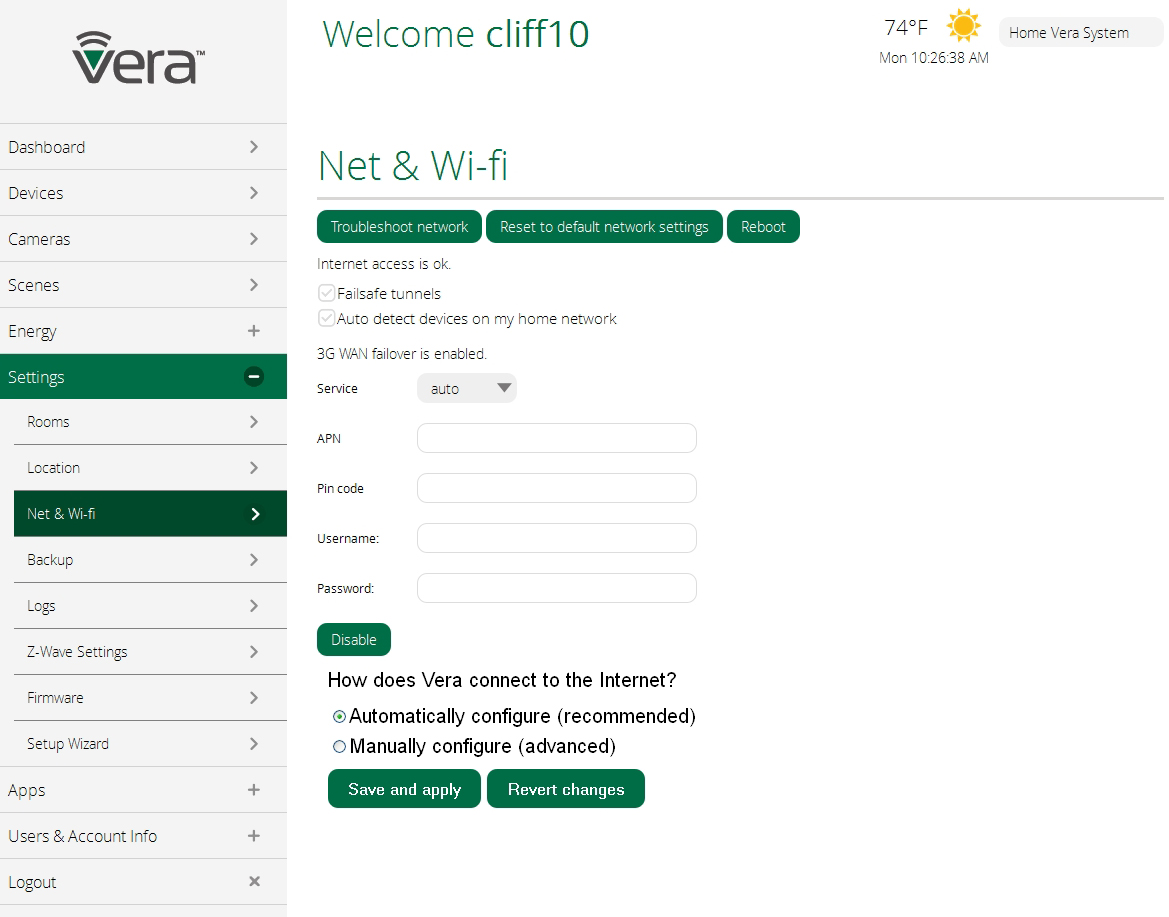
Advanced users also have the option here to manually specify how Vera connects to the Internet. Generally speaking if your system is working properly you probably should not change any settings here, except if you wish to add the cellular (3G) backup service just in case your Internet Service Provider has an outage.
Backup
Vera automatically creates a backup of your system, typically on a daily basis. You don't need to do anything here to create the backups, they are completely automatic. When you click on Backup you'll see a list of the most recent backups that have been created.
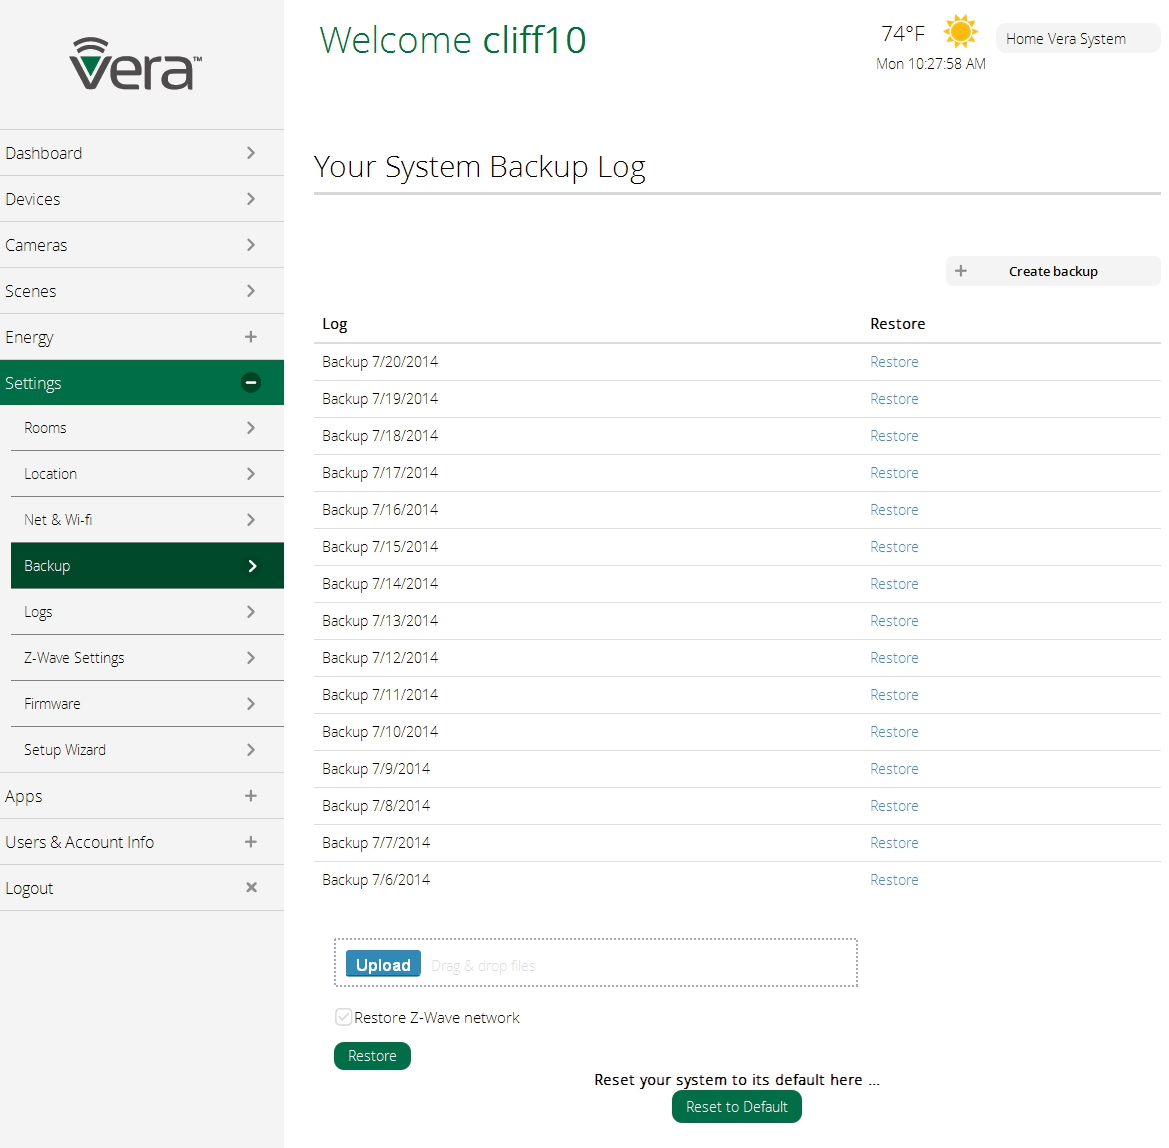
From here you can restore your system to a previous state from one of these backups. This will only be needed if something goes wrong, for example, you install some new piece of equipment and suddenly nothing is working right and you want to get back to the way things were yesterday or last week. Under normal operation, this should never happen, but the capability is provided here just in case.
Similarly, before making any major changes to your system, such as when upgrading Firmware or upgrading to a new Controller, you should create a backup just in case anything goes wrong. That's what the Create Backup button is for.
The Upload button enables you to drag and drop Restore files saved in a different location or from a different device, adding them to your library of Backups. This can be very useful when upgrading to a new Controller, as you can take a Backup created for the old Controller, copy it into the Backup Log for the new Controller, and then perform a Restore on the new Controller. This will transfer all the setup information, including all Devices in the system, from the old Controller to the new. (Assuming both are compatible with Vera UI7.)
Restore Z-Wave network
Z-Wave is a "mesh network" technology that uses the AC plug-in Devices in your system, such as Lamp Dimmers and Smart Switches, as "repeaters" to relay the signals from battery-powered Devices to your Controller. The system is completely automatic when you first set things up, figuring the best path for each Device's signal to take to the Controller. But after you move some Devices around, such as if you unplug a Lamp Dimmer and move it somewhere, problems may arise because a Device that was previously being used as a repeater is no longer in the right position. That's the problem that the "Restore Z-Wave network" option resolves.
Click the Restore button here only if you're experiencing problems communicating with one or more Z-Wave Devices. For example, if a Door/Window sensor is no longer showing up in your system, and you know the battery is in good condition, and it was working fine just before you made some changes to your system, then in all likelihood the Z-Wave network needs to be restored.
Finally, on this page you also have the option to restore your system to its default settings. This is like wiping the Controller clean and erasing all the custom settings you created.
Logs
Unlike Backups which are records of your system's settings, Logs are complete detailed reports of everything going on in your system. You will probably never need to access any of your system's logs, but if instructed by Vera tech support to help resolve a tech issue, you may need to make a copy of your logs on a standard USB thumb drive or external hard drive.

Plug the USB drive into the USB port on the back of your Vera Controller to store logs onto the USB memory device. Note that the drive will be completely erased prior to creating the logs.
Z-Wave Settings
These are settings that should only be touched by advanced users, as they cover many of the technical details regarding Z-Wave communications between your Vera Controller and your Z-Wave Devices.
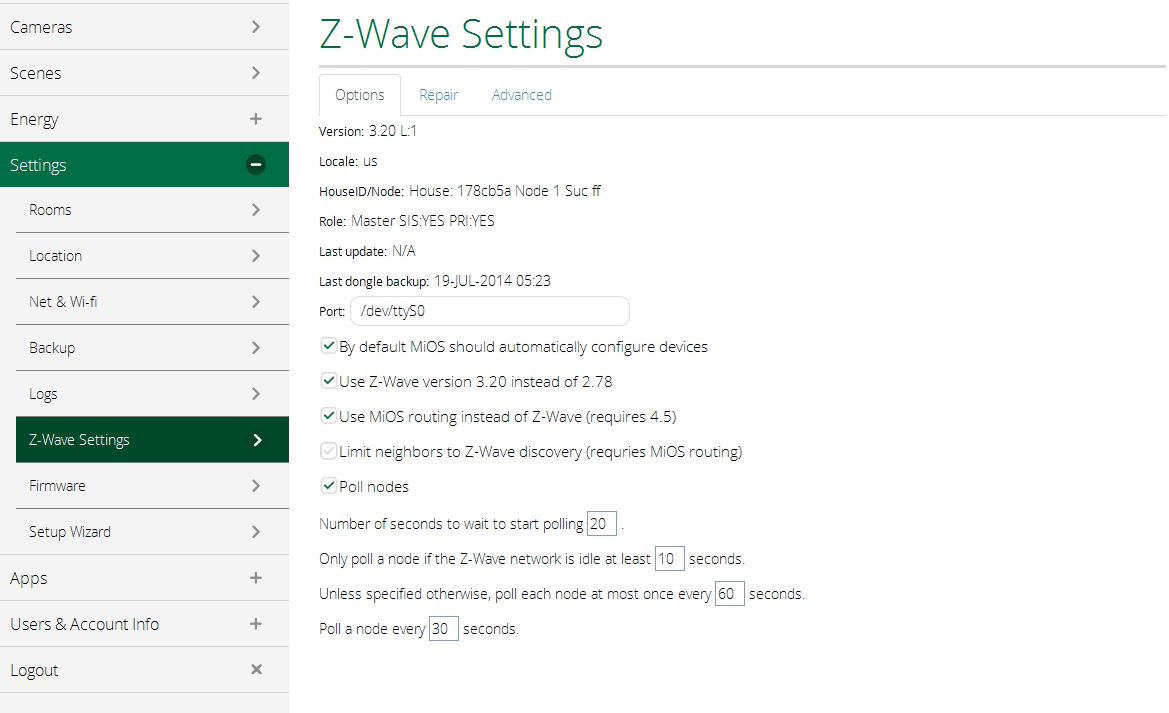
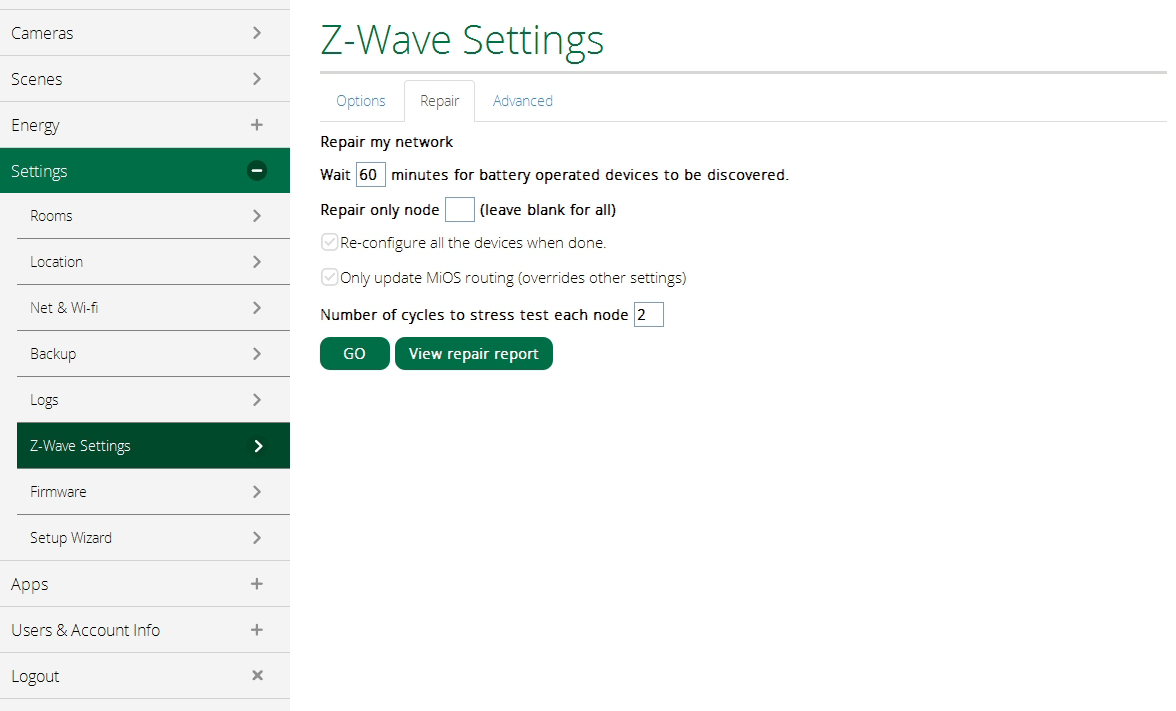
The one section here that an "ordinary" user might need to know about is the "Repair" tab, which can be used to help repair a Z-Wave network in which pieces of the system have been moved around. Please see "Restore Z-Wave Network," above, for a more detailed explanation. Clicking on the "Go" button herer will initiate a restoration of the Z-Wave network.
Firmware
The Vera UI7 software resides on your Vera Controller in the form of "firmware" that remains in the Controller's memory. Periodically Vera will offer updates to this firmware as bugs are resolved and as new Devices become available to use with your Vera system.
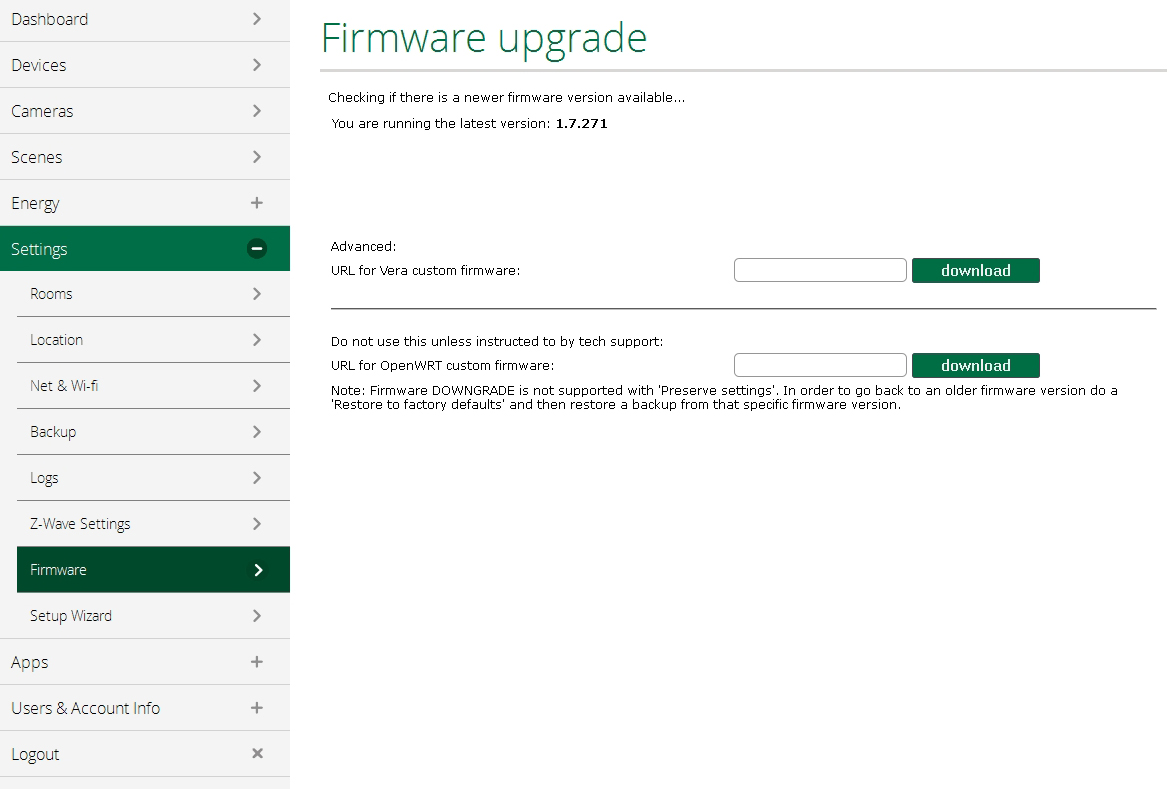
Updating the firmware is an advanced operation that non-experienced users should only undertake when instructed by Vera tech support or customer support. You will be supplied with a URL (Internet address) for downloading the new firmware. Copy and paste that address into the blank field on this page, click "download" and follow the instructions.
Setup Wizard
When you first installed your Vera Controller, the Setup Wizard probably launched automatically to guide you through the entire installation process for your Vera system.

This menu item lets you re-launch the Setup Wizard at any time later. So, for example, if you previously got halfway through the Setup Wizard, then started using the system without finishing, here's how you can get back to where you left off. Click on Next to re-start the Setup Wizard and pick up where you left off.
Next: Apps Tab
Click on Settings and a number of sub-menu items will appear, including Rooms, Location, Net & Wi-fi, Backup, Logs, Z-wave Settings and Firmware. Let's look at each of these.
Rooms
The Rooms Settings simply lists the available Room names you've already created, and provides you with the opportunity to edit these room names and/or create new ones.
Select the pencil icon to make changes to any of the room names, or the garbage can icon to delete a room.
Location
The next Settings item lets you change the location of your system. The Location information is used for showing you the local time and weather conditions at the top of the Dashboard. The more precisely you tell Vera what the system's location is, the more accurate the weather info will be.
Note: You only need to enter the city or town to change the location. The longitude and latitude information is filled in automatically by Vera from the city name.
Net & Wi-Fi
The Net & Wi-fi sub-menu includes features to help you troubleshoot your Internet access and local network should any problem arise. There's also an option here to activate 3G (cell phone) backup of your notifications in the event the Internet fails (this requires a Vera Controller with built-in 3G capability, or a cellular accessory dongle for your Vera Controller.)
Advanced users also have the option here to manually specify how Vera connects to the Internet. Generally speaking if your system is working properly you probably should not change any settings here, except if you wish to add the cellular (3G) backup service just in case your Internet Service Provider has an outage.
Backup
Vera automatically creates a backup of your system, typically on a daily basis. You don't need to do anything here to create the backups, they are completely automatic. When you click on Backup you'll see a list of the most recent backups that have been created.
From here you can restore your system to a previous state from one of these backups. This will only be needed if something goes wrong, for example, you install some new piece of equipment and suddenly nothing is working right and you want to get back to the way things were yesterday or last week. Under normal operation, this should never happen, but the capability is provided here just in case.
Similarly, before making any major changes to your system, such as when upgrading Firmware or upgrading to a new Controller, you should create a backup just in case anything goes wrong. That's what the Create Backup button is for.
The Upload button enables you to drag and drop Restore files saved in a different location or from a different device, adding them to your library of Backups. This can be very useful when upgrading to a new Controller, as you can take a Backup created for the old Controller, copy it into the Backup Log for the new Controller, and then perform a Restore on the new Controller. This will transfer all the setup information, including all Devices in the system, from the old Controller to the new. (Assuming both are compatible with Vera UI7.)
Restore Z-Wave network
Z-Wave is a "mesh network" technology that uses the AC plug-in Devices in your system, such as Lamp Dimmers and Smart Switches, as "repeaters" to relay the signals from battery-powered Devices to your Controller. The system is completely automatic when you first set things up, figuring the best path for each Device's signal to take to the Controller. But after you move some Devices around, such as if you unplug a Lamp Dimmer and move it somewhere, problems may arise because a Device that was previously being used as a repeater is no longer in the right position. That's the problem that the "Restore Z-Wave network" option resolves.
Click the Restore button here only if you're experiencing problems communicating with one or more Z-Wave Devices. For example, if a Door/Window sensor is no longer showing up in your system, and you know the battery is in good condition, and it was working fine just before you made some changes to your system, then in all likelihood the Z-Wave network needs to be restored.
Finally, on this page you also have the option to restore your system to its default settings. This is like wiping the Controller clean and erasing all the custom settings you created.
Logs
Unlike Backups which are records of your system's settings, Logs are complete detailed reports of everything going on in your system. You will probably never need to access any of your system's logs, but if instructed by Vera tech support to help resolve a tech issue, you may need to make a copy of your logs on a standard USB thumb drive or external hard drive.
Plug the USB drive into the USB port on the back of your Vera Controller to store logs onto the USB memory device. Note that the drive will be completely erased prior to creating the logs.
Z-Wave Settings
These are settings that should only be touched by advanced users, as they cover many of the technical details regarding Z-Wave communications between your Vera Controller and your Z-Wave Devices.
The one section here that an "ordinary" user might need to know about is the "Repair" tab, which can be used to help repair a Z-Wave network in which pieces of the system have been moved around. Please see "Restore Z-Wave Network," above, for a more detailed explanation. Clicking on the "Go" button herer will initiate a restoration of the Z-Wave network.
Firmware
The Vera UI7 software resides on your Vera Controller in the form of "firmware" that remains in the Controller's memory. Periodically Vera will offer updates to this firmware as bugs are resolved and as new Devices become available to use with your Vera system.
Updating the firmware is an advanced operation that non-experienced users should only undertake when instructed by Vera tech support or customer support. You will be supplied with a URL (Internet address) for downloading the new firmware. Copy and paste that address into the blank field on this page, click "download" and follow the instructions.
Setup Wizard
When you first installed your Vera Controller, the Setup Wizard probably launched automatically to guide you through the entire installation process for your Vera system.
This menu item lets you re-launch the Setup Wizard at any time later. So, for example, if you previously got halfway through the Setup Wizard, then started using the system without finishing, here's how you can get back to where you left off. Click on Next to re-start the Setup Wizard and pick up where you left off.
Next: Apps Tab

Comments
0 comments
Please sign in to leave a comment.