
Quick breakdown of the content:
Ezlo Atom Protocols:
The Atom uses Z-Wave Plus™ - the latest (5th generation) version of the technology, which comes with advantages such as increased range and improved battery life.
*For S2 devices, DSK or QR code can be used to add the devices to the Z-Wave™ network.
*Z-Wave™ and Z-Wave Plus™ are registered trademarks of Silicon Labs
Button operation and reading the LED lights
| Ezlo Atom state | LED status |
|
1. Not connected to router |
|
|
2. Connected to router, but not connected to the server |
|
| 3. Connected to the server |
|
| 4. Atom is in inclusion mode - interview not started |
|
| 5. Atom is in inclusion mode - interview started |
|
| 6. Atom is in exclusion mode - interview not started |
|
| 7. Atom is in exclusion mode - interview started |
|
Button operation, Ezlo Atom resulting state, and LED status
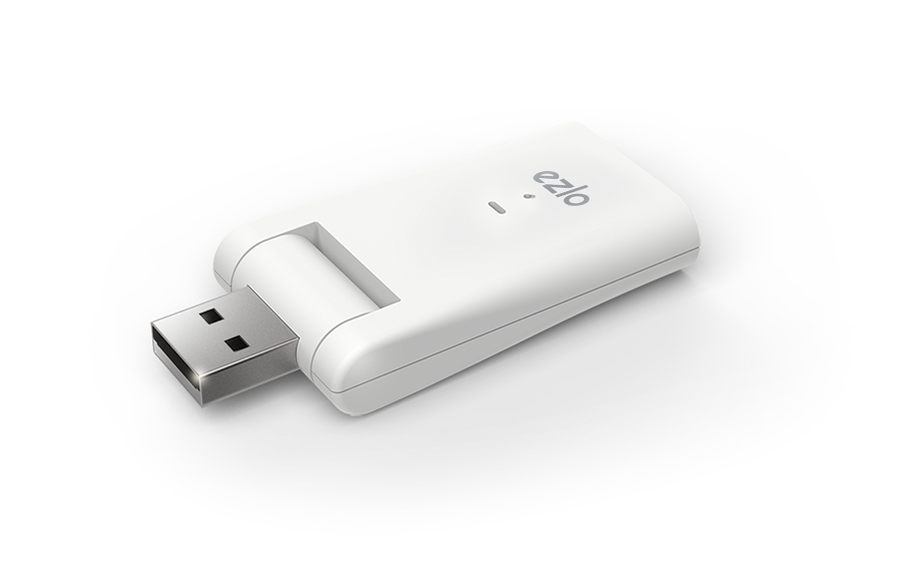
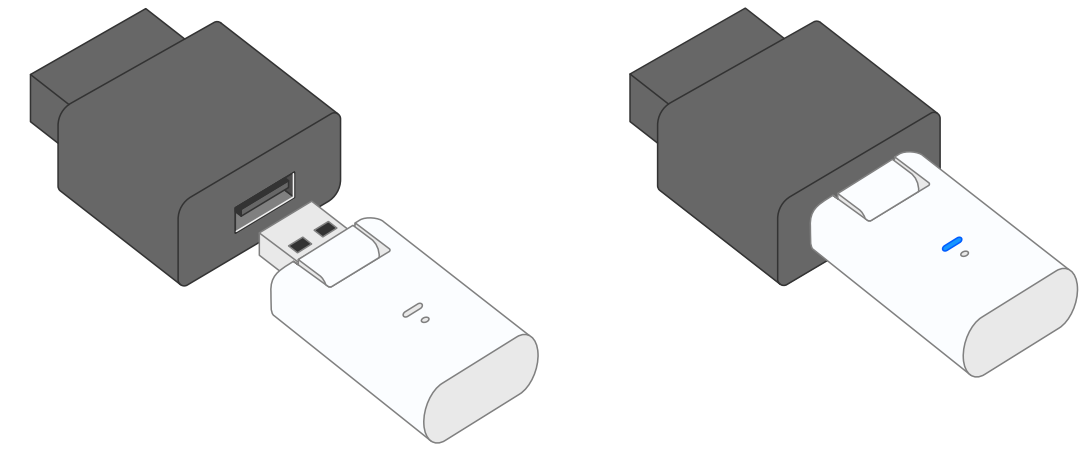
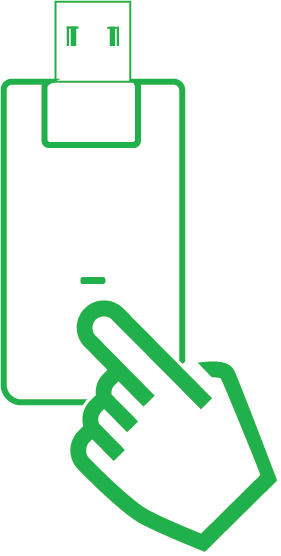
*Ezlo Atom has only one button, used for resetting the device. It is easy to find: it's recessed, inside the little hole between the rectangular LED and where the brand name is. See below an image of the Ezlo Atom with the LED turned off, and on, respectively.
The reset button is located near the status LED. To access it, you are going to need a paper clip or something similar.
Network Reset
- Button action: Two short (0.2 - 2,5 seconds) pushes
- LED status: LED blinking 3 times per second, stopping once the process is complete. Once finished, it will blink once a second until the Atom is connected to a Wi-Fi network.
- Result: Reset settings of Wi-Fi connection to factory defaults
Soft Reset
- Button action: One long (5 - 9.5 seconds) push
- LED status: LED blinking 10 times per second, stopping once the reset process is complete.
- Result: Remove all devices from the controller and reset all settings—but not the Wi-Fi ones: the hub will remain connected to your Wi-Fi Network. All the user accounts other than the default one are removed.
Factory Reset
- Button action: One very long (longer than 10 seconds) pressing
- LED status: LED is on, turning off once the reset process is completed
- Result: Reset firmware to a default version and wipe out everything, including the network settings as well as all the user accounts.
* If your controller is the primary controller for your network, resetting it will result in the Z-Wave™ devices of your network to stop working and it will be necessary to exclude and re-include all of your Z-Wave™ devices. If this controller is being used as a secondary controller in the network, use this procedure to reset this controller only in the event that the network primary controller is missing or otherwise inoperable.
Setting up your Ezlo Atom
Download and install the Vera app ('VeraMobile') from the Google Play store or Apple Store—depending on whether you're using Android or iOS.
Once you've launched the app, if you're a new user, choose New to Vera? to set up an account.
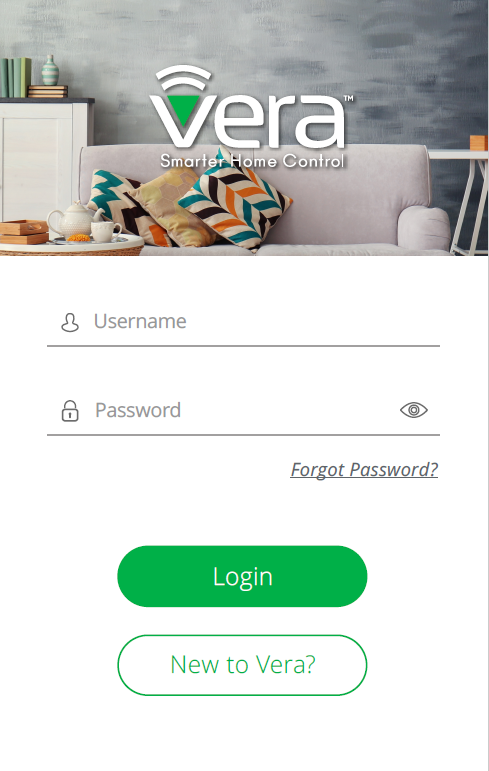
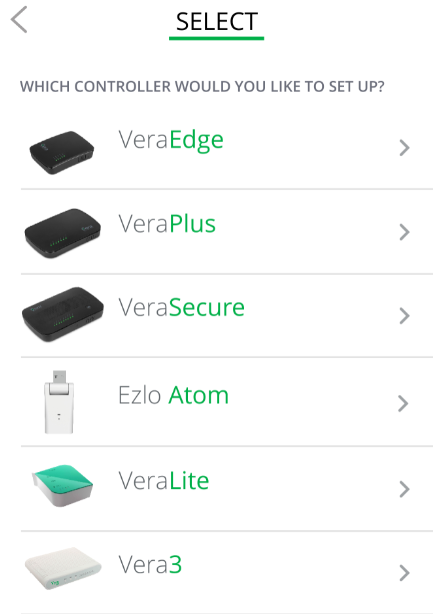
If you're an existing user and already have an account, log in using your credentials in the Vera Mobile App. Once that's done, you can add a new controller by pressing the green plus-sign button at the bottom, then selecting the kind you have - in this case, the Ezlo Atom.
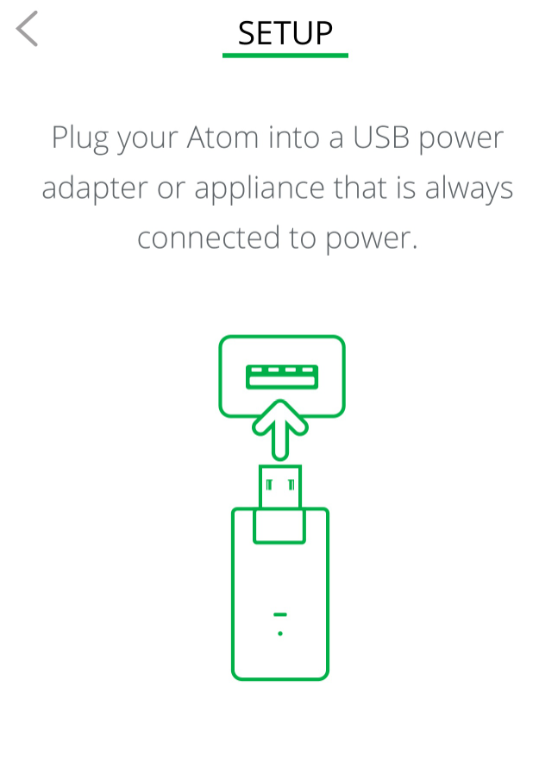
Plug your Ezlo Atom controller into a USB port that will serve as its power source. Choose a port that is always powered to ensure the Atom doesn't get switched off.
Swipe left to get to the next screen.
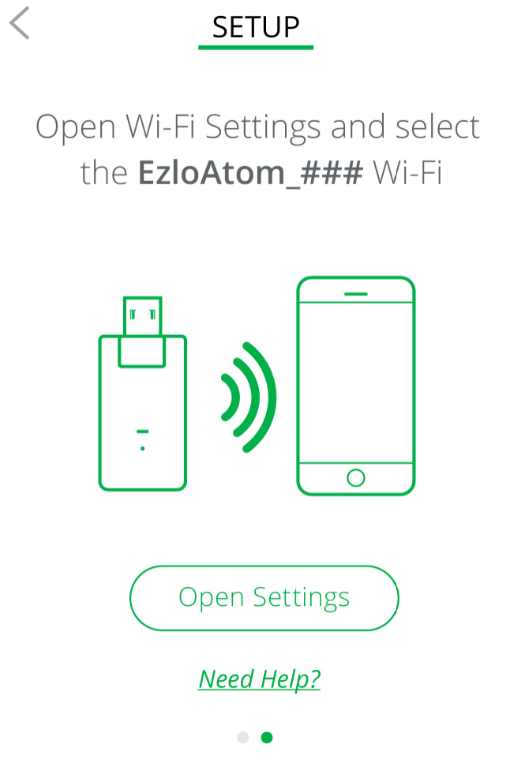
The Atom should at this point be on and broadcasting an access point connection with an SSID to the effect of Atom_### *. Per the instructions, open the Wi-FI settings of your mobile device (just press on Open Settings) and connect to it. If no such network is found, click Need Help? for possible reasons and solutions.
* When you include Ezlo Atom for the first time, the Access Point is actually called ezlo_xxxx, not Atom_xxx. Once the Atom gets its first upgrade, it will appear correctly.
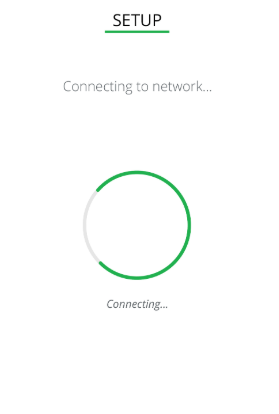
Wait for the device to connect to Atom via Wi-Fi.
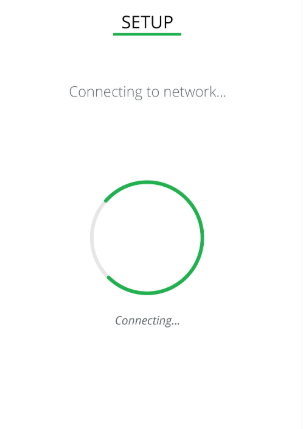
Return to the application and connect to your home Wi-Fi network.
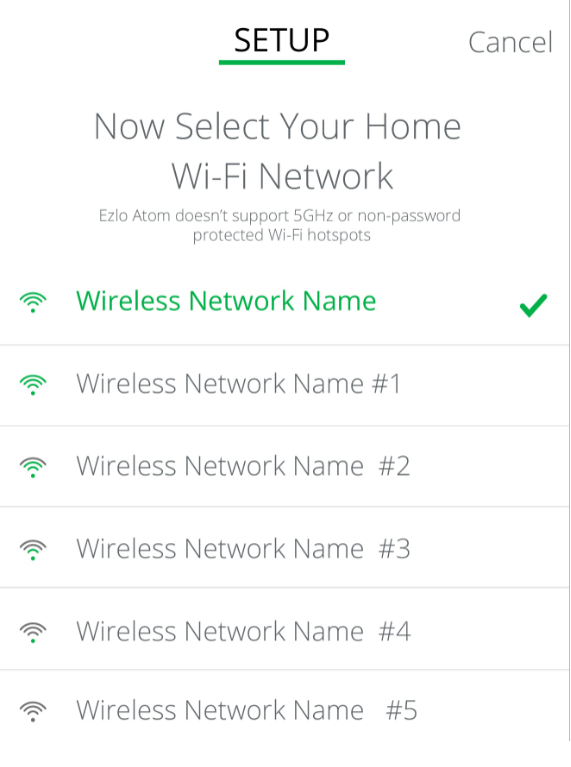
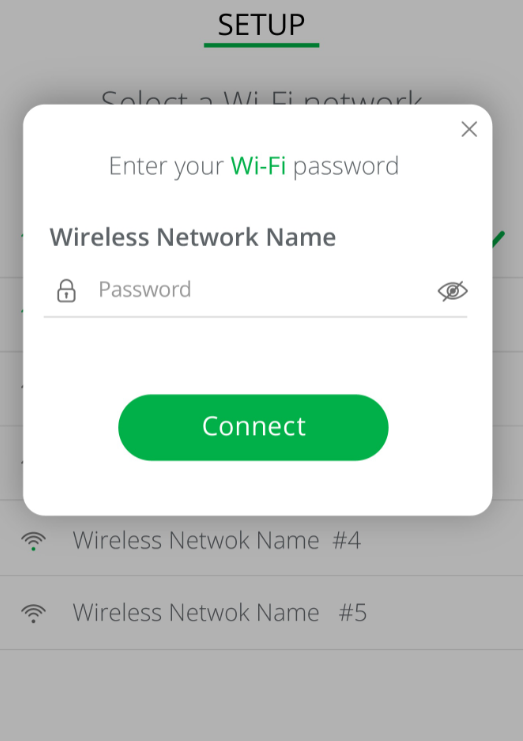
Wait for Atom to connect to your home Wi-Fi network.
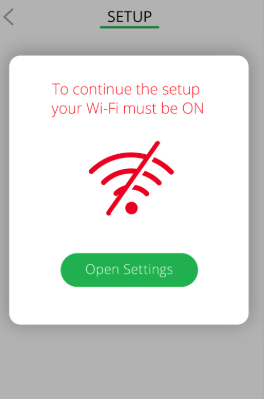
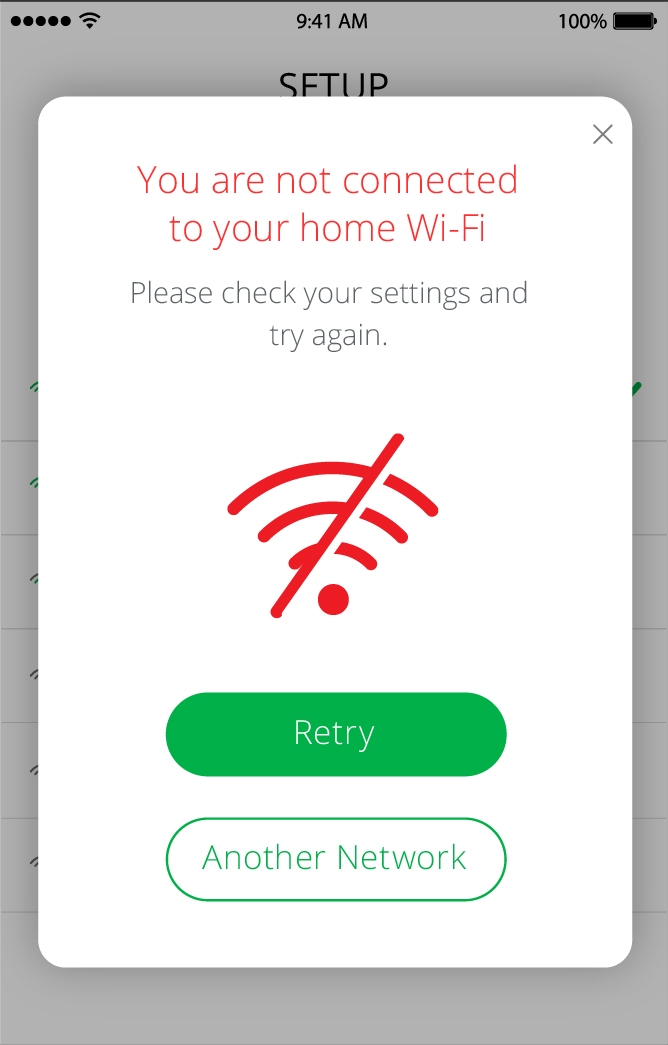
Before and during your Ezlo Atom setup, make sure that the Wi-Fi access point is switched on, that your Wi-Fi router is connected to the Internet, that your device is within the Wi-Fi service area and within reliable range of the Atom, and that Atom is within range of the router for a reliable connection.
Also, note that Atom supports only 2.4GHz Wi-Fi networks and that the connection must be password-protected. Public non-protected networks cannot be used to connect the Ezlo Atom.
If any of the above requirements isn't met, the app will display a corresponding alert, along the lines of the ones below:
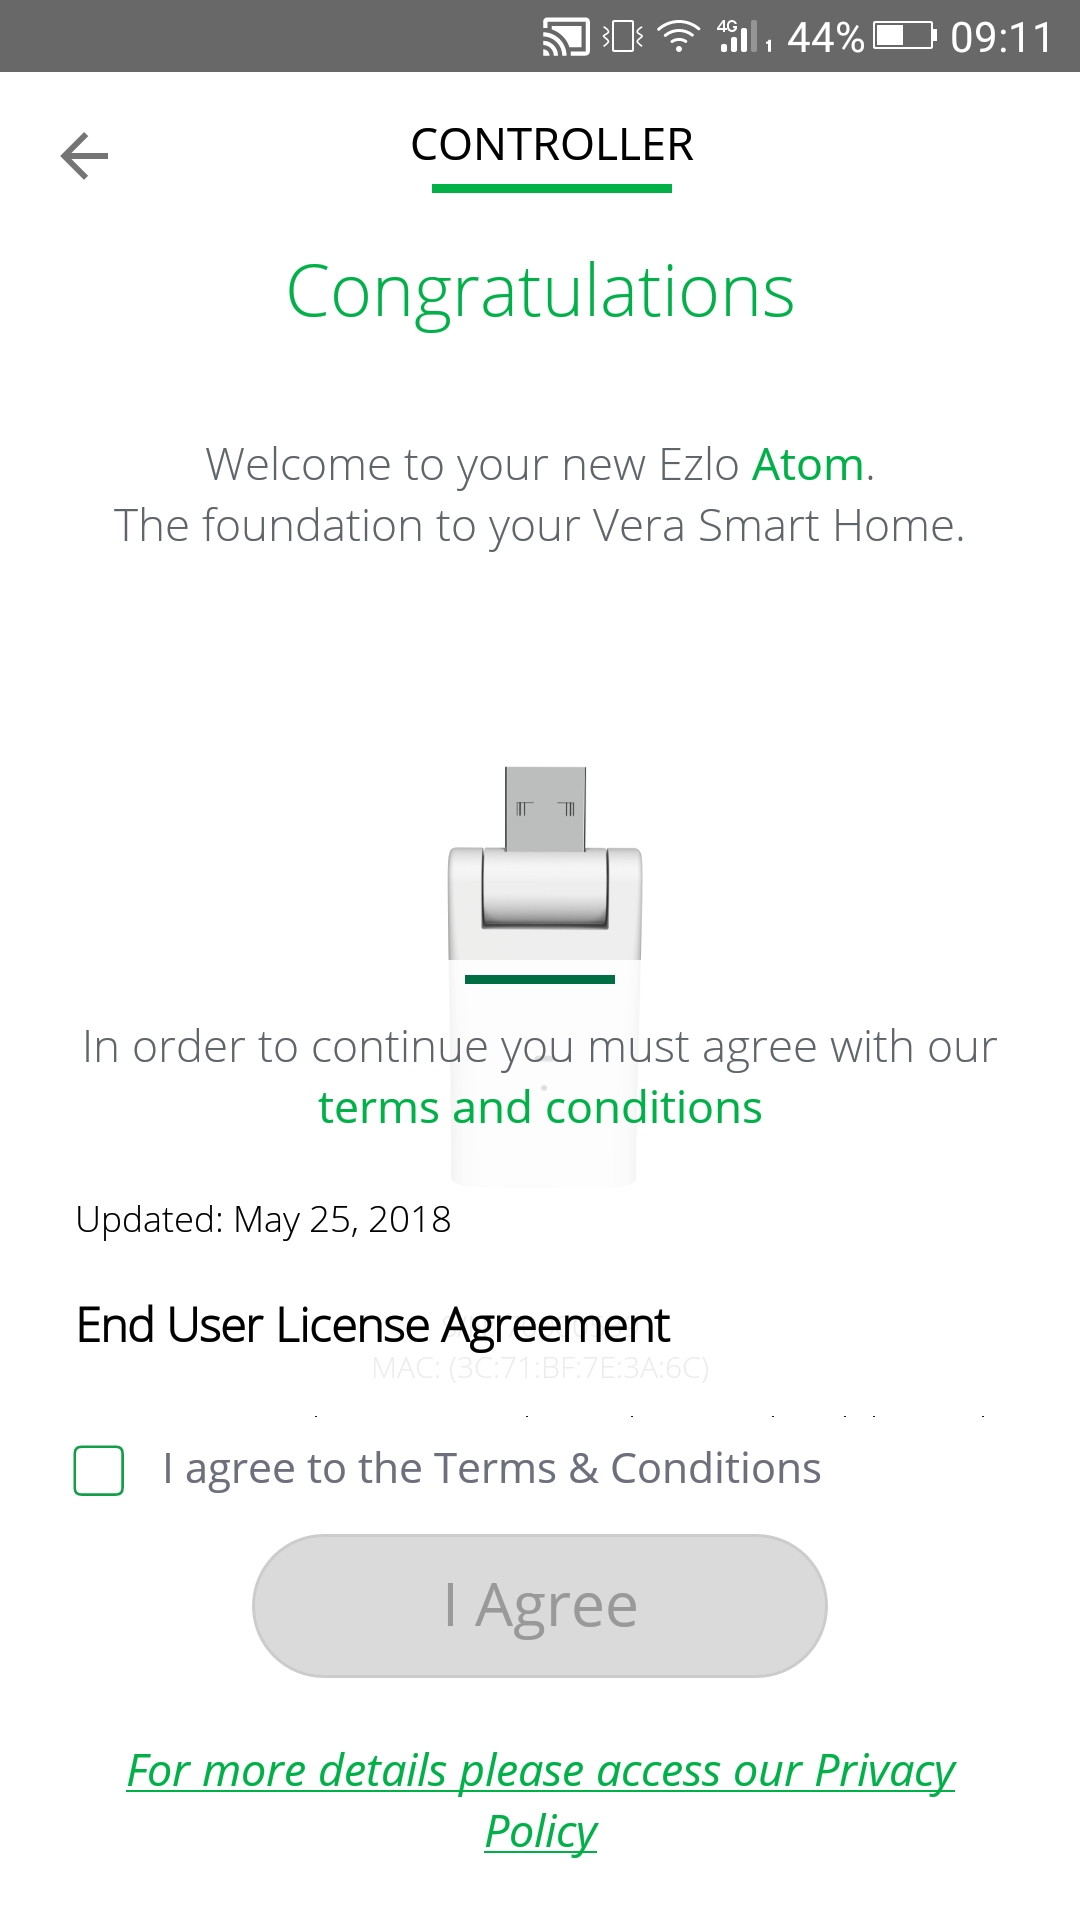
As soon as the Atom has successfully connected to your home network, a congratulations message will be displayed. If you're a new user, once the Atom installation is complete, you'll the have to finish creating your account. First agree to the Terms and Conditions presented by checking the checkbox and then tapping on the I agree button.
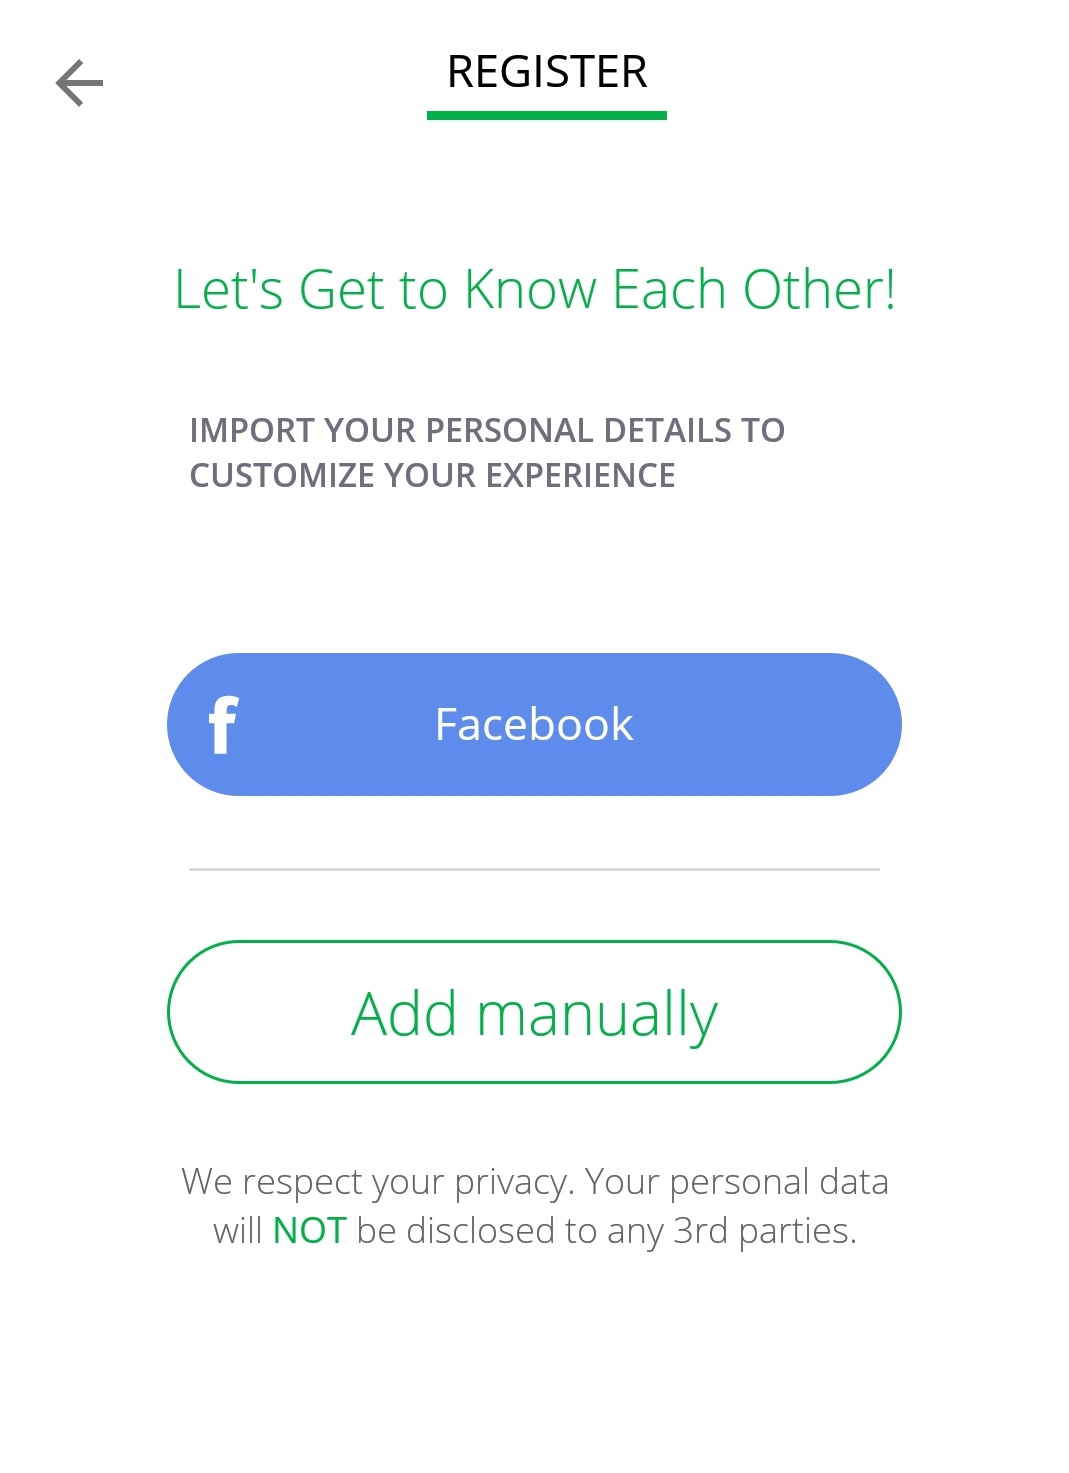
After agreeing to all the Terms and Conditions, you can begin registering your account. You're given the option of using your Facebook account to speed up the process, or you can choose to do this manually.
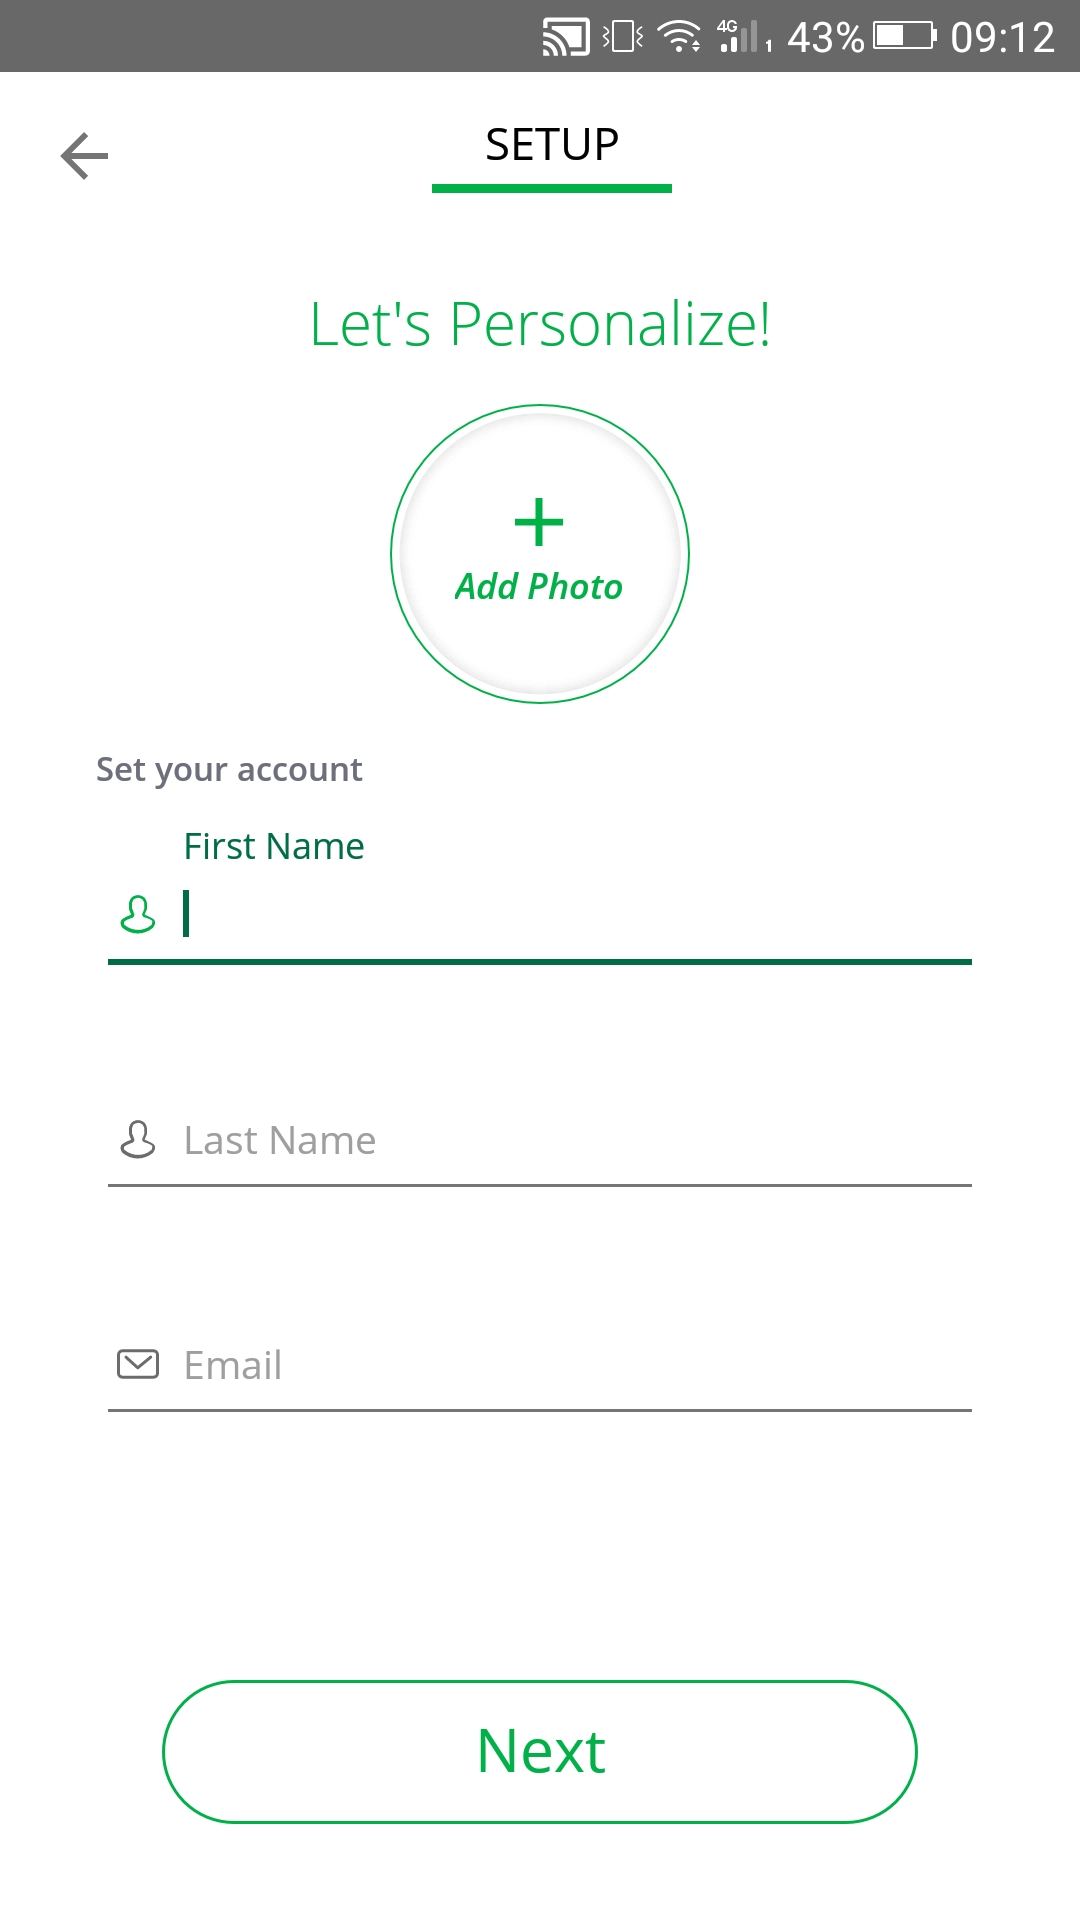
If you've taken the manual route, you'll be prompted for your first and last names, and your email address, while also being provided the option of adding an account picture. Tap on Next to move on to the next step, once you're done.
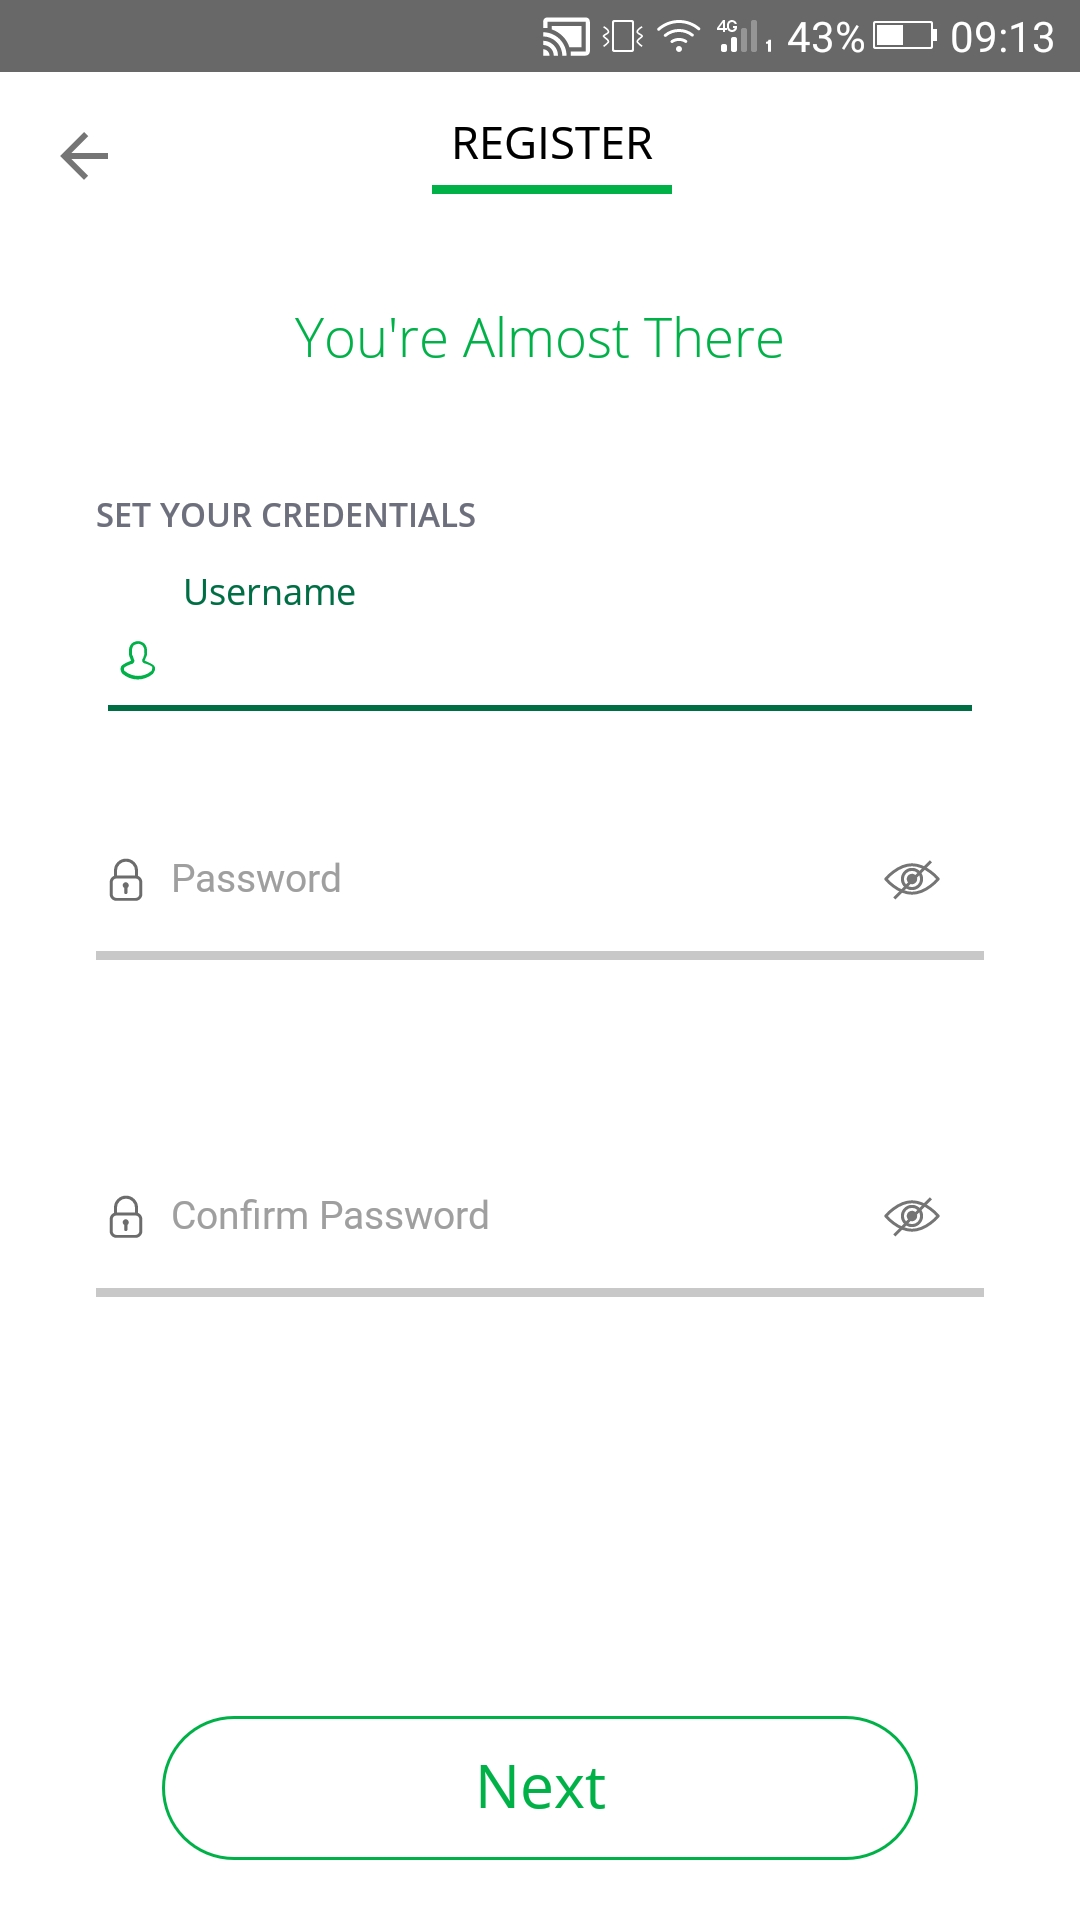
You'll now have to decide on a username and come up with a password that you'll have to fill in twice, by way of confirmation. The strength of your password will be assessed by the app as you type it in, and it'll alert you in case it's too weak, prompting you for a stronger, harder-to-guess one.
On the next screen, choose the way you prefer to receive notifications from the app. Your email address and phone number need to be validated, and a one-time code or link will be sent to you to this end. The above is required for email or SMS notifications to work.
Note: the phone number you use should be unique and not used for any other Vera account.

Press Validate and type in the validation code received on the next screen.
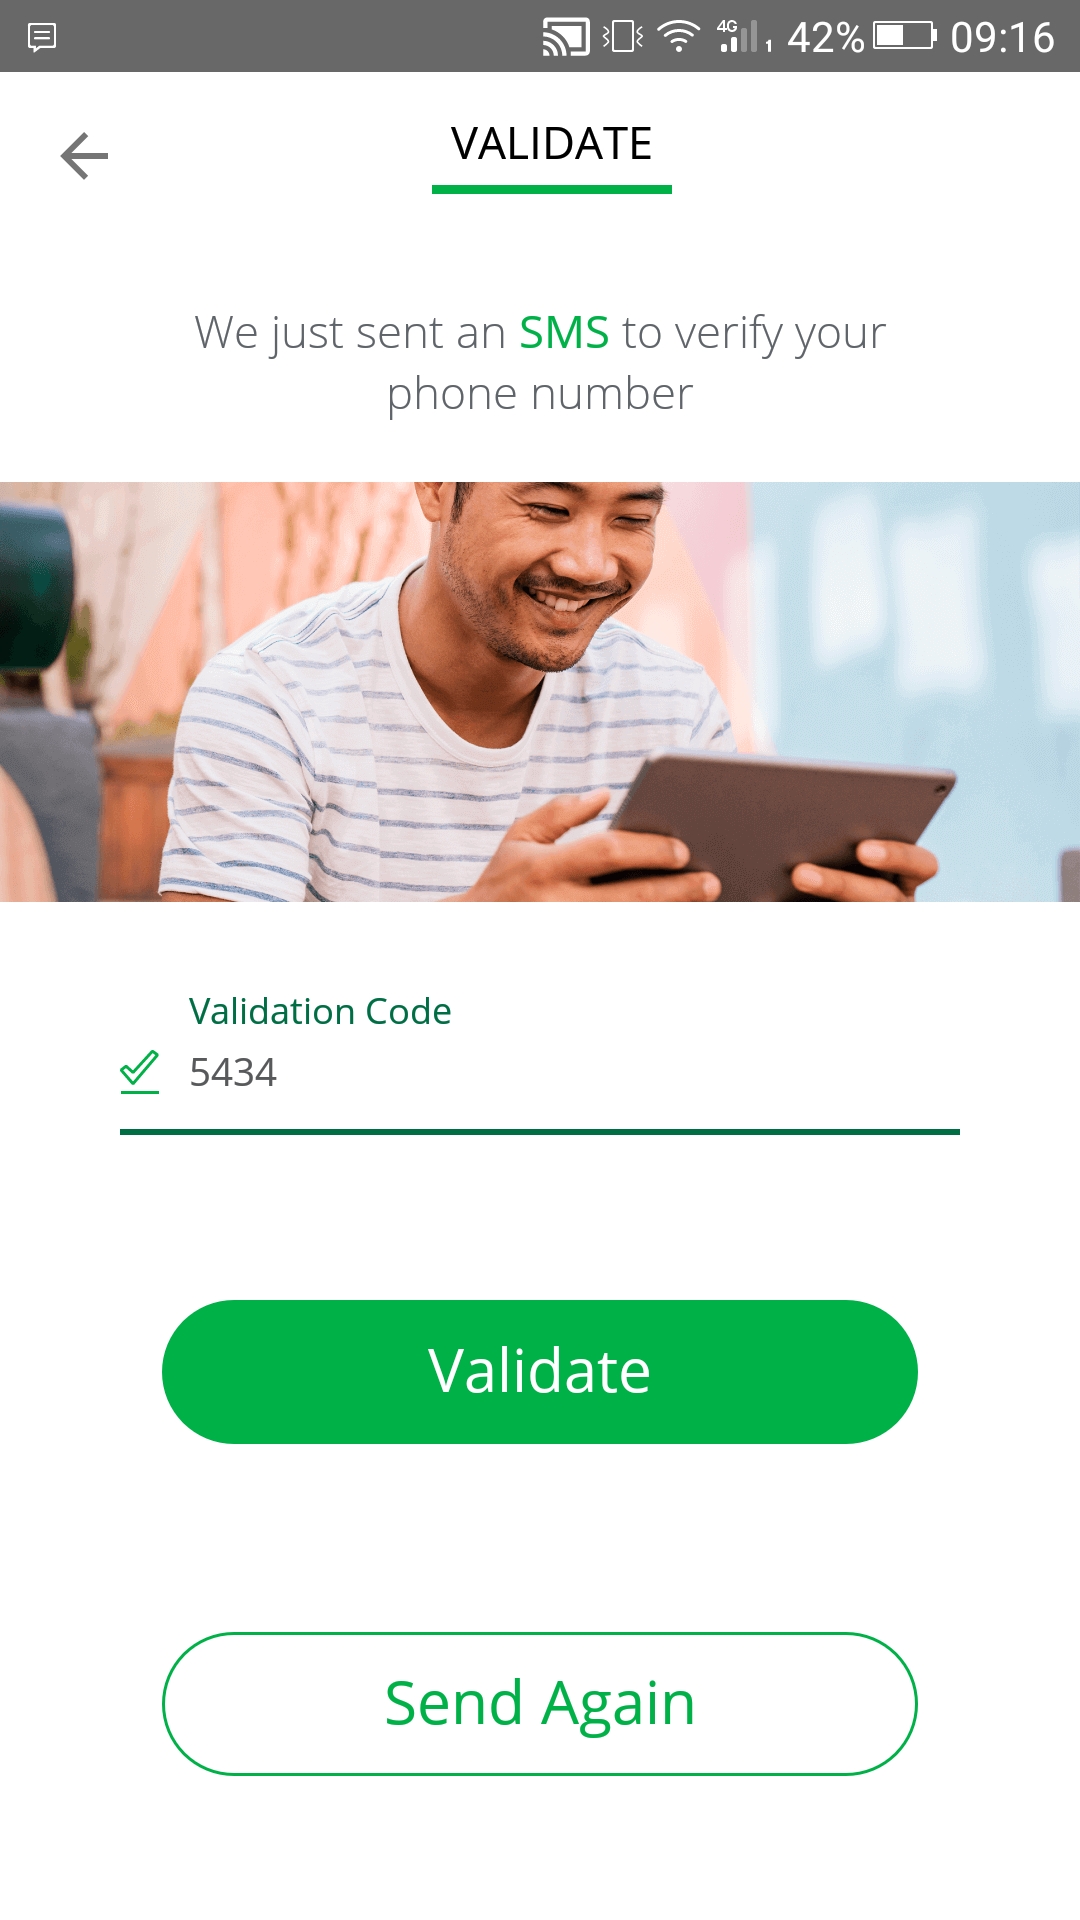
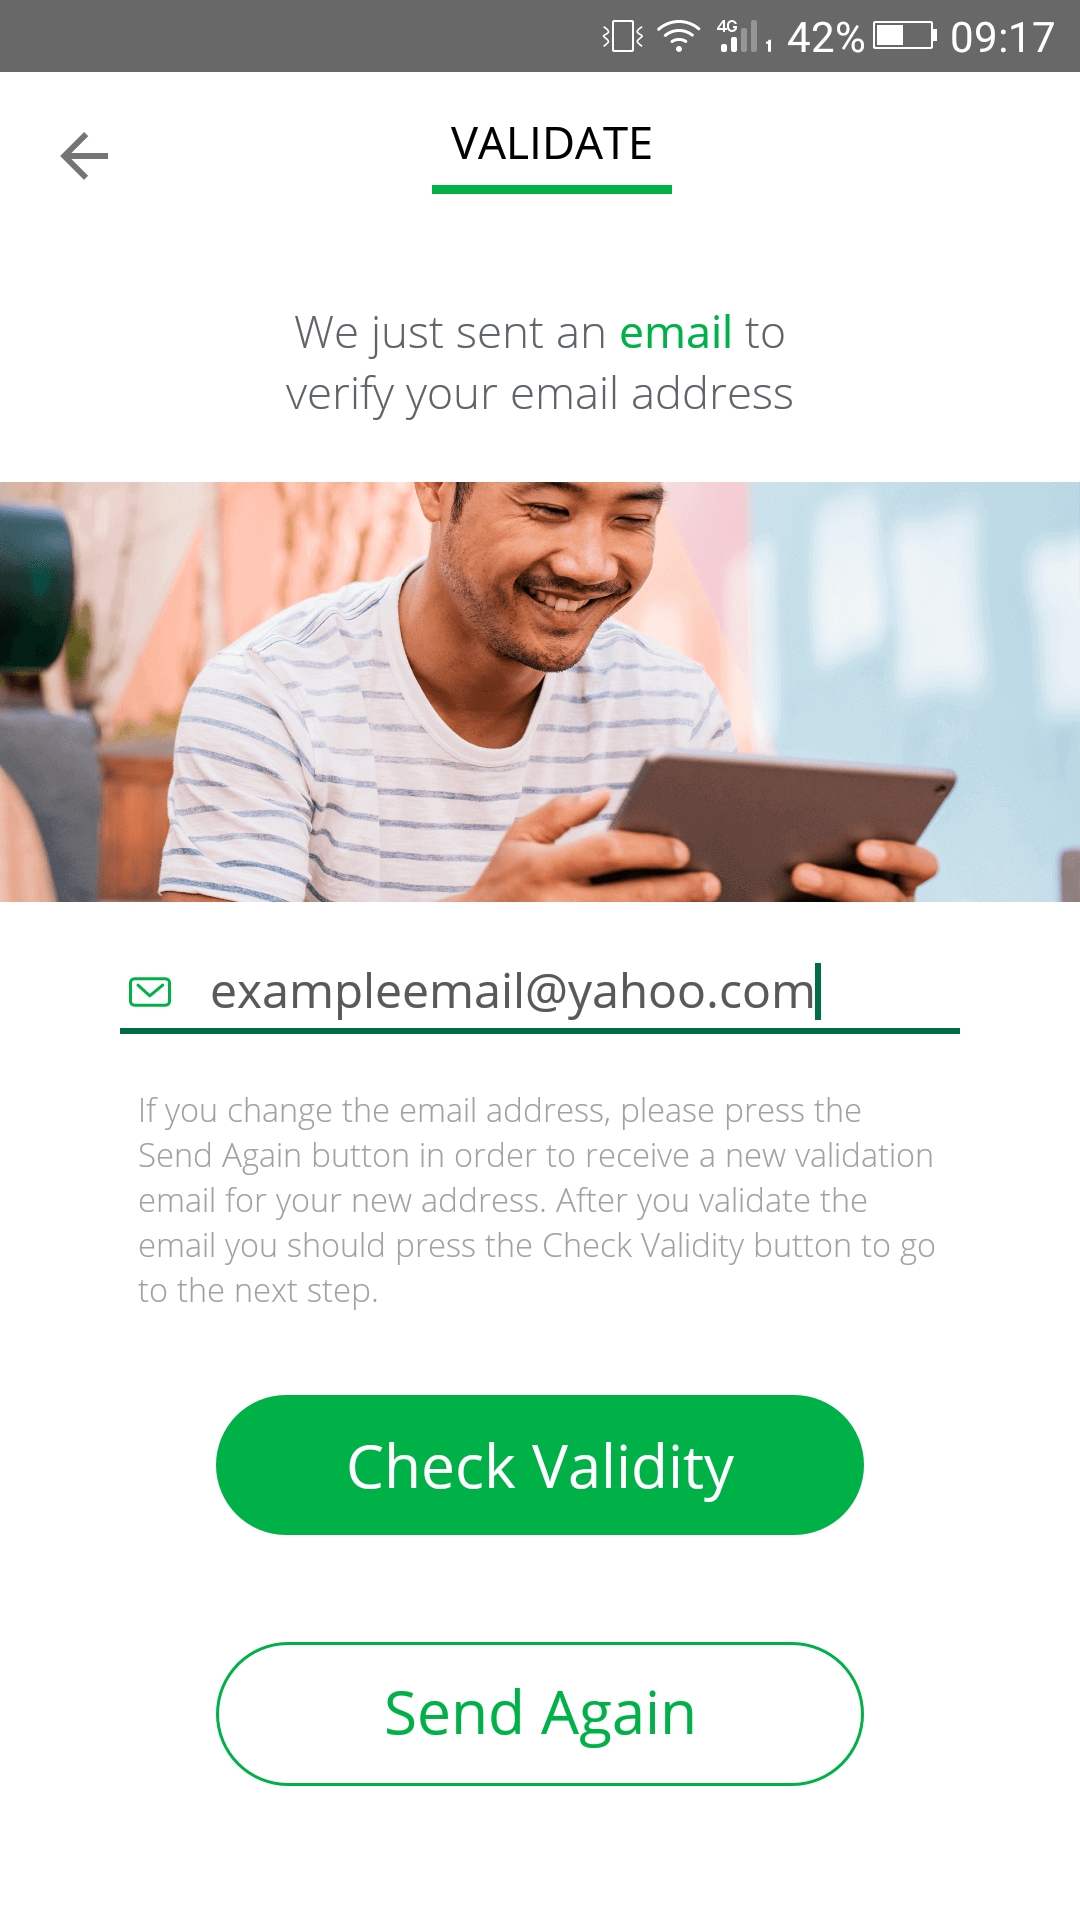
You can have another code sent to you if, for whatever reason, it didn't work. With your phone number successfully validated, you now have to do the same for your email address. On the next screen, tap on Check Validity, then head over to your inbox and click the link received from Vera.
Note: the email address you use should be unique and not used for any other Vera account.

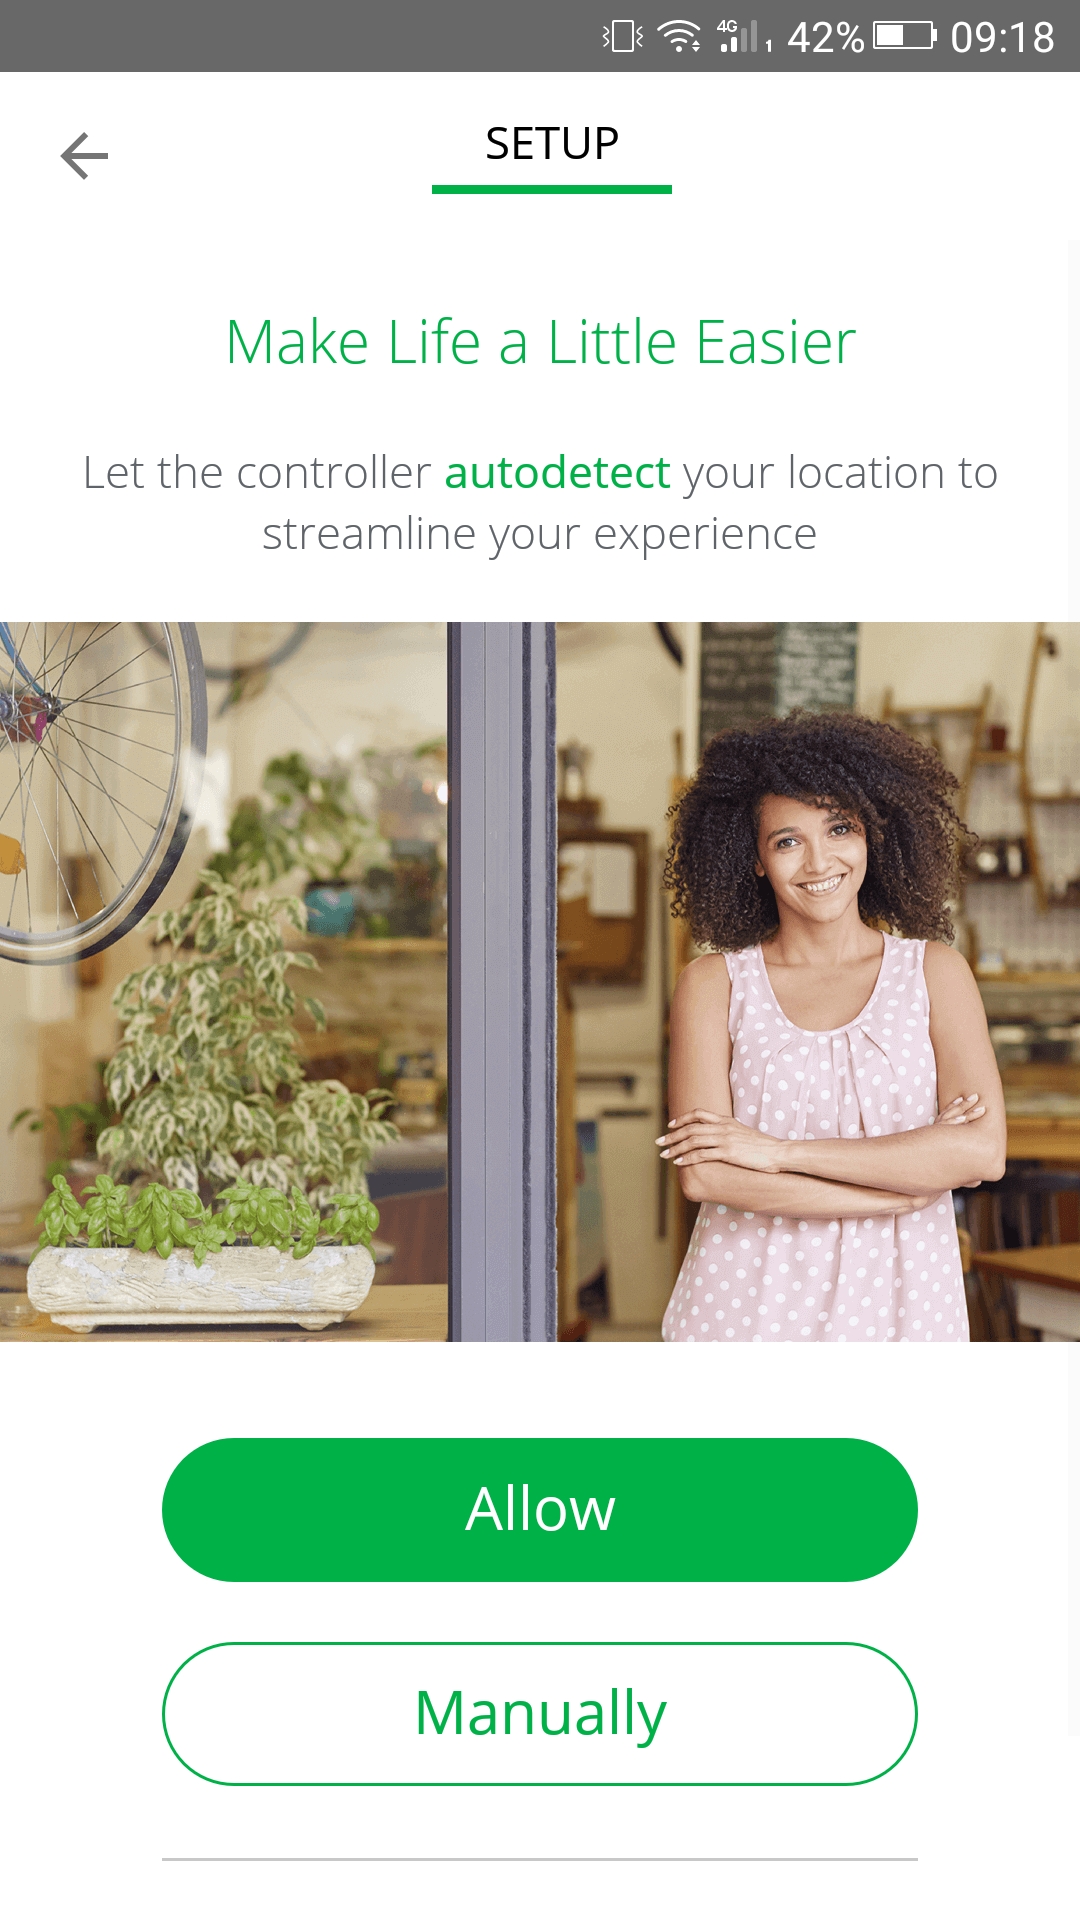
The next step consists in setting your location. You can have Vera automatically detect it by tapping on Allow, which might be quicker and more convenient, or choose Manually, and fill in all the information yourself.
After successfully setting your location, the Atom will finish setting up your account, sending the data to the cloud.
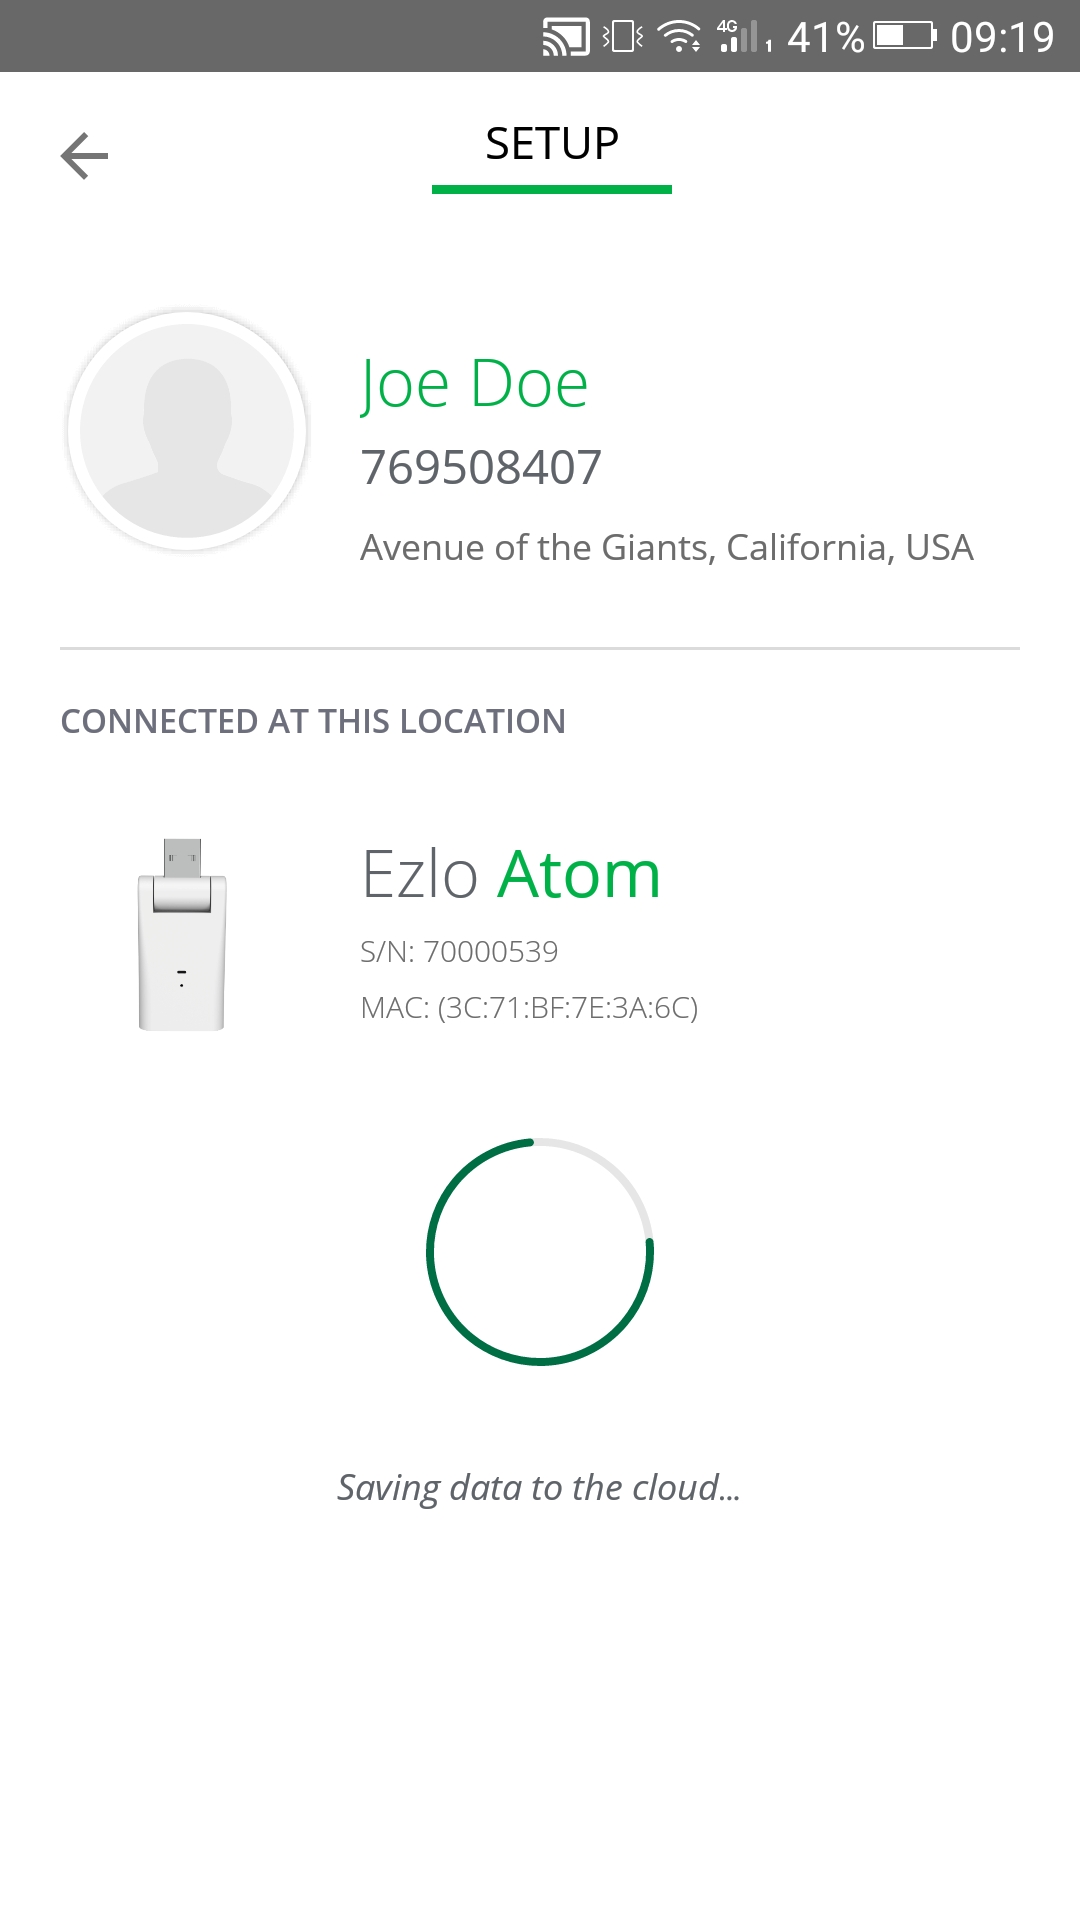
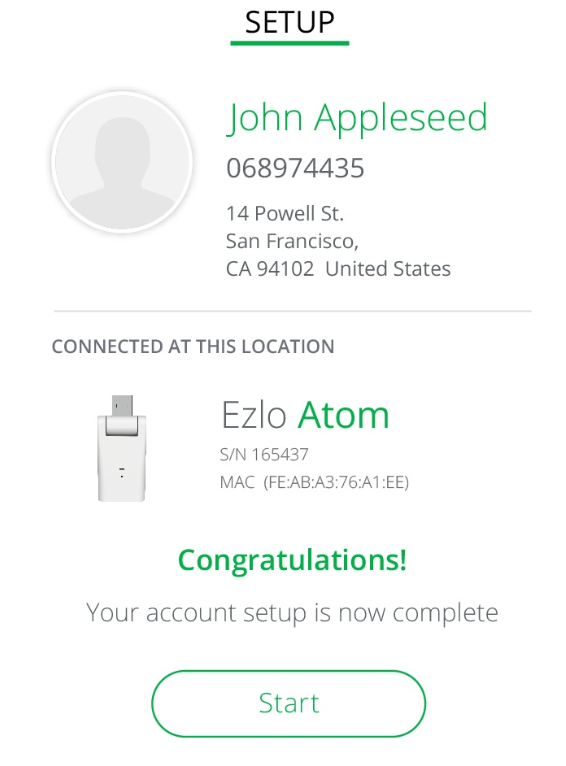
Wait until it's finished, at which point you'll get a confirmation message.
You can then connect to your Atom by clicking on Start.
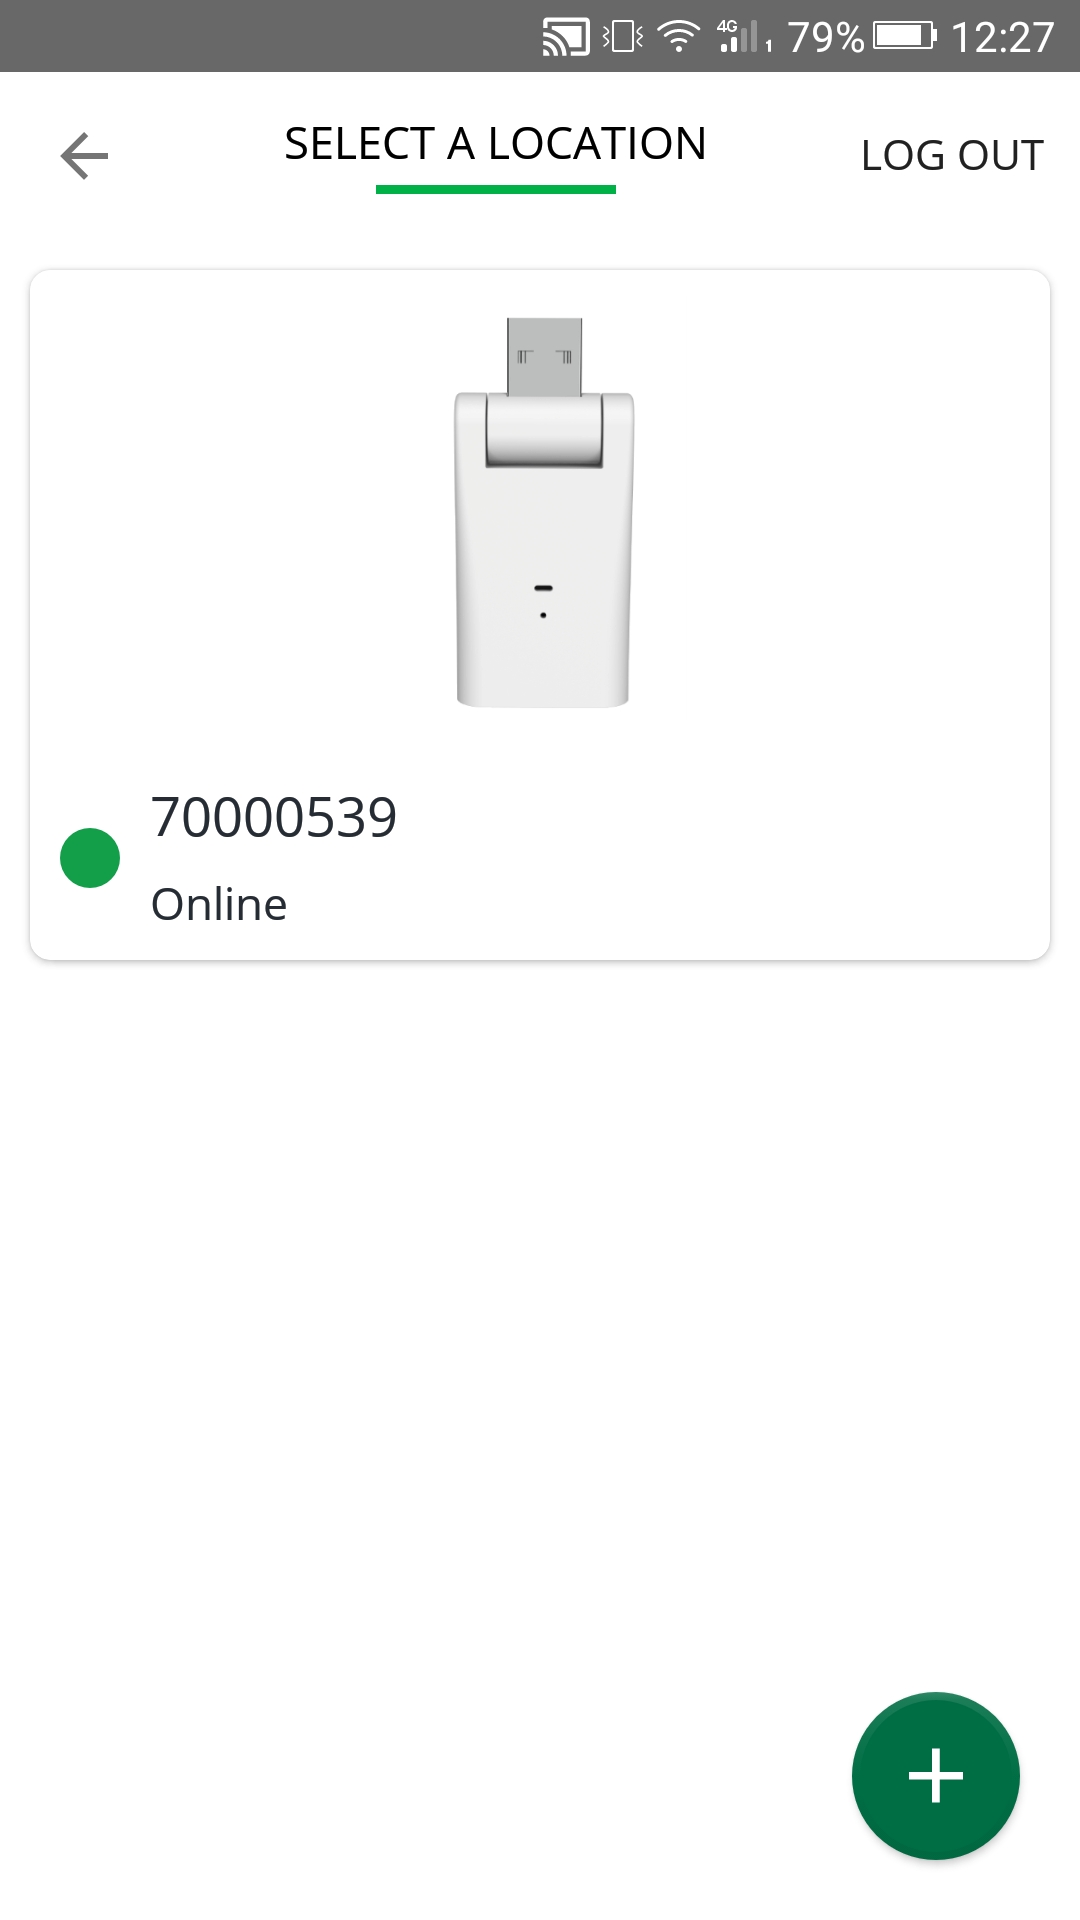
This is it - you're good to go. Whenever you log into the app from here on out, you should see the newly-installed Ezlo Atom there, and all it takes to connect to it is a tap. If you have other controllers assigned to your account, they'll also show up there.
Note: When setting up Ezlo Atom for the first time, the connect button might appear grayed out, and with a message saying 'upgrading software,' once it's been connected to the Internet. This means it's in the process of updating its firmware, in which case you should leave the controller plugged in and not interrupt the process.
Getting to know the Vera App
Some of the key features of the Vera app:
Comments
0 comments
Please sign in to leave a comment.